For PC gamers, screen stuttering, low or unstable frame rates (FPS), and input latency are common issues that can lead to bad gaming experience. In fast-paced competitive games, these issues can mean the difference between winning and losing.
WMaster Cleanup Game Booster solves these pain points by deeply optimizing your system, reducing lag, boosting your FPS with a single click, and minimizing network latency—delivering an ultra-smooth gaming experience.
Part 1: Core Feature Breakdown of WMaster Cleanup Game Booster
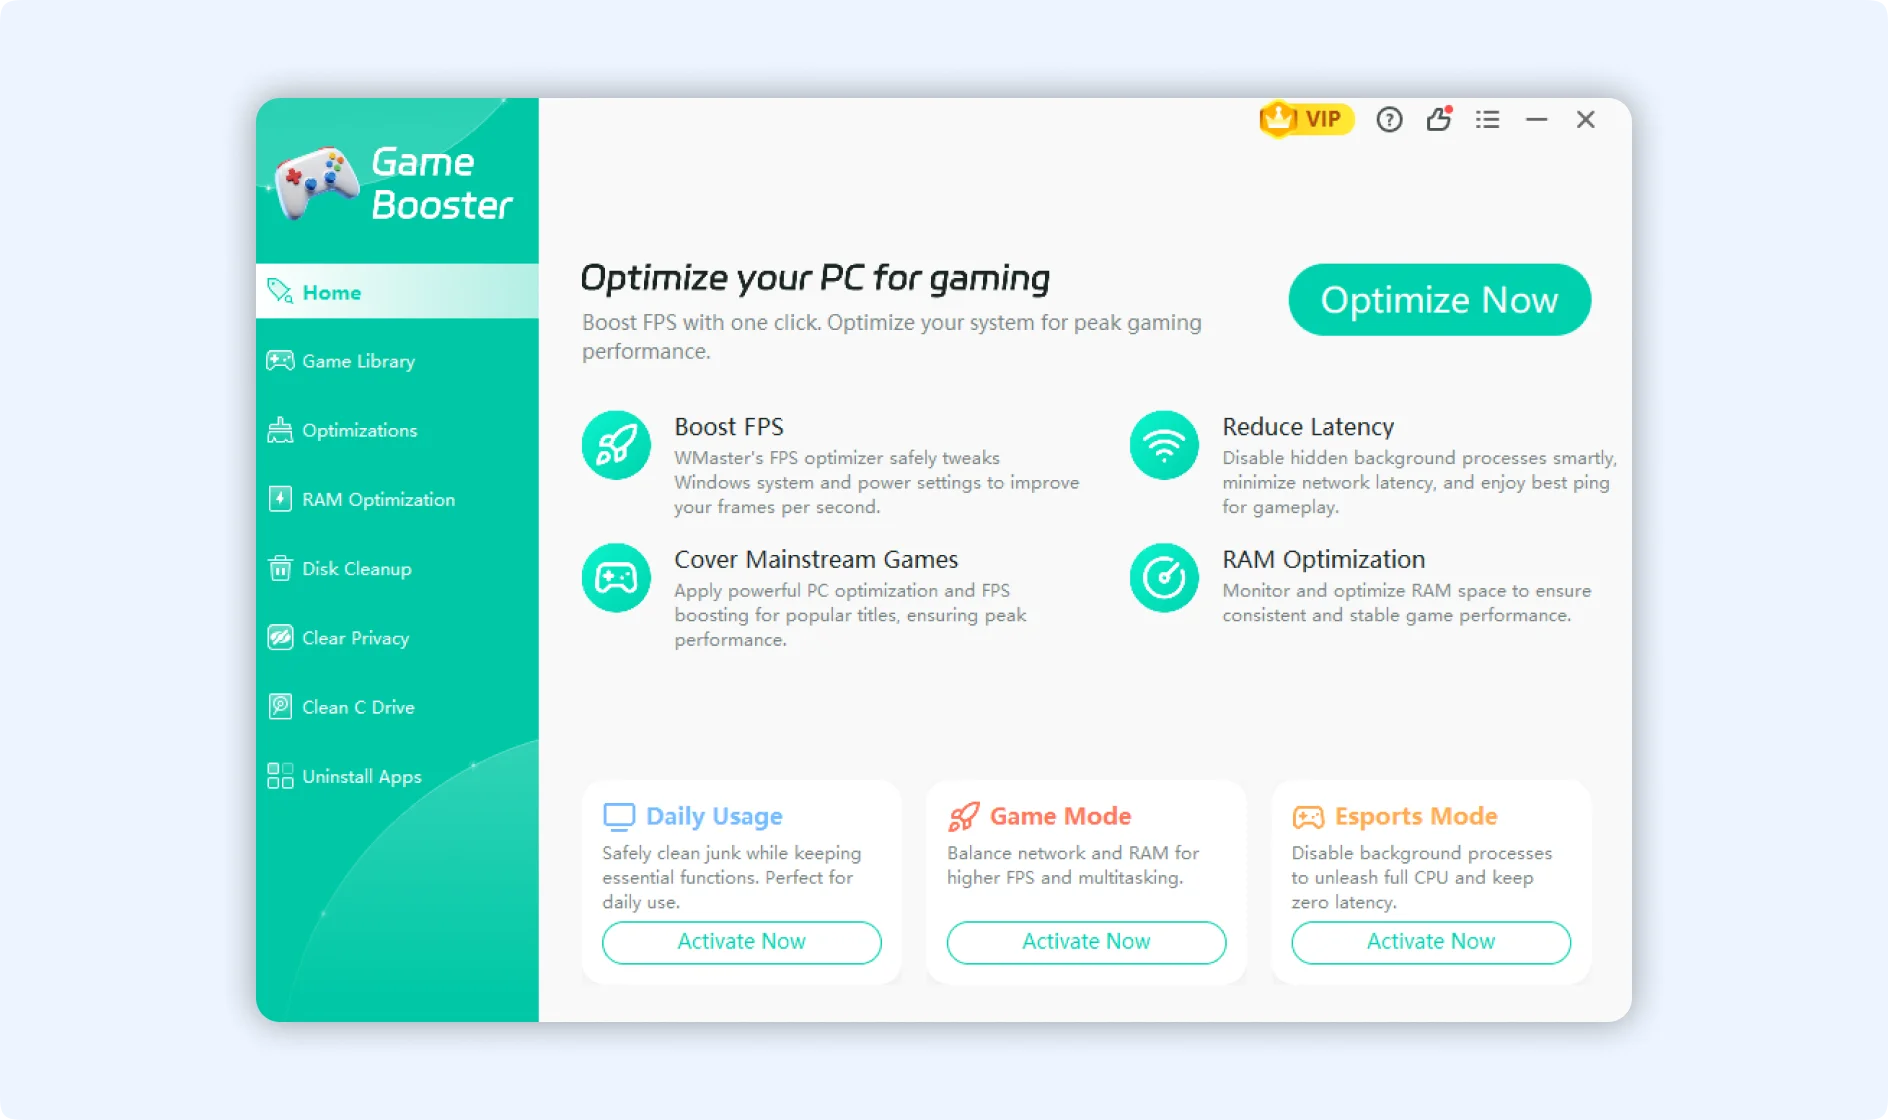
WMaster Cleanup Game Booster provides three core optimization pillars:
1.Three Tailored Game Optimization Modes: So far, there are total 93 distinct configuration items. To meet different user needs, we divide those 93 tweaks into three distinct modes: Daily Usage (Lite Mode), Game Mode (Advanced Mode), and Esports Mode (Geek Mode). You can maximize FPS and eliminate stutters with just one click.
2.Game Library: Supports over 5,000+ mainstream titles (with continuous updates), this feature automatically scans and identifies installed games on your PC, applying exclusive optimization to each game.
3.RAM Optimization: Intelligently scans active memory usage, stop unnecessary background processes, and releases trapped RAM to guarantee seamless gameplay.
Part 2: How to Open WMaster Cleanup Game Booster
Step 1: To get started, visit the official WMaster Cleanup website. Click Download Now to download and install the software onto your PC, or you can directly visit WMaster Game Booster feature page to download and install it.
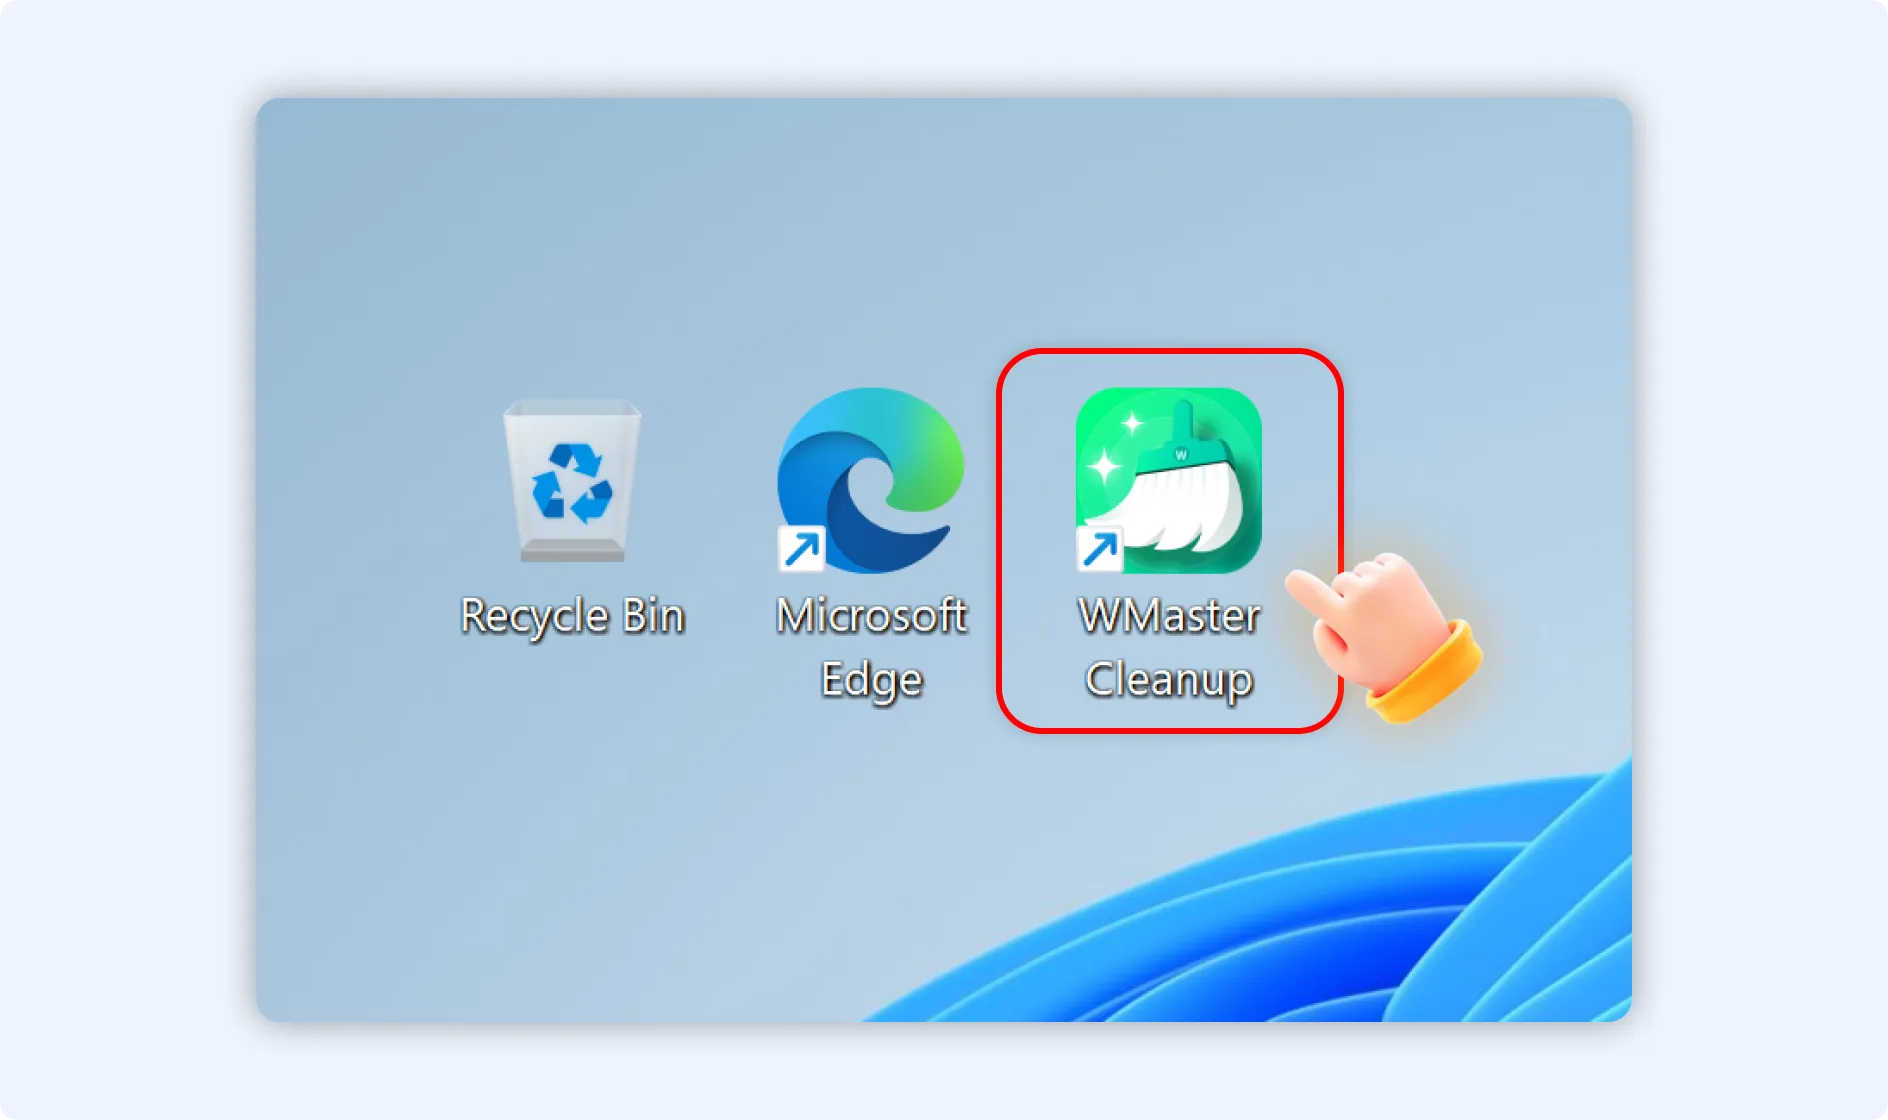
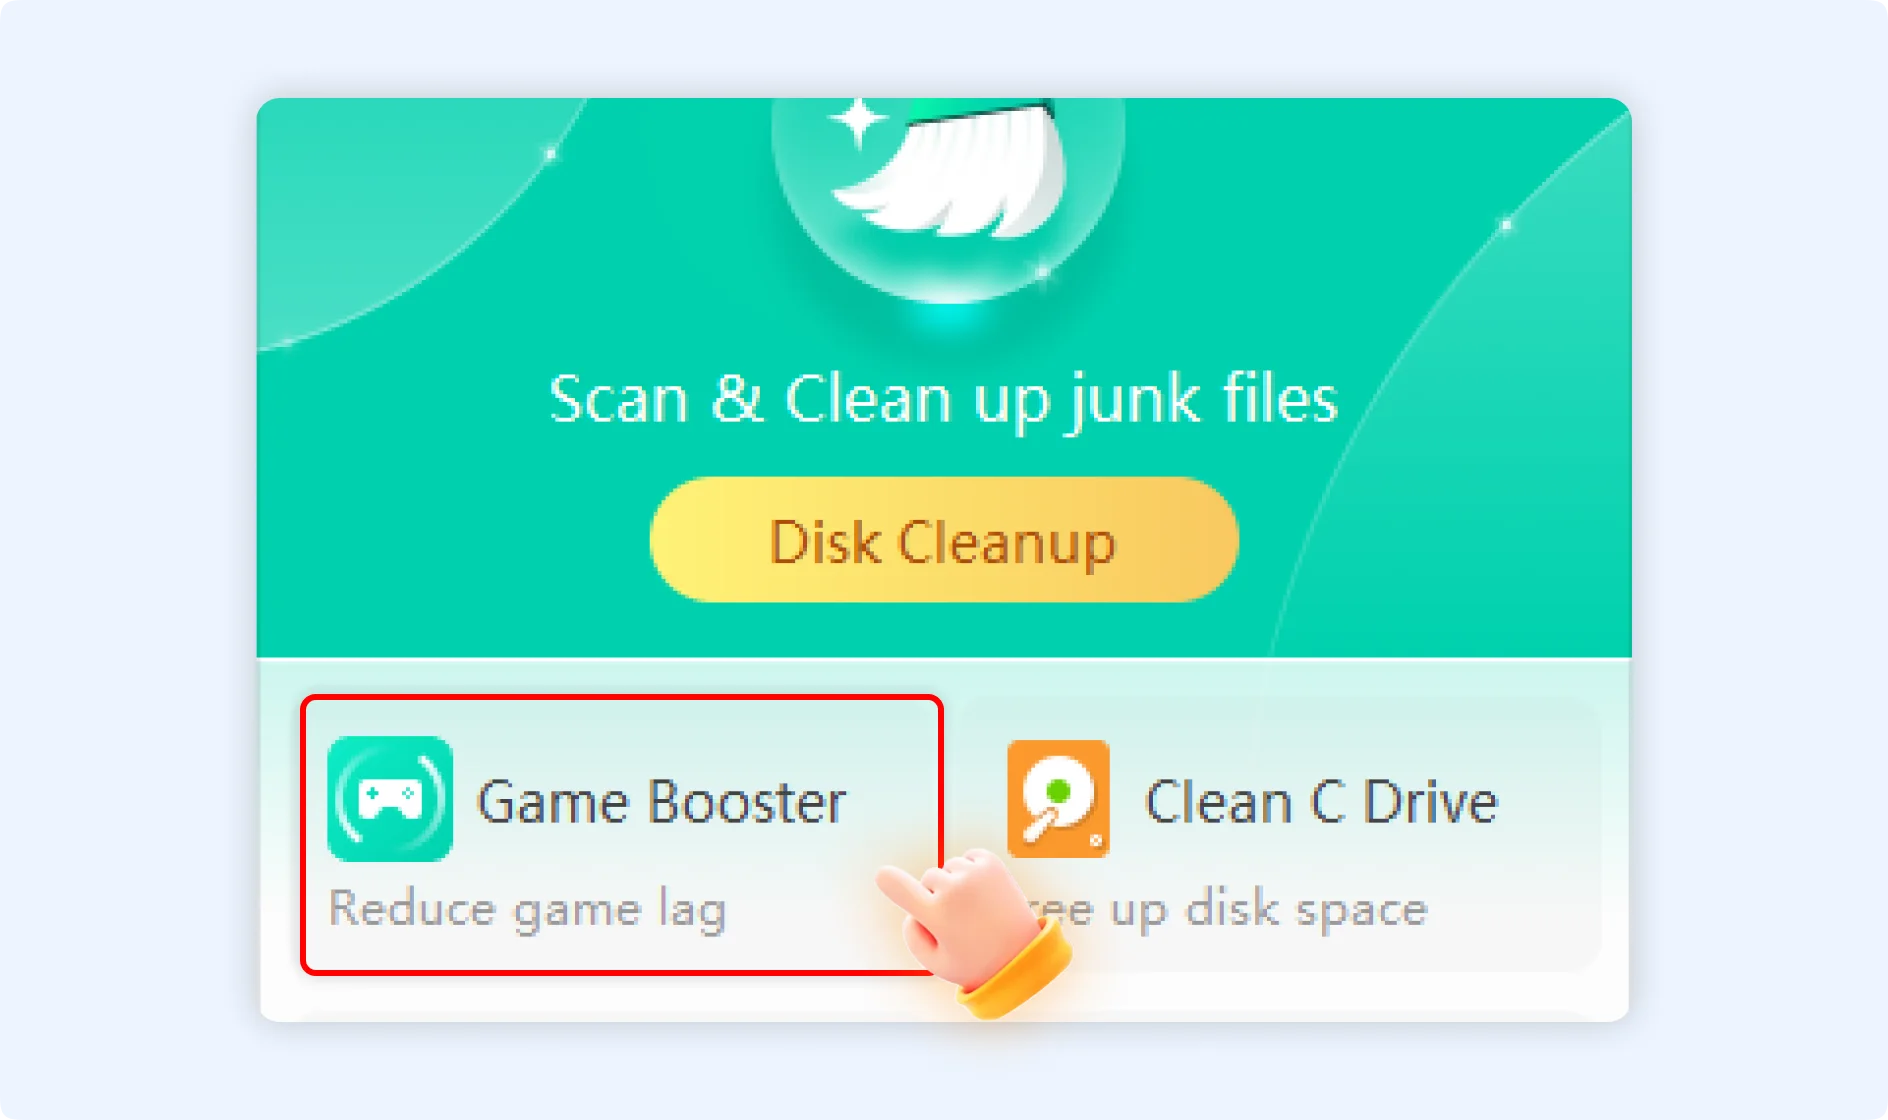
Step 2: Once installed, double-click the WMaster Cleanup desktop shortcut to launch the application, then click on Game Booster from the main dashboard.
Part 3: How to Use WMaster Cleanup Game Booster [Full Tutorial]
How to Run the Main Optimization Modes?
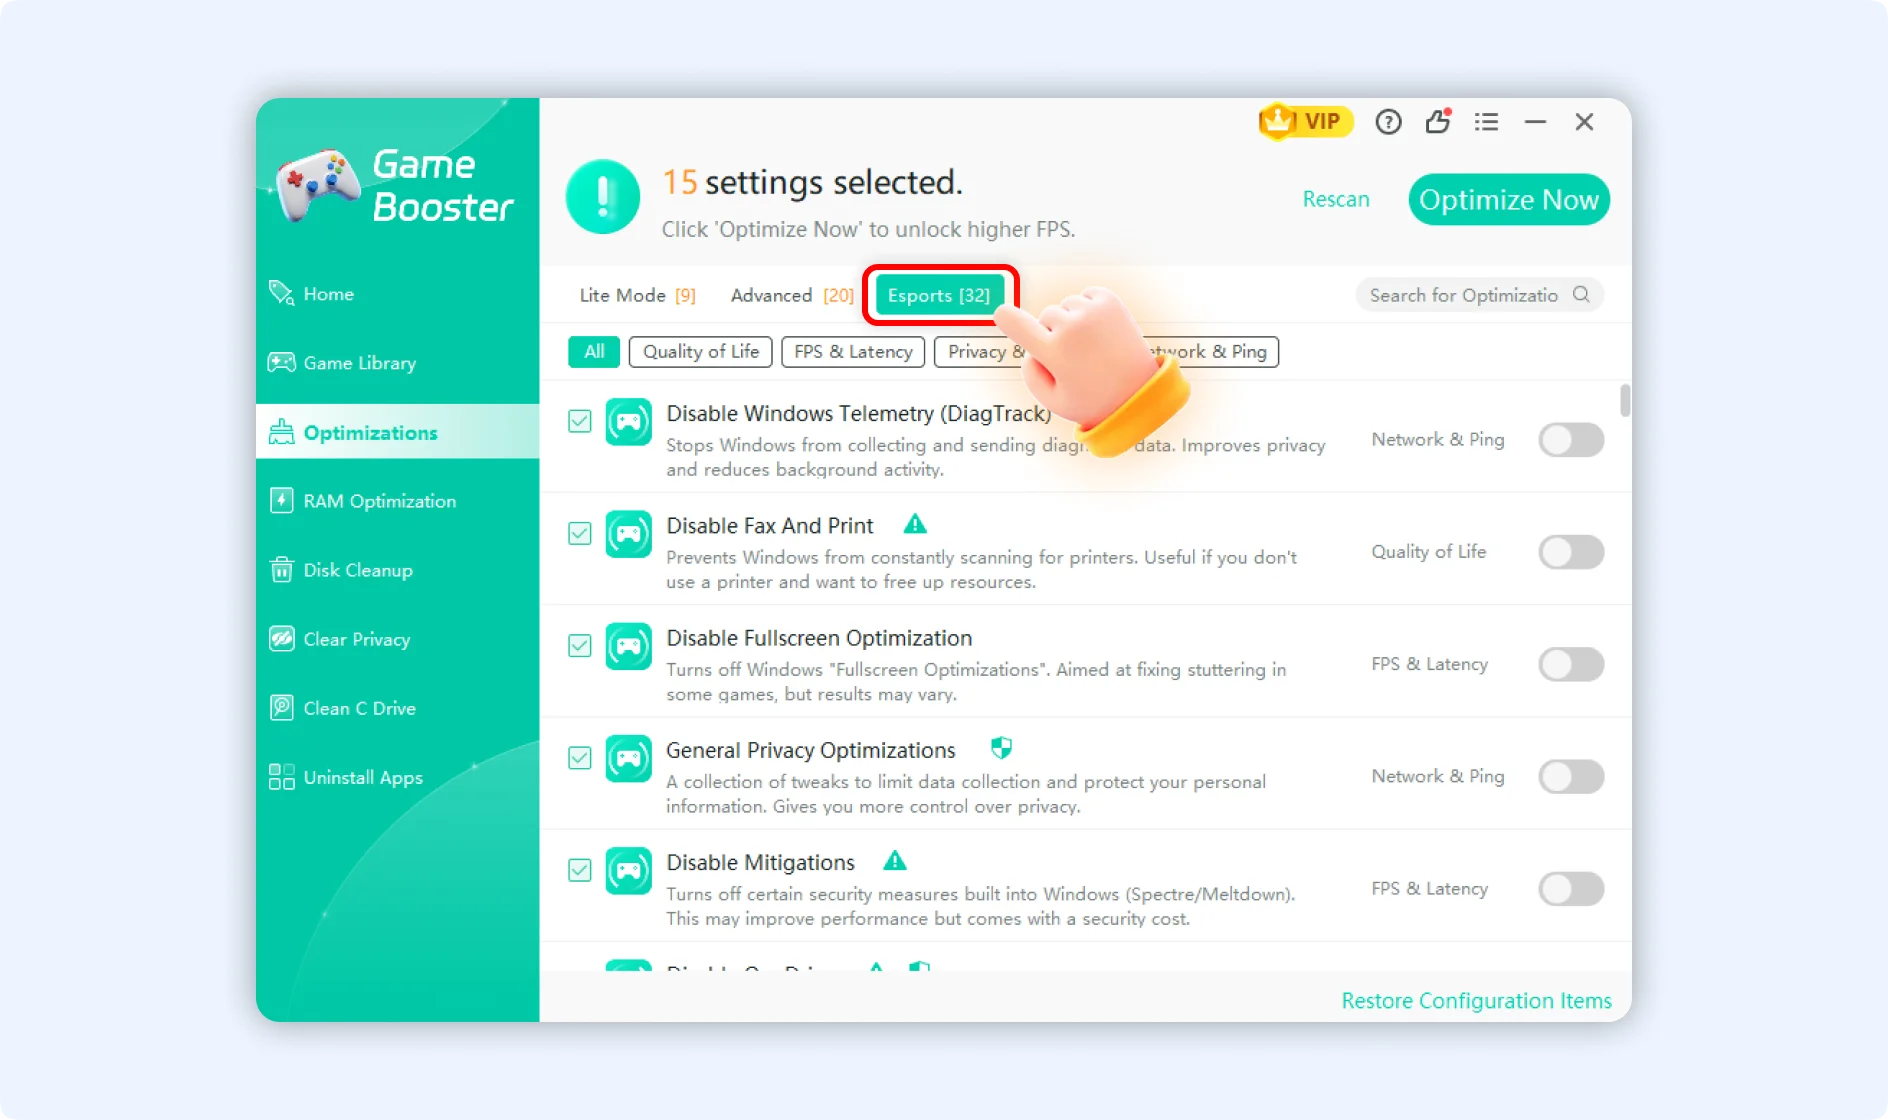
Step 1: Once you enter the Game Booster home screen, you will find three tailored optimization modes at the bottom of the interface. Select and click the mode that fits your current needs (we will use Esports Mode as an example here).

Step 2: After selecting Esports Mode, the tool will automatically scan for tweakable system items. There are 93 total optimization tweaks available, The Esports mode will automatically select 32 configuration items for you, if you want to add more, you can manually tick more tweaks according to your actual needs.
💡Tips:Each mode provides a different default selection:
- Lite Mode: our system will automatically select 9 configuration items for you.
- Advanced Mode: our system will automatically select 20 configuration items for you.
- Esports Mode: our system will automatically select 32 configuration items for you.
💡Tips 1:If you want to switch between different modes, you can change your selection directly at the top of the Optimizations screen.
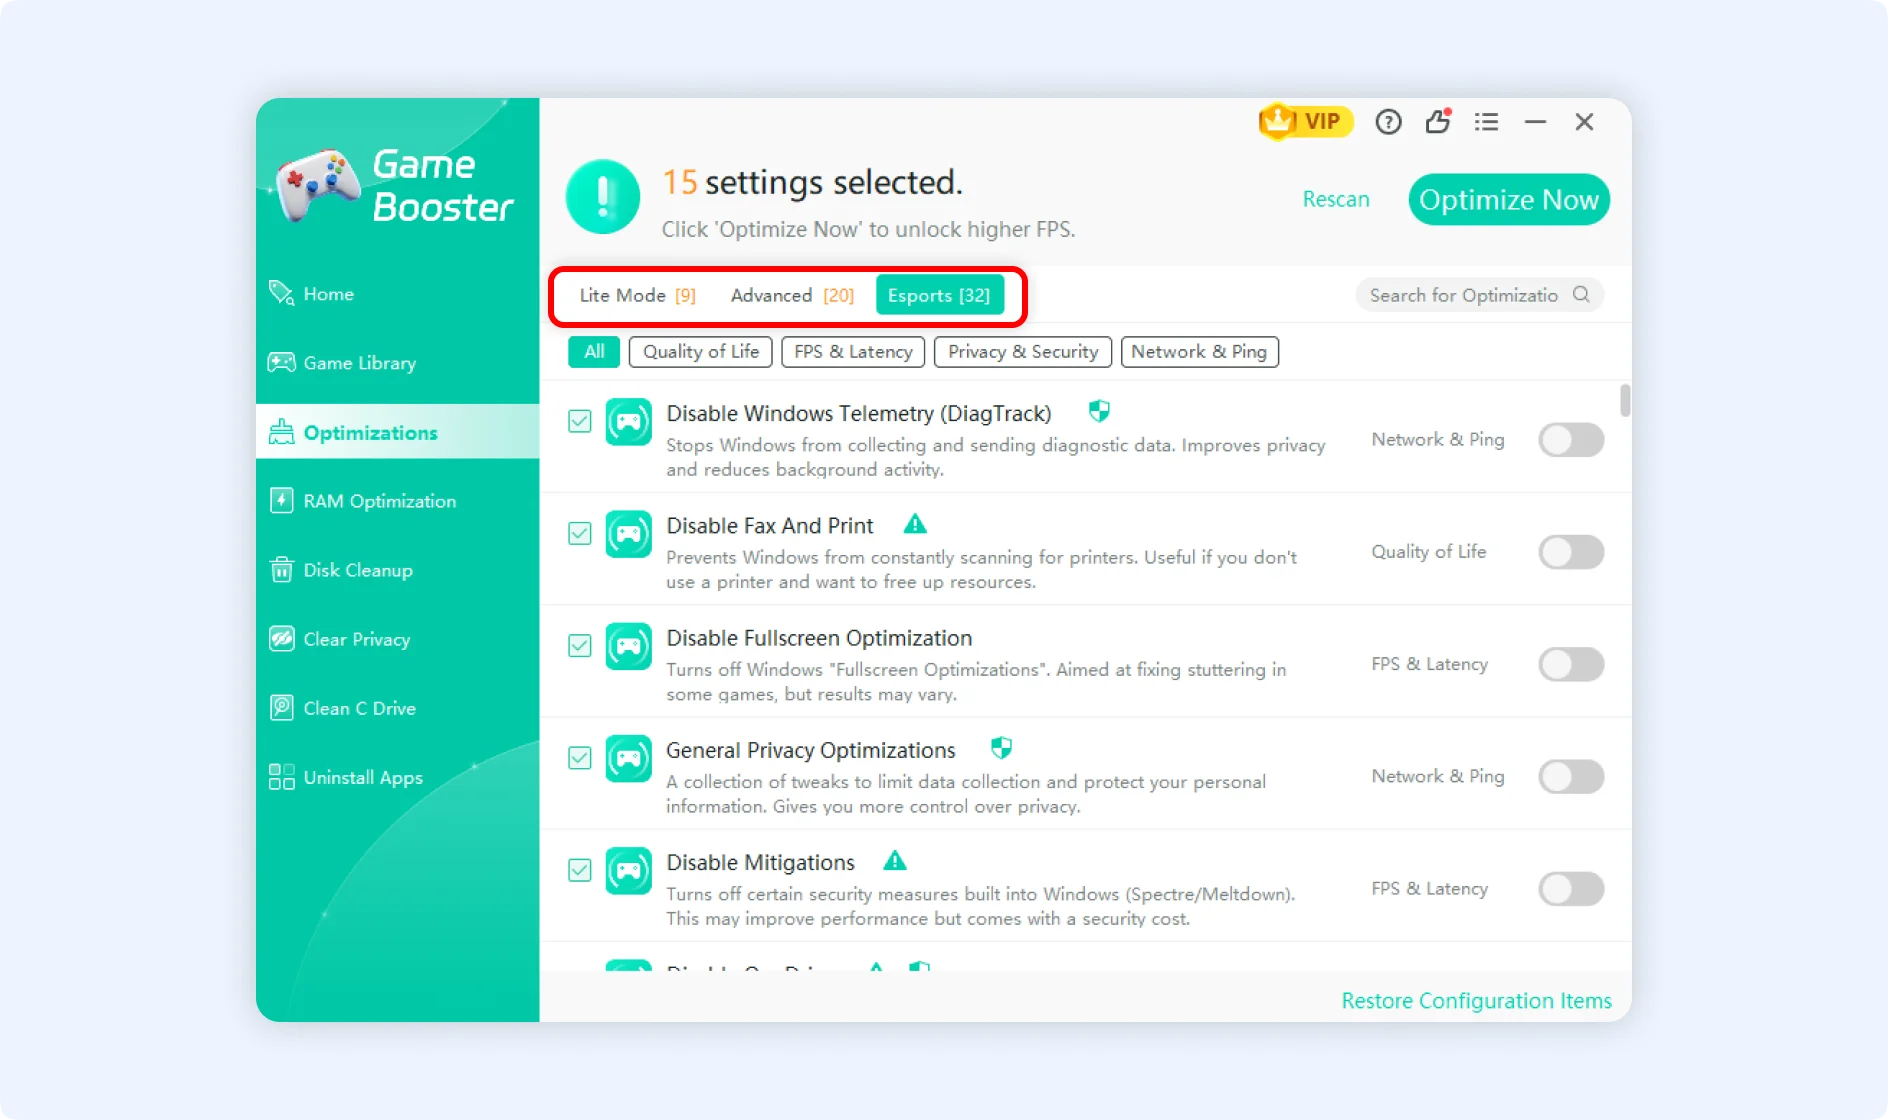
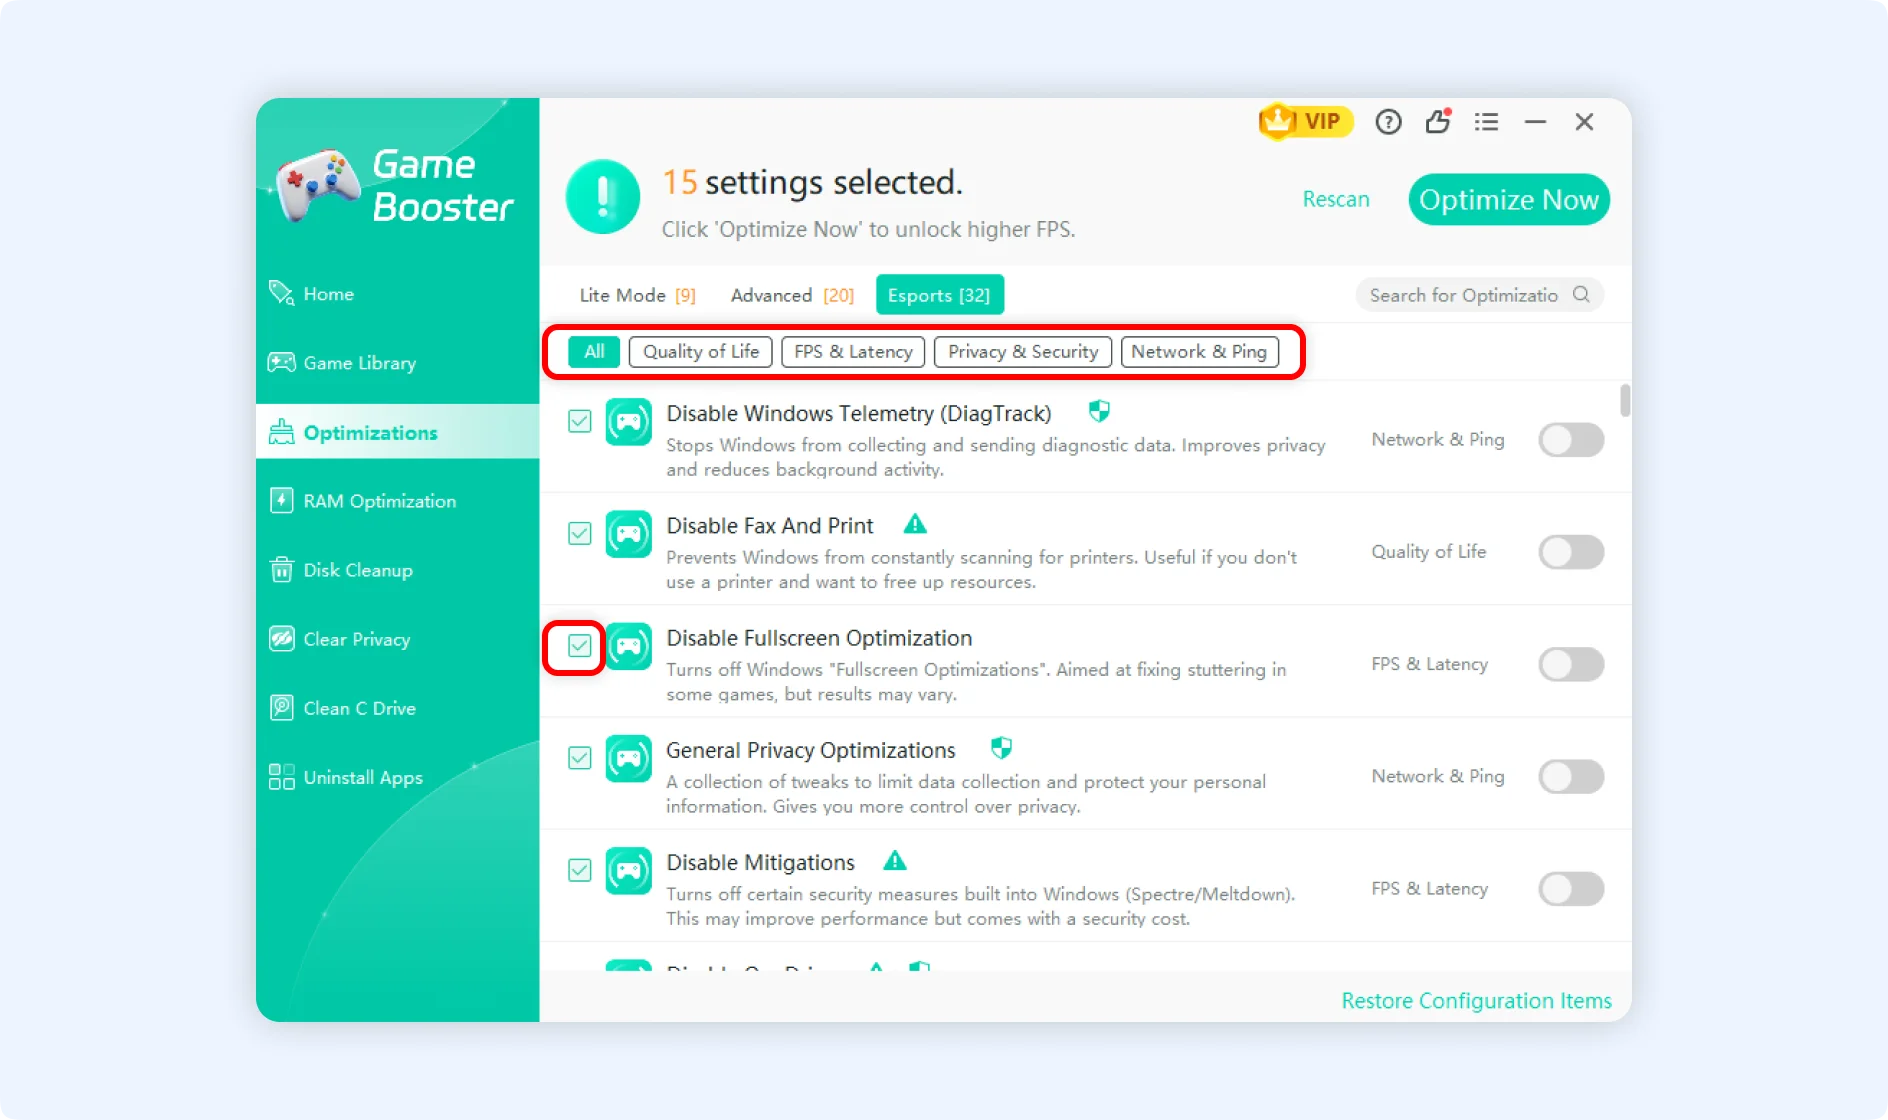
💡Tips 2:If you want to switch between different configuration items, you can select the configuration types manually.
💡Tips 3:For the applied tweaks/configuration items, if you want to restore or cancel them, you can go to the bottom, click "Restore Configuration Items" to revert those applied tweaks/configuration items.
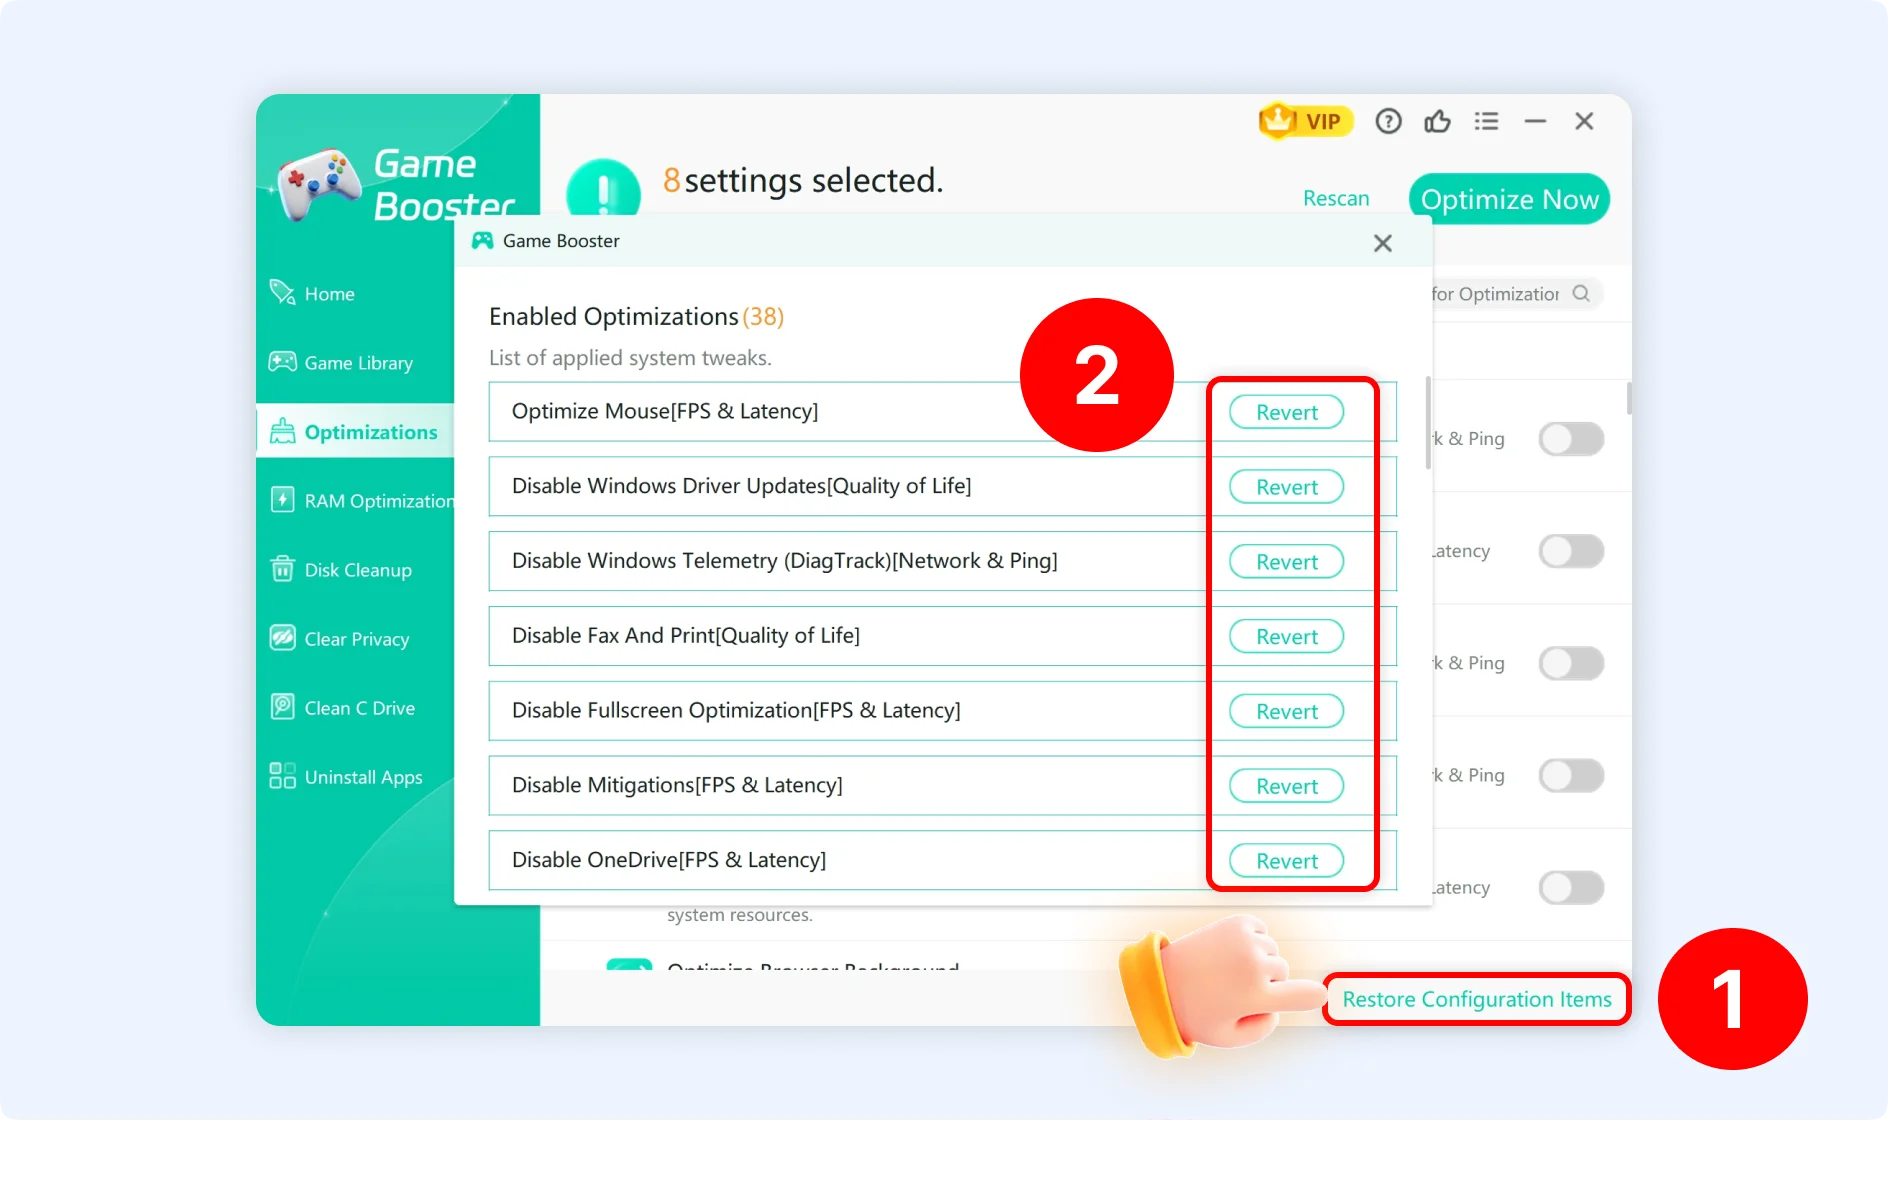
Step 3: Click the Optimize Now button in the upper right corner to begin the optimization process. When finished, the top status bar will display the total number of settings applied, and a confirmation dialog will appear.
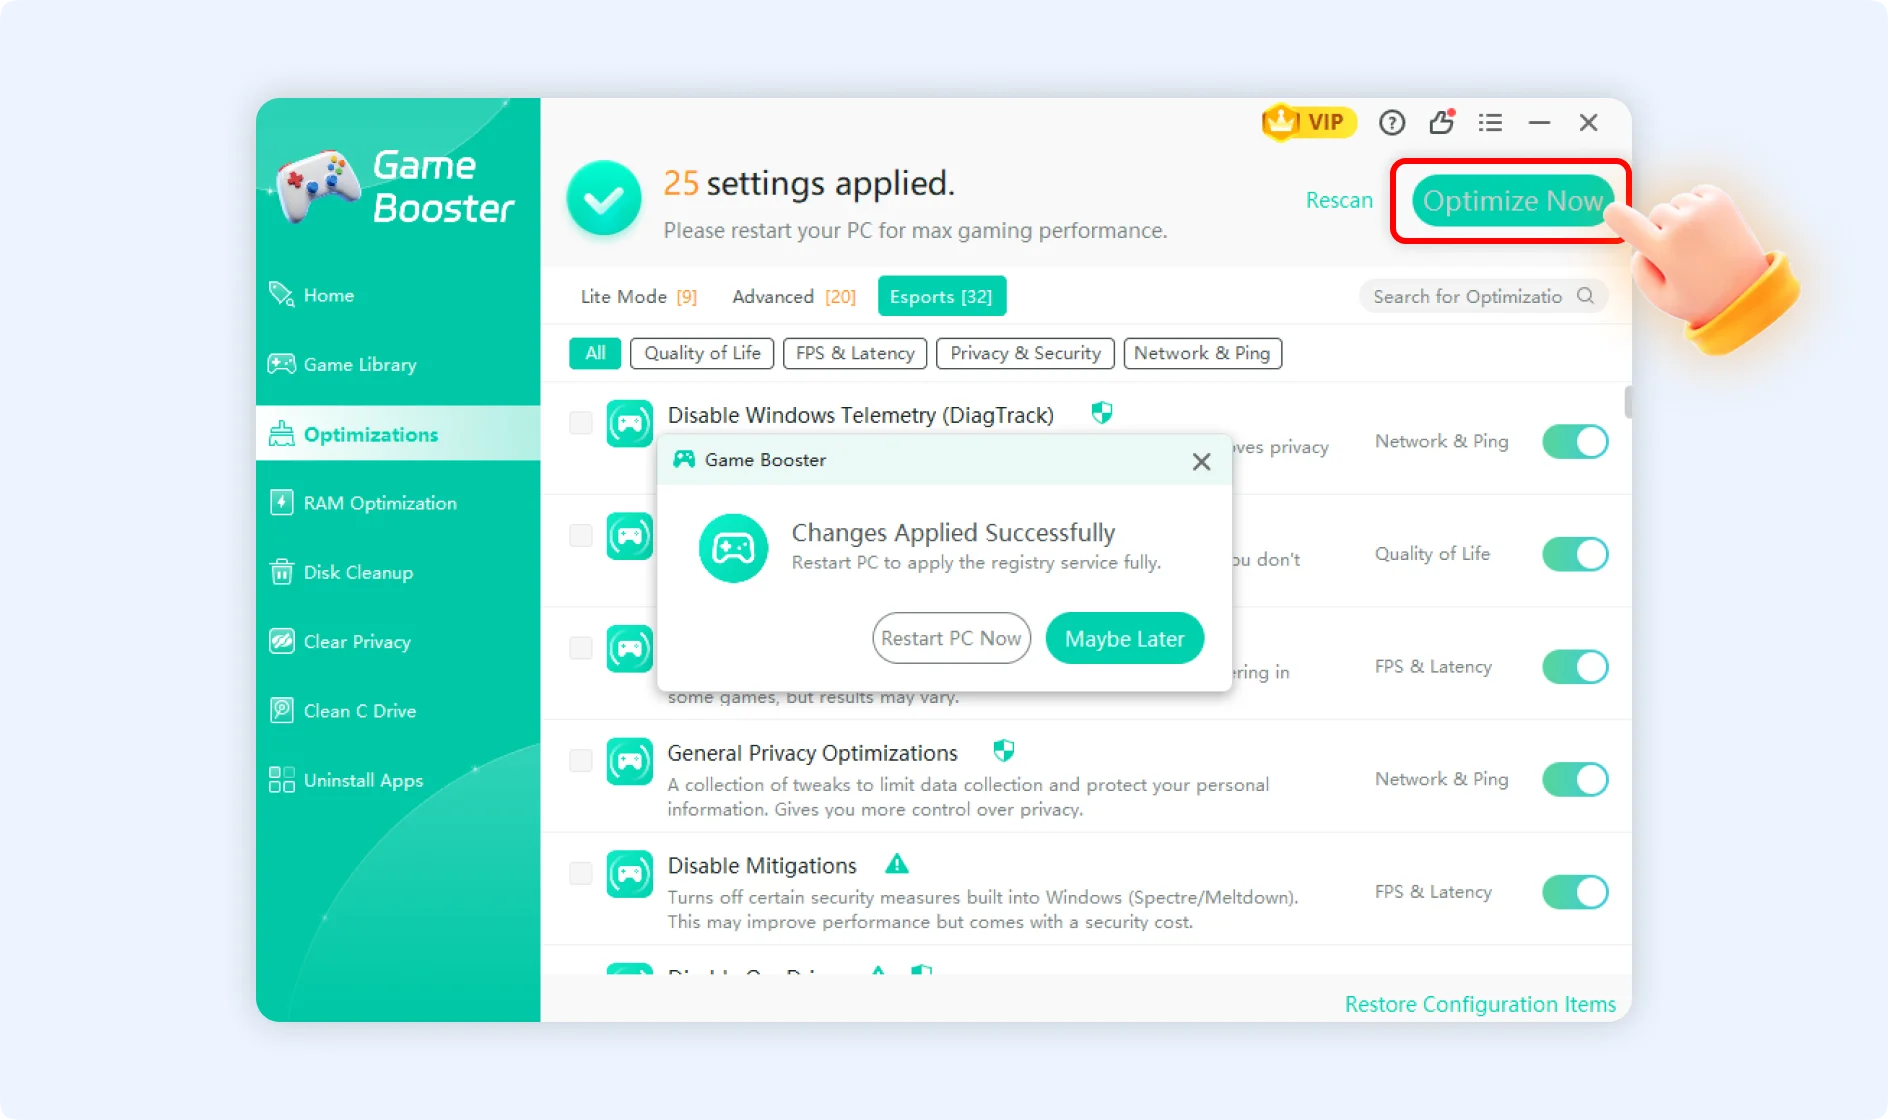
💡Tips :We highly recommend clicking Restart PC Now to allow all tweaks to take effect completely. Alternatively, you can click Maybe Later to reboot manually at another time.
Once the optimizations are active, simply launch your game to enjoy a dramatically smoother gaming experience!
How to Use WMaster Cleanup's Game Library?
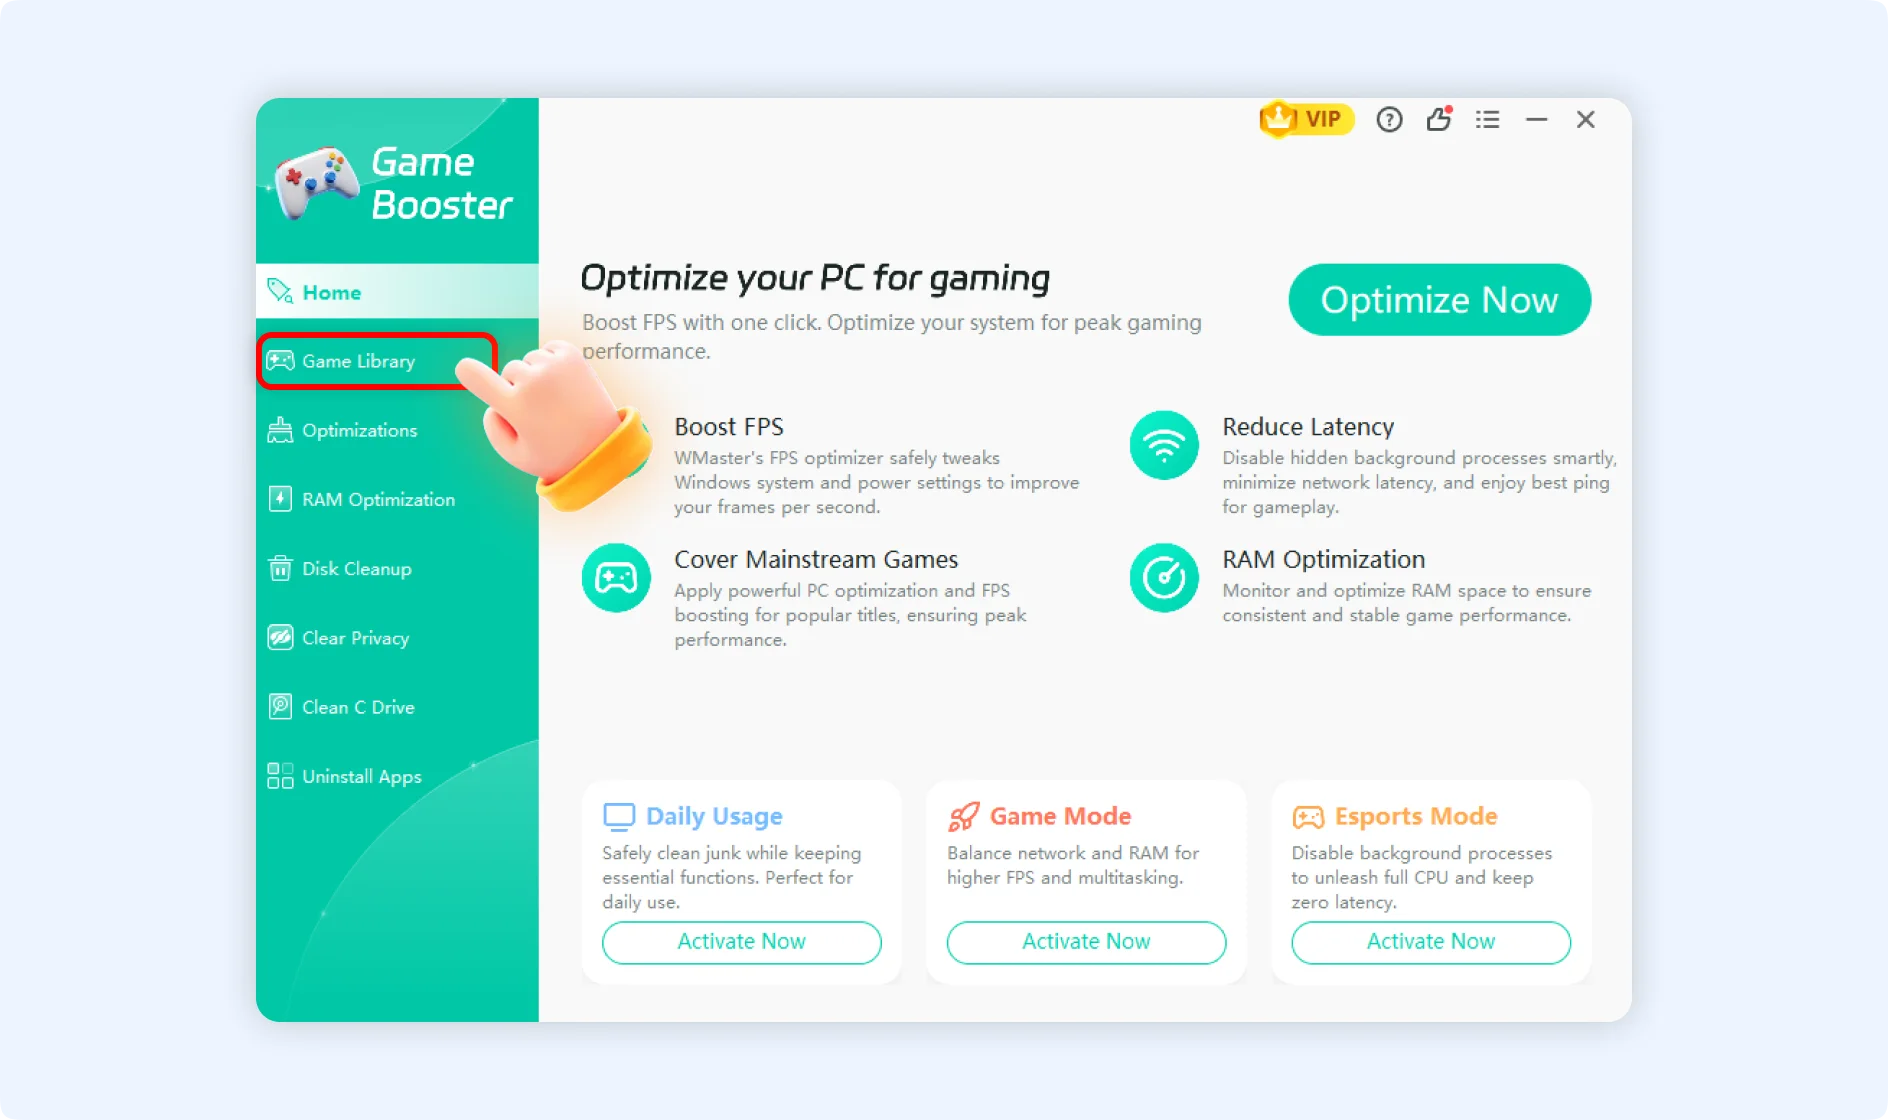
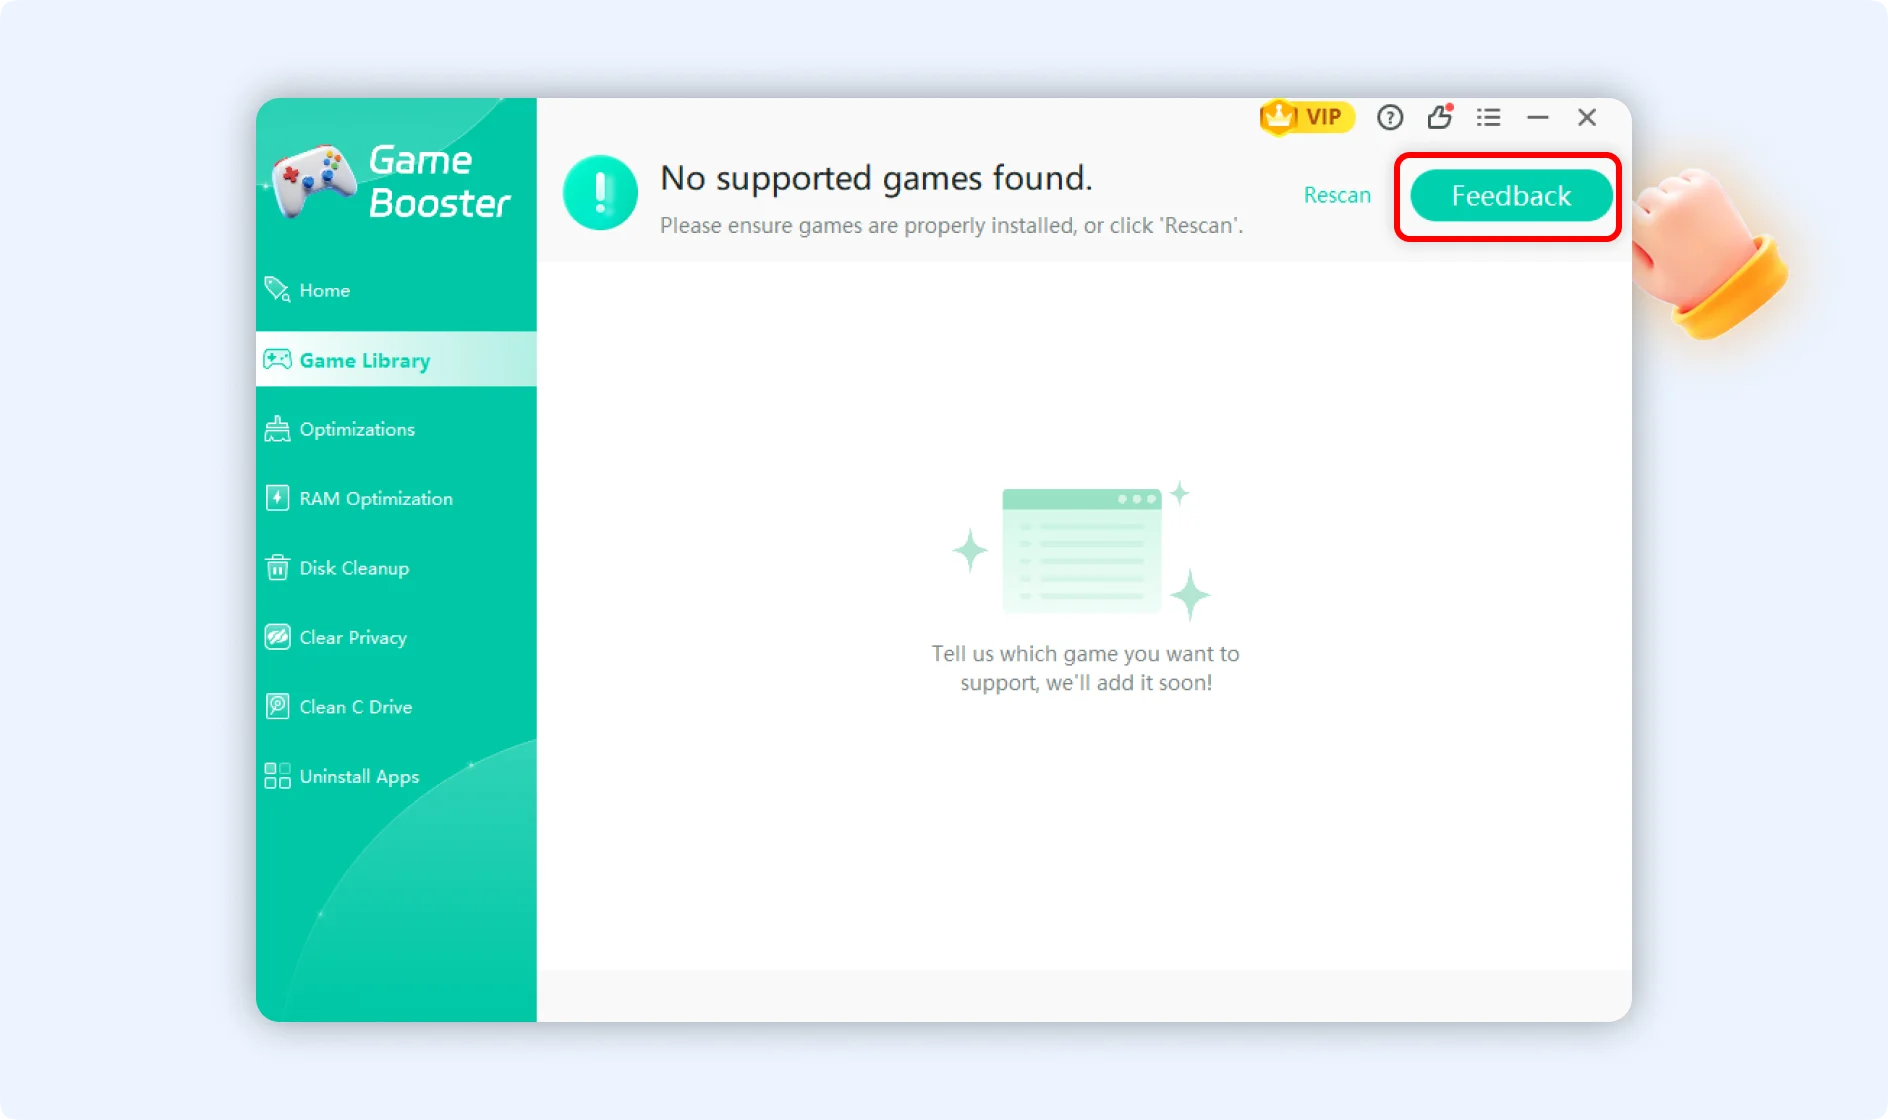
Step 1: On the left navigation bar of the Game Booster interface, click on Game Library.
Step 2: Then you will see an automatic scan of your local drives to detect any installed games that are currently supported by our database.
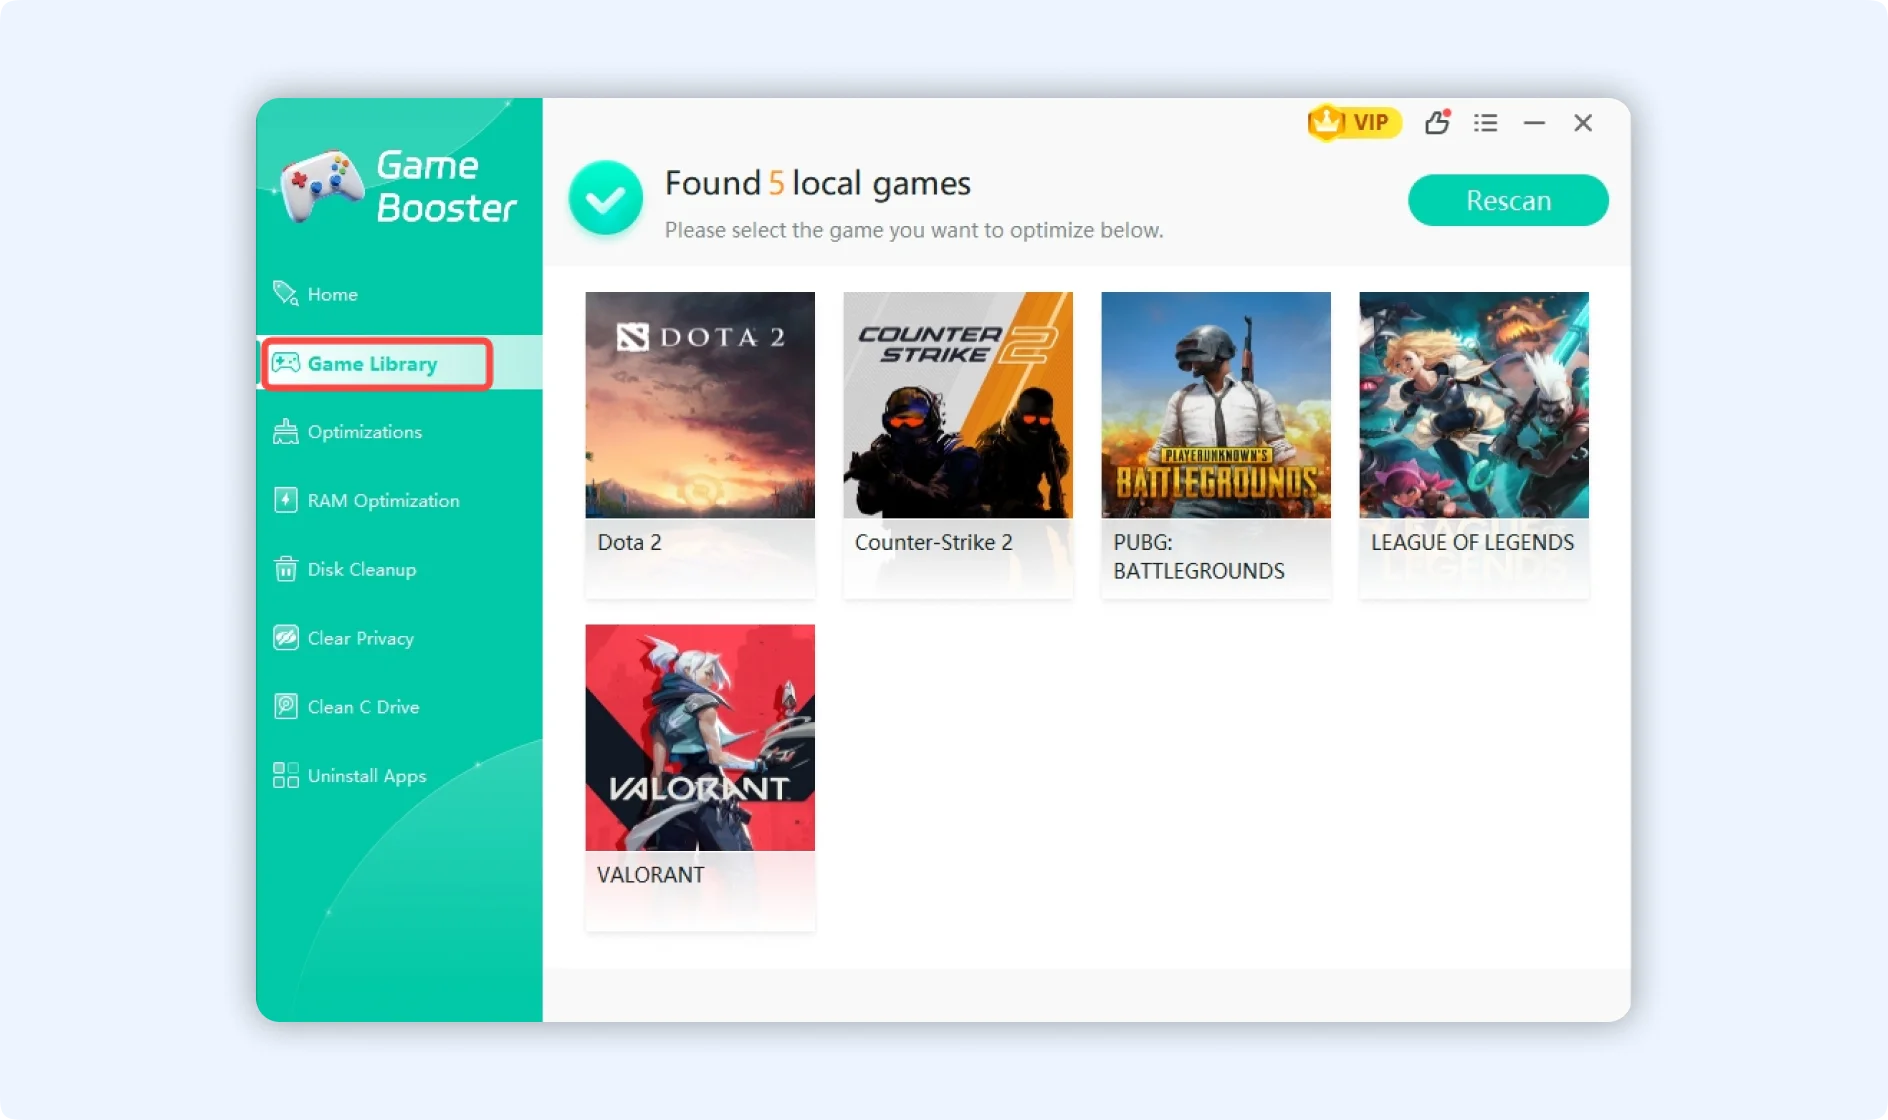
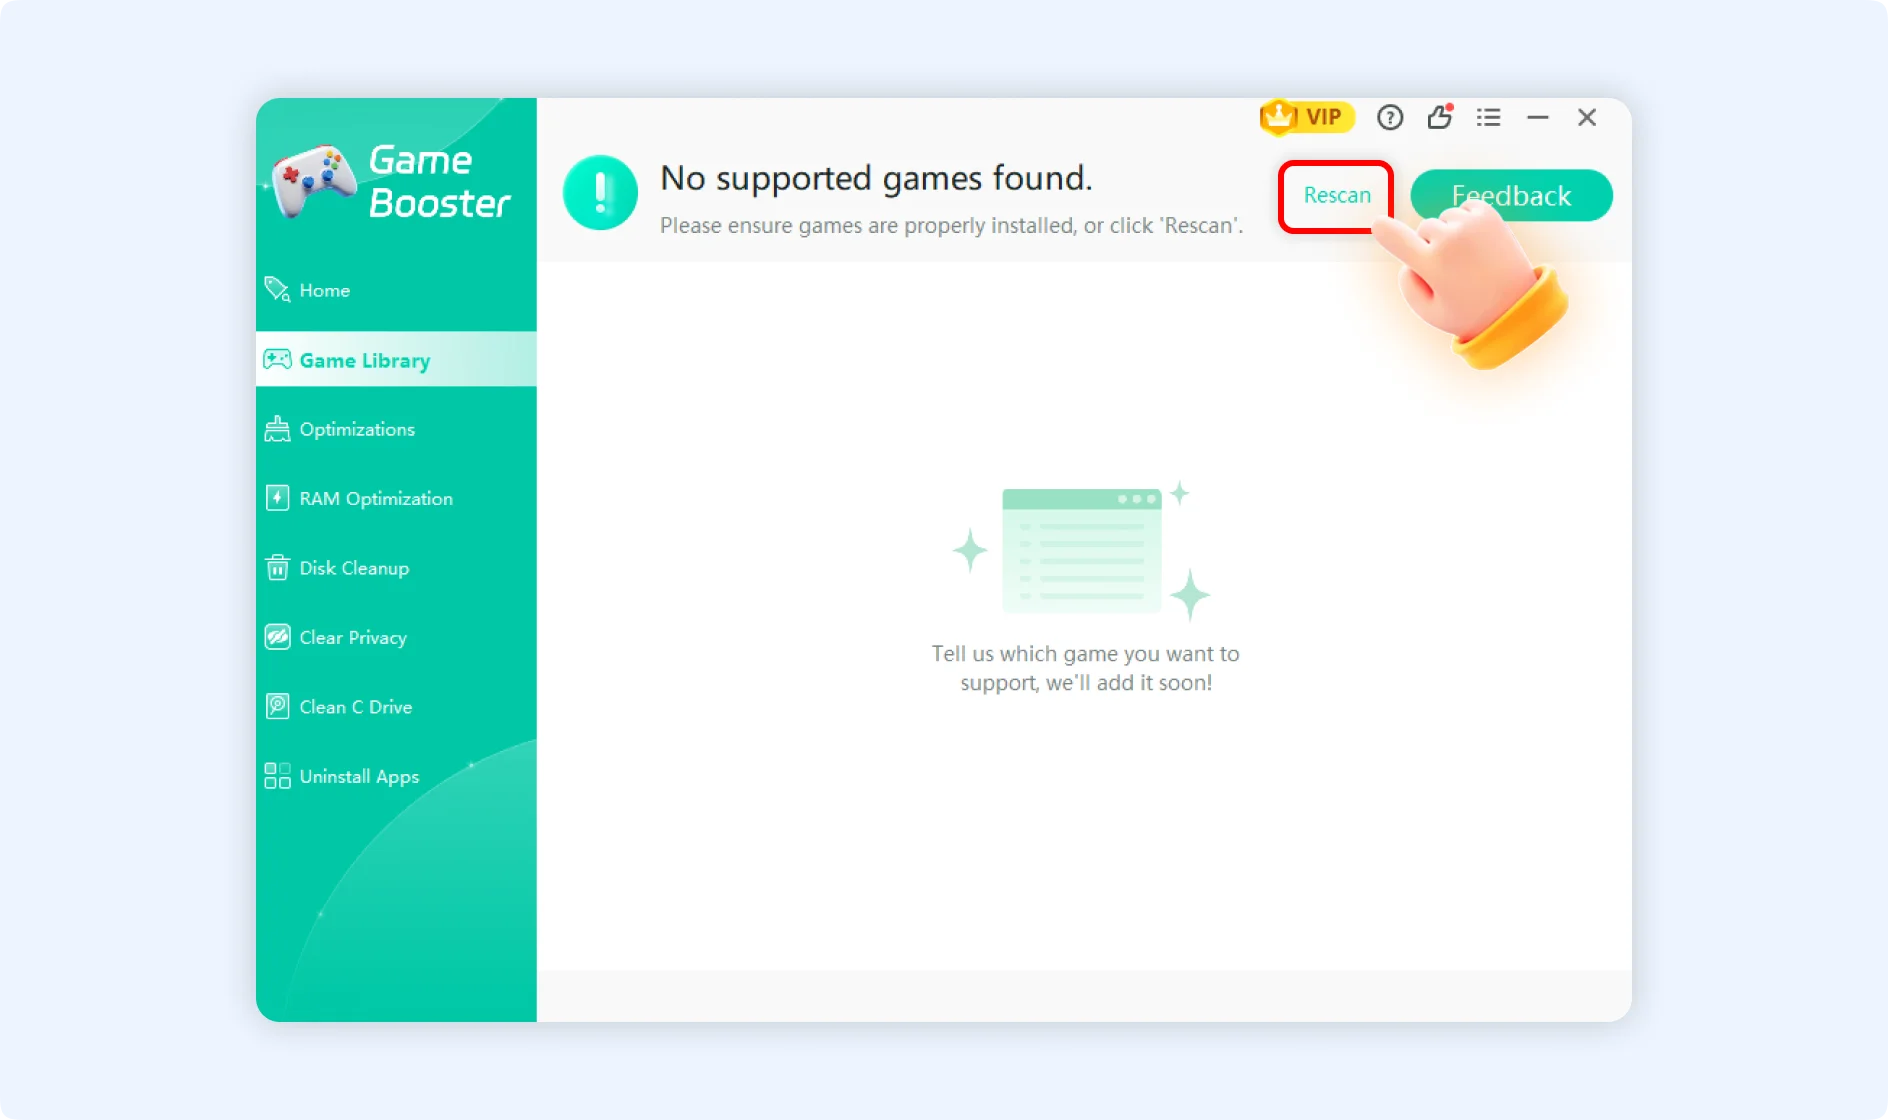
💡Tips :If a game you own doesn't show up, verify that it is properly installed on your drive and click Rescan. Our database currently covers over 5,000+ mainstream titles. If your favorite game is still missing, click the Feedback button in the top right corner to drop us a line; we will work on adding it into our game library quickly.
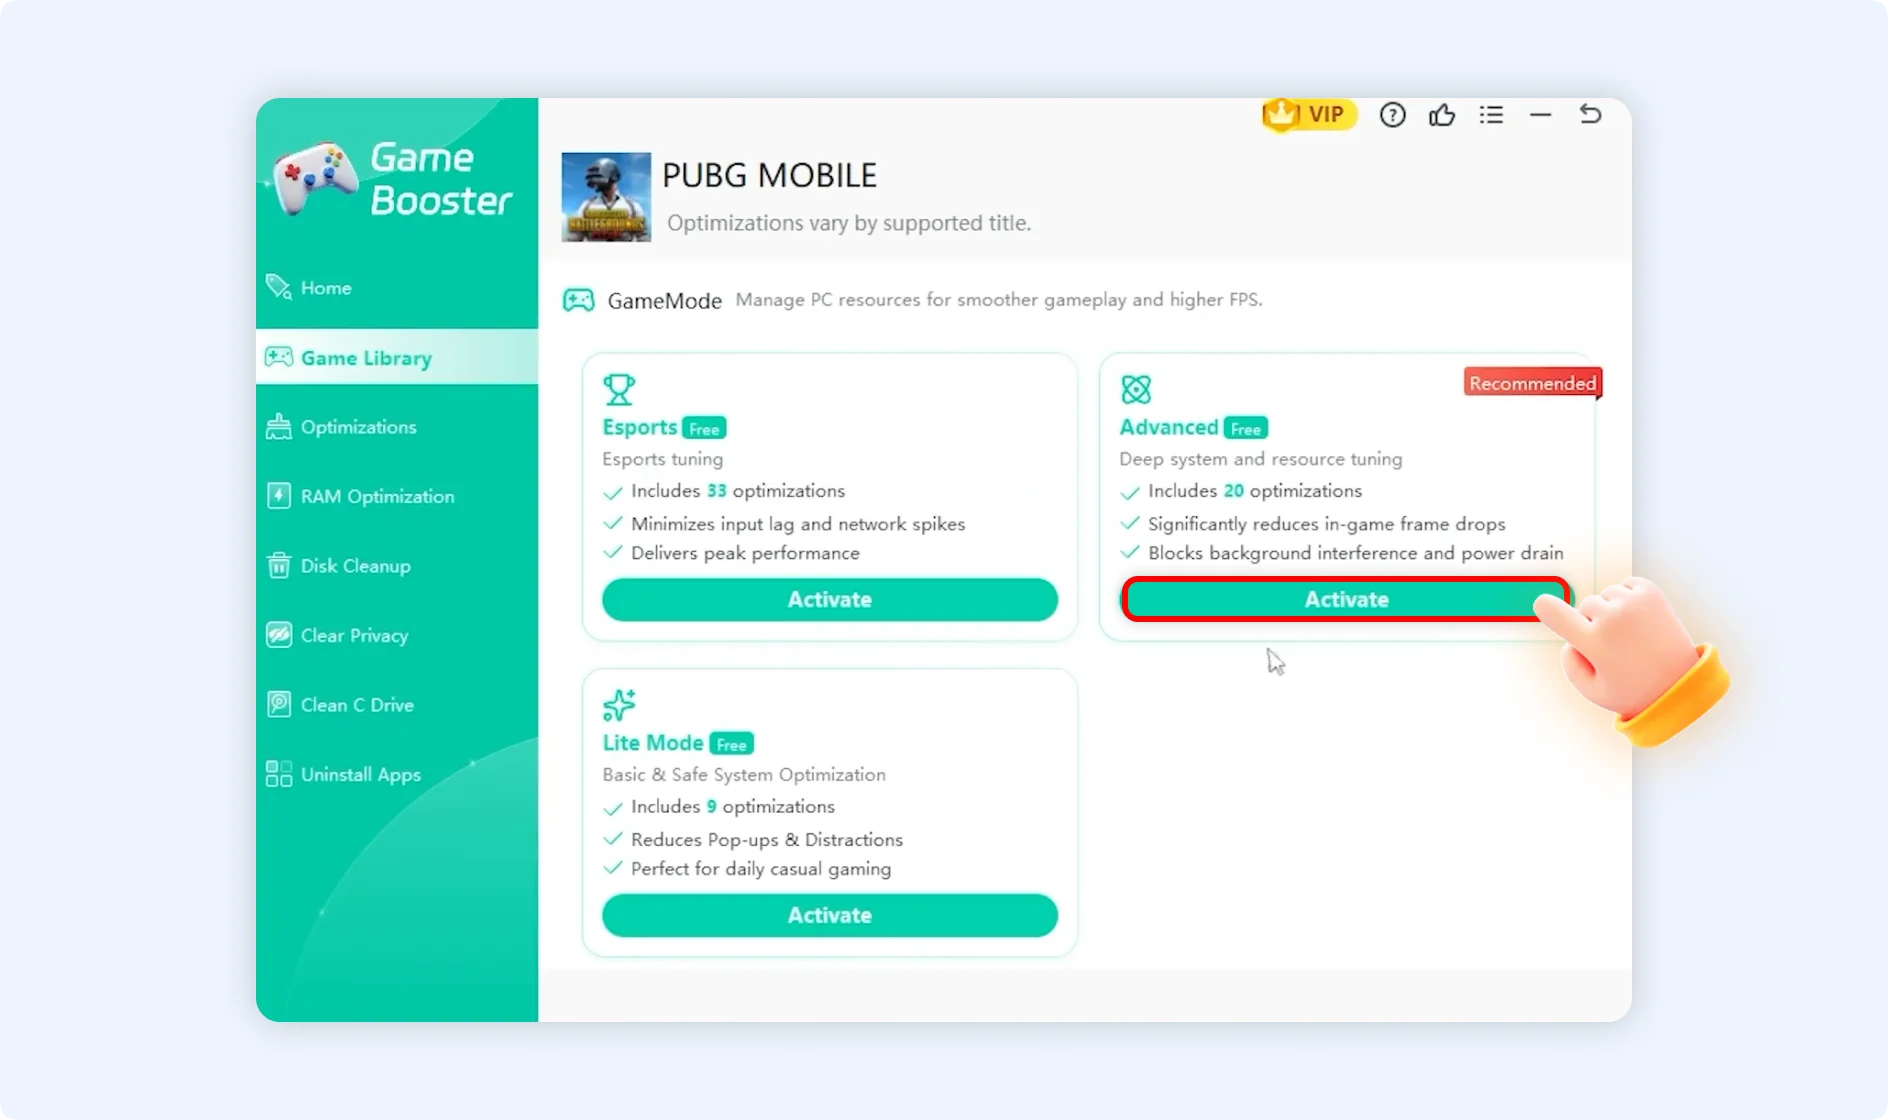
Step 3: Click on the specific title you want to play. The system will recommend an optimal profile (e.g., Advanced Mode). Click the Activate button under your preferred mode.
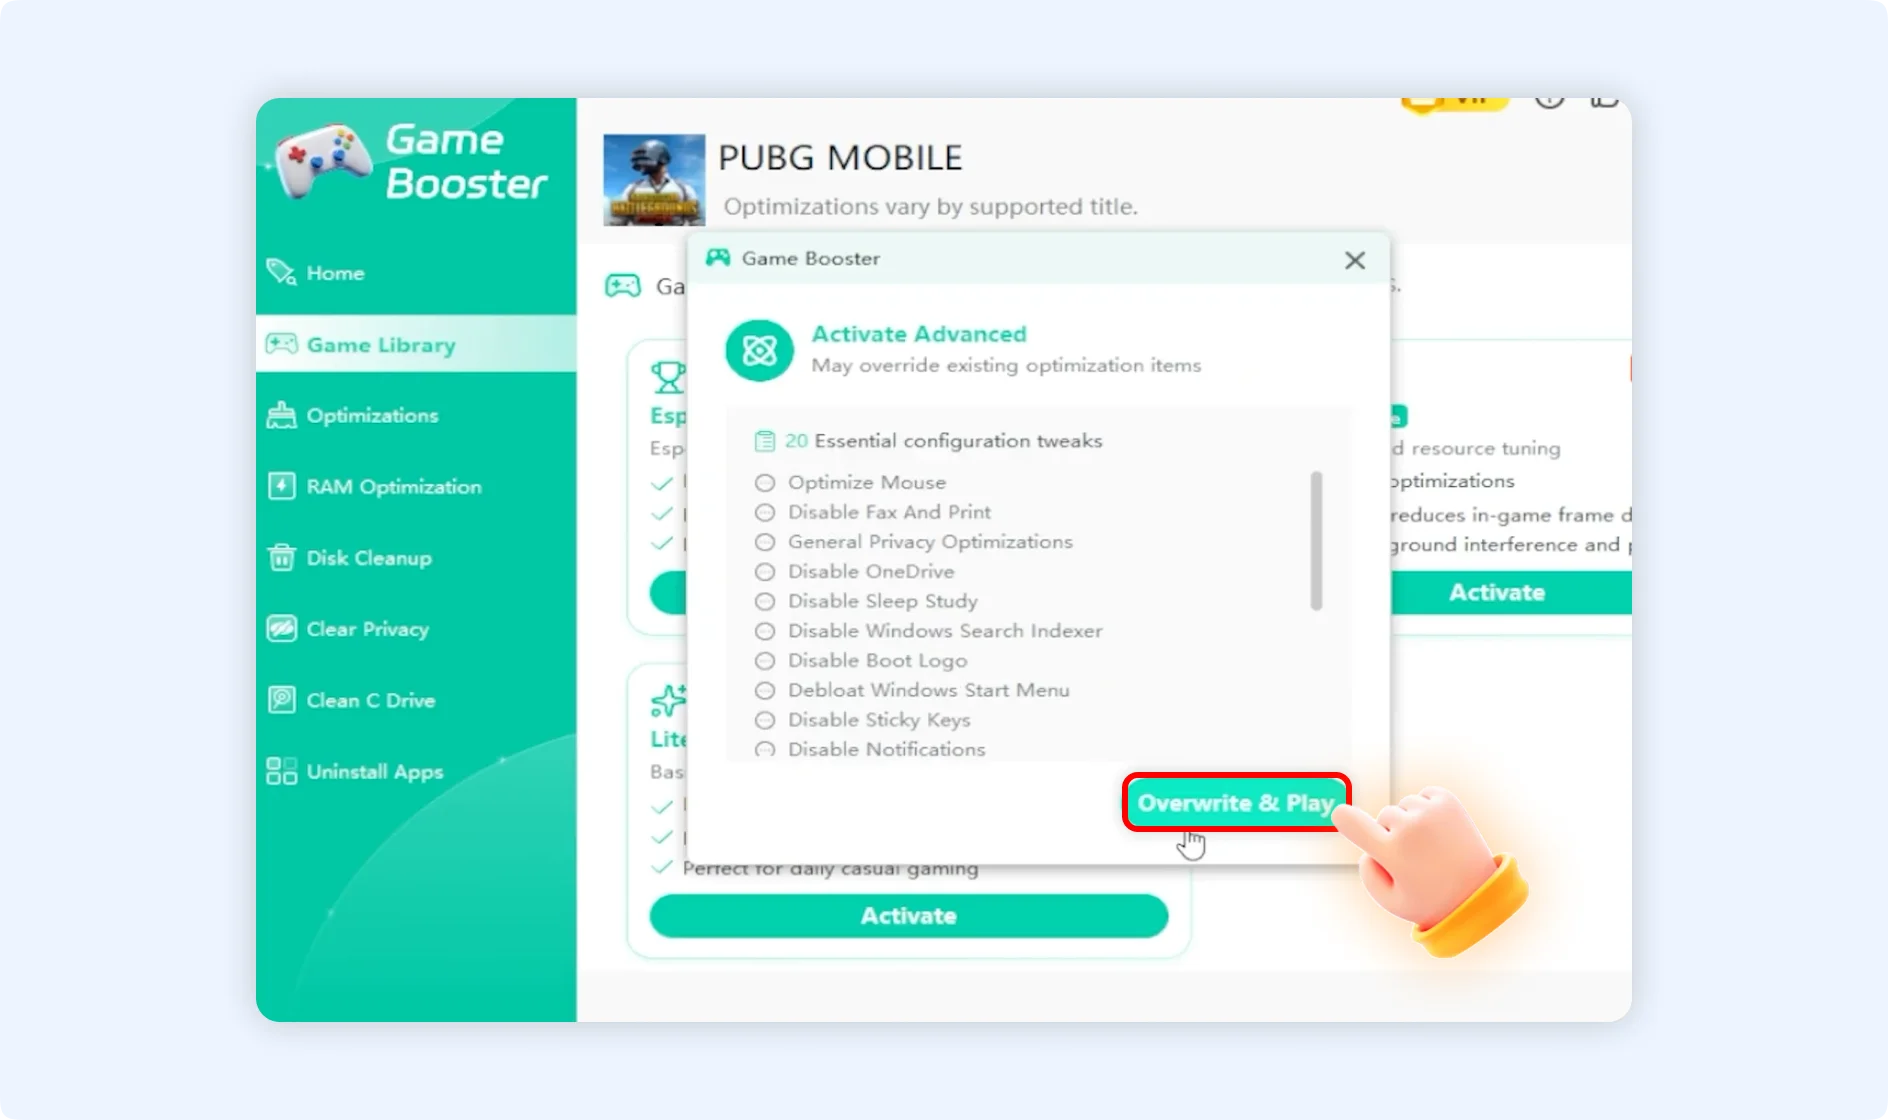
Step 4: A pop-up will display the list of essential configuration tweaks included in that mode. Review the items and click Overwrite & Play to apply them.
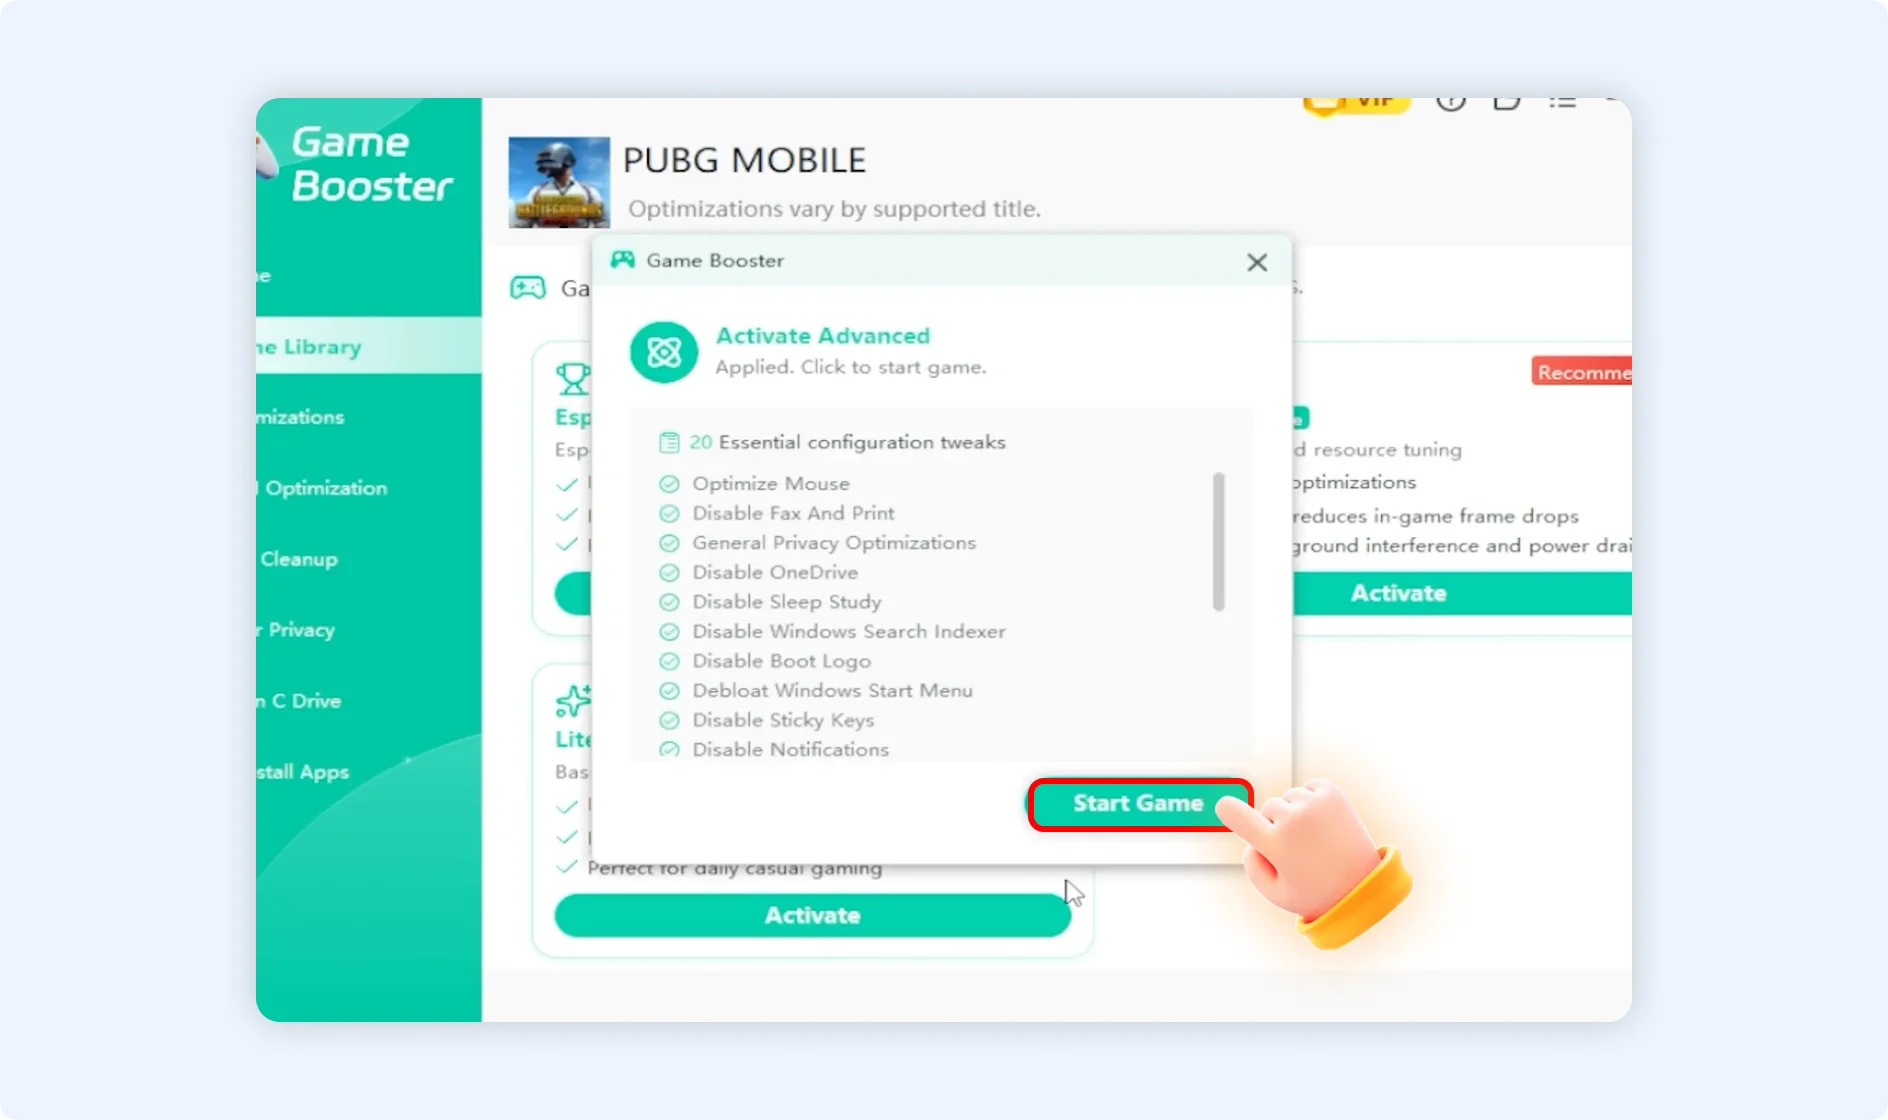
Step 5: Once processing completes, click the Start Game button inside the pop-up to apply the profile and launch your game immediately.
How to Apply RAM Optimization?
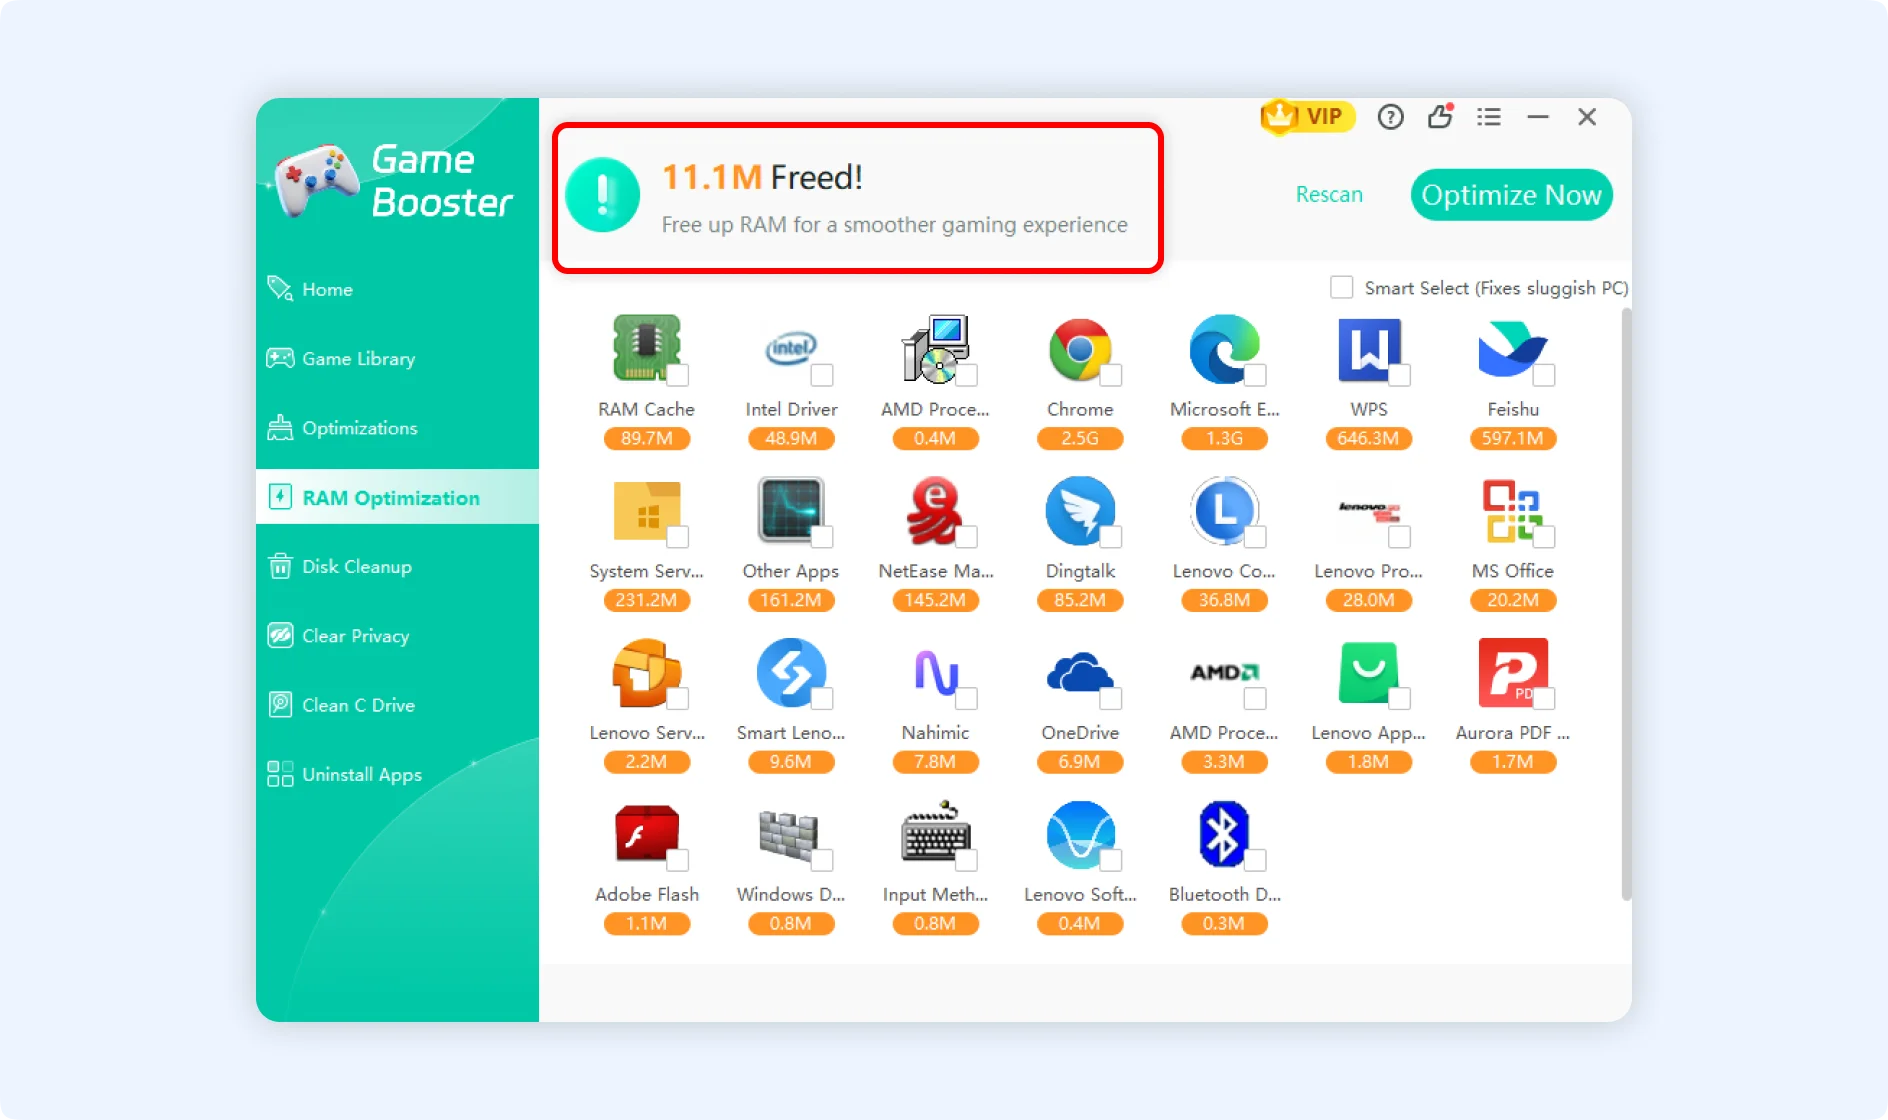
Step 1: On the left navigation bar of the Game Booster interface, select and click on RAM Optimization.
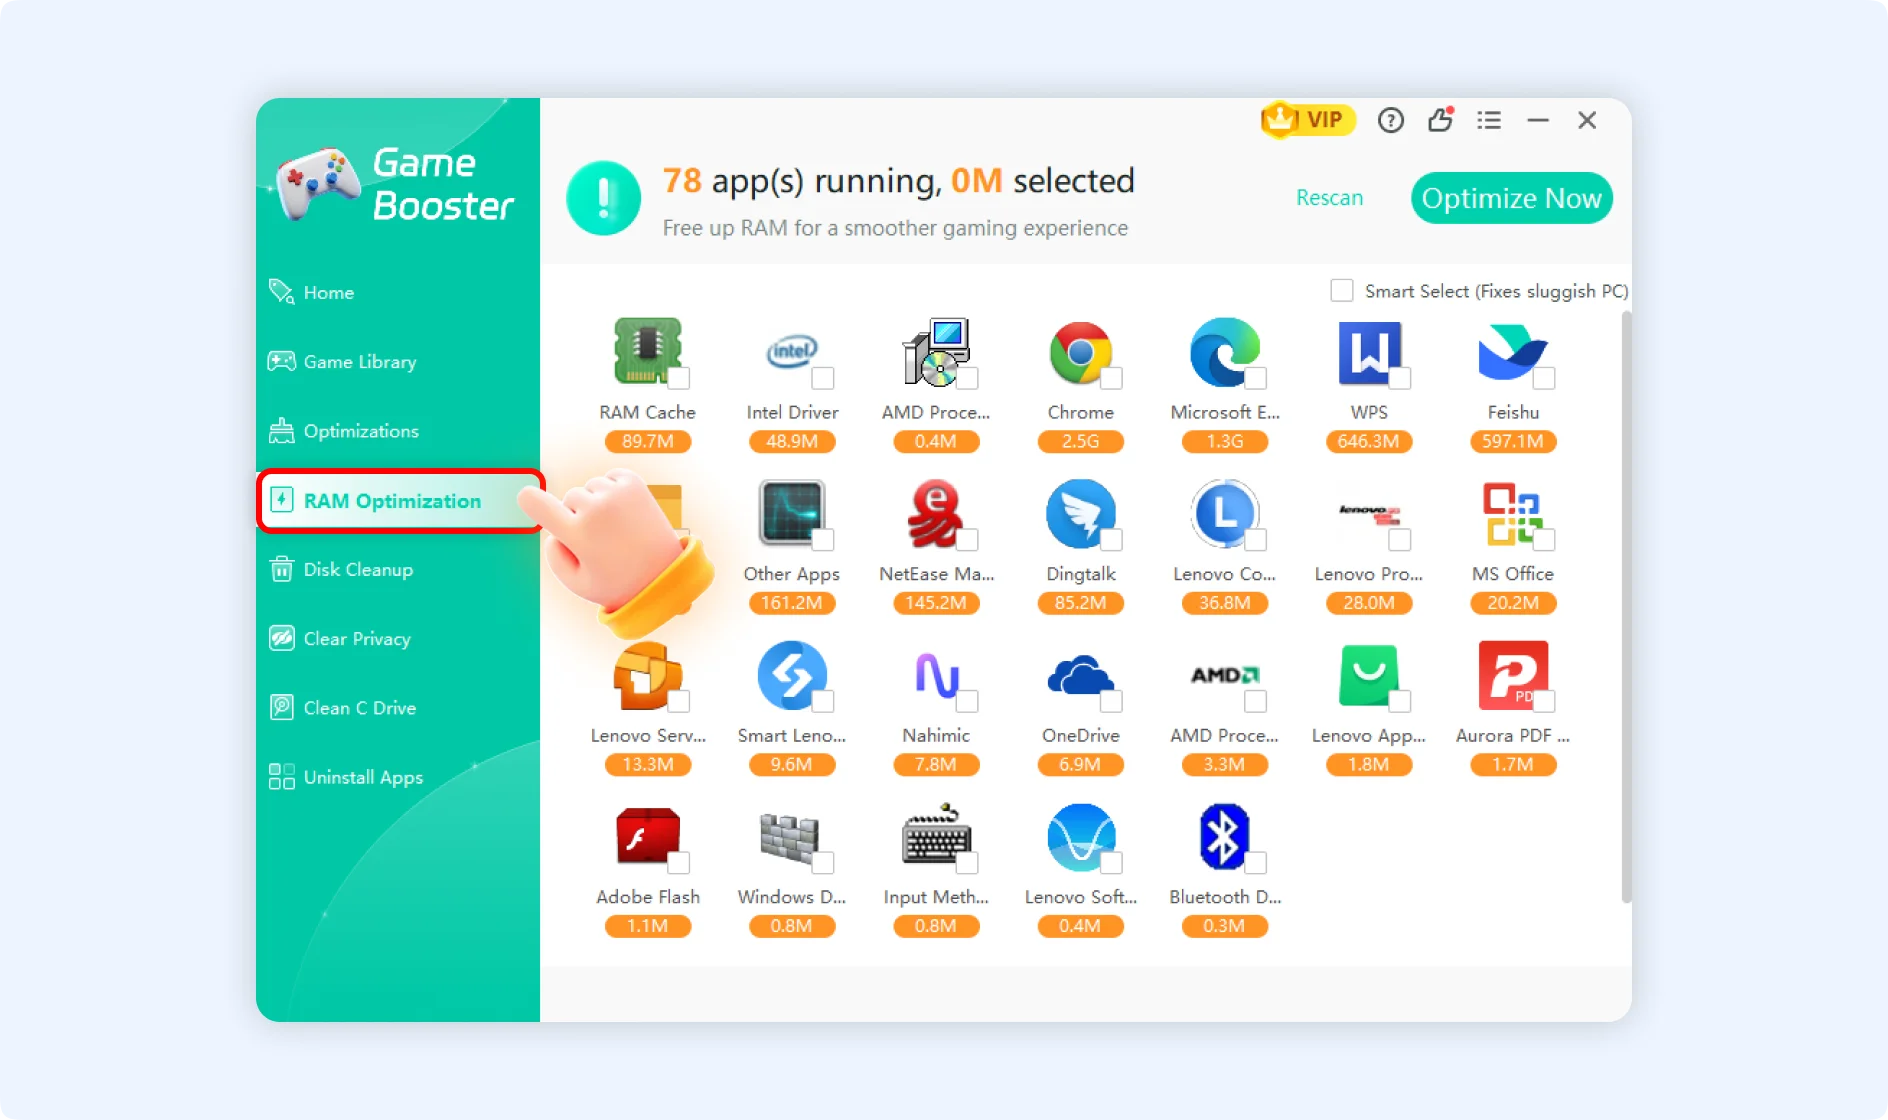
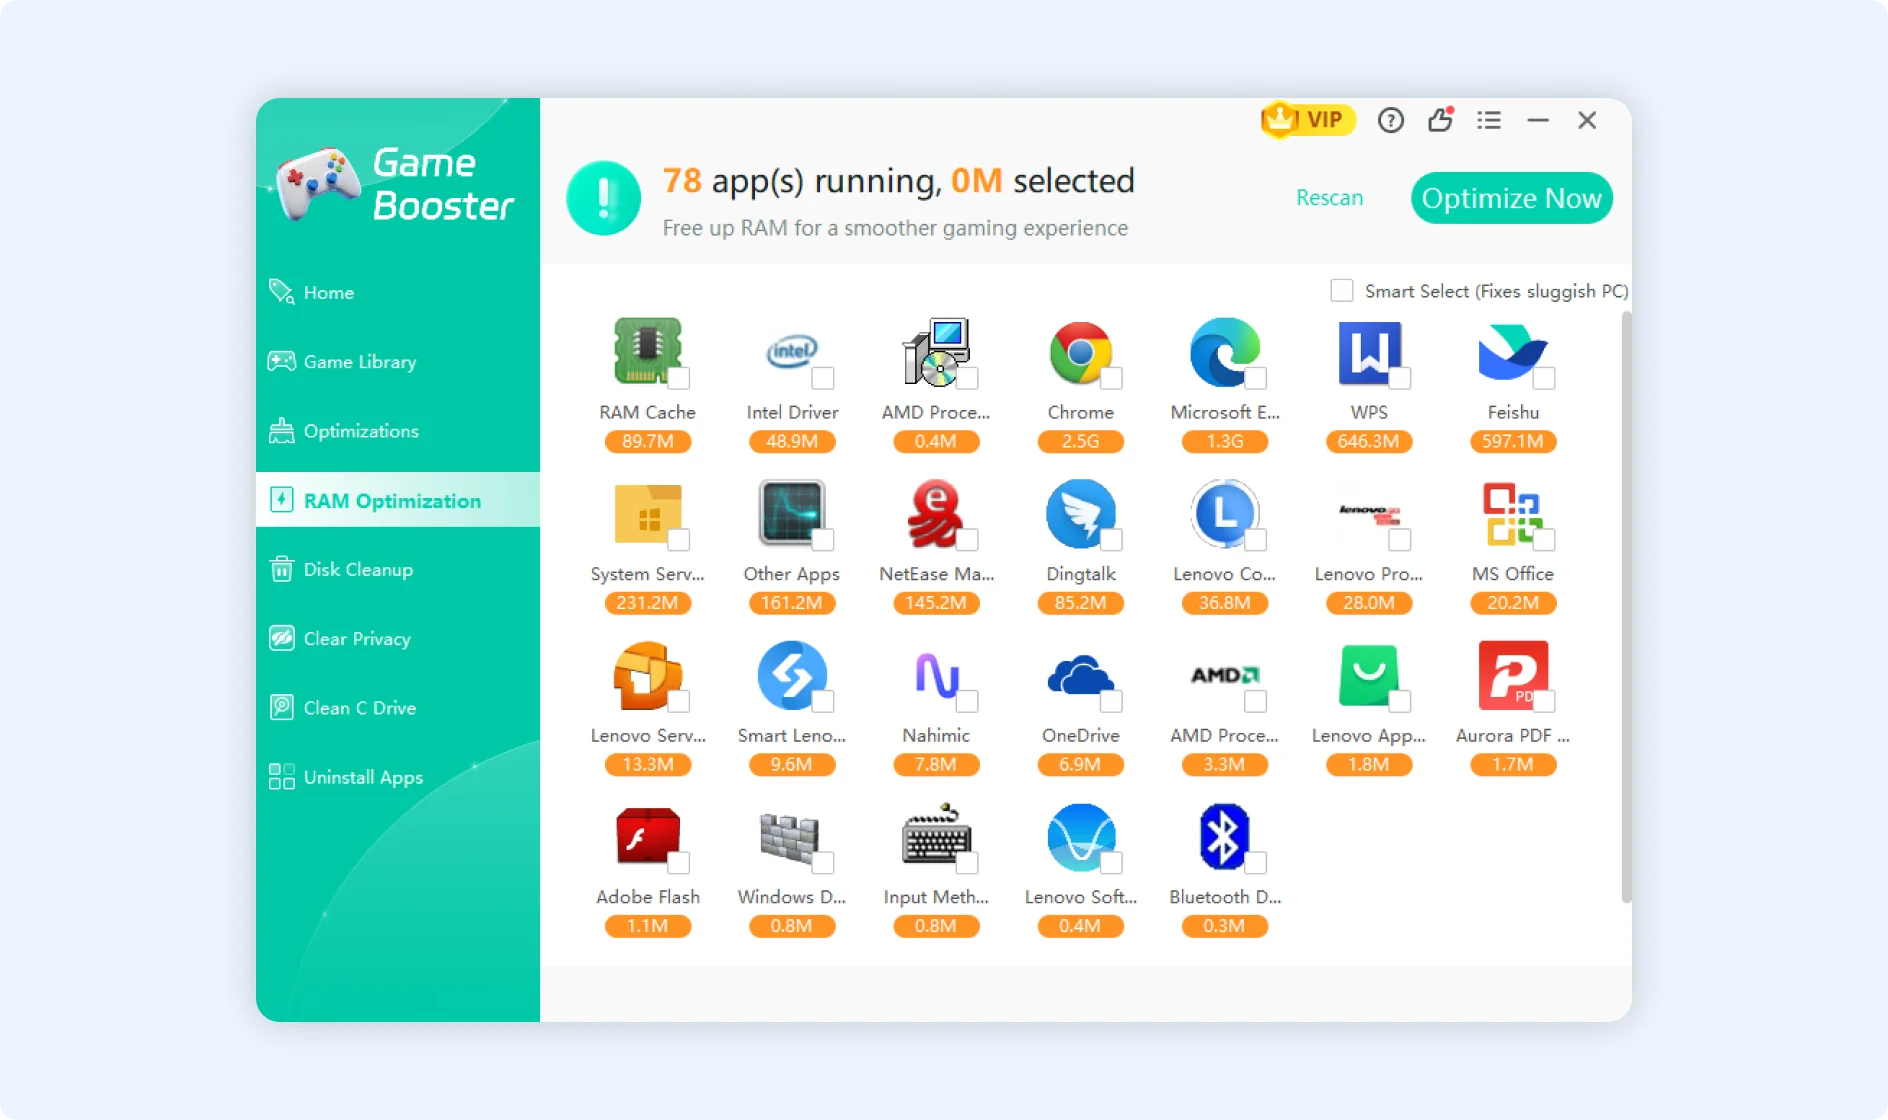
Step 2: Next, you will see our tool automatically scans and visualizes all active background processes utilizing your system memory.
💡Tips :You can click on any individual application icon in the scan results to open its Boost Details. From there, you can view the specific background executable paths and choose to optimize or close that application individually.

Step 3: Check the boxes for the applications you wish to close (or check Smart Select to safely stop background applications), then click the Optimize Now button in the upper right corner to free up your memory.
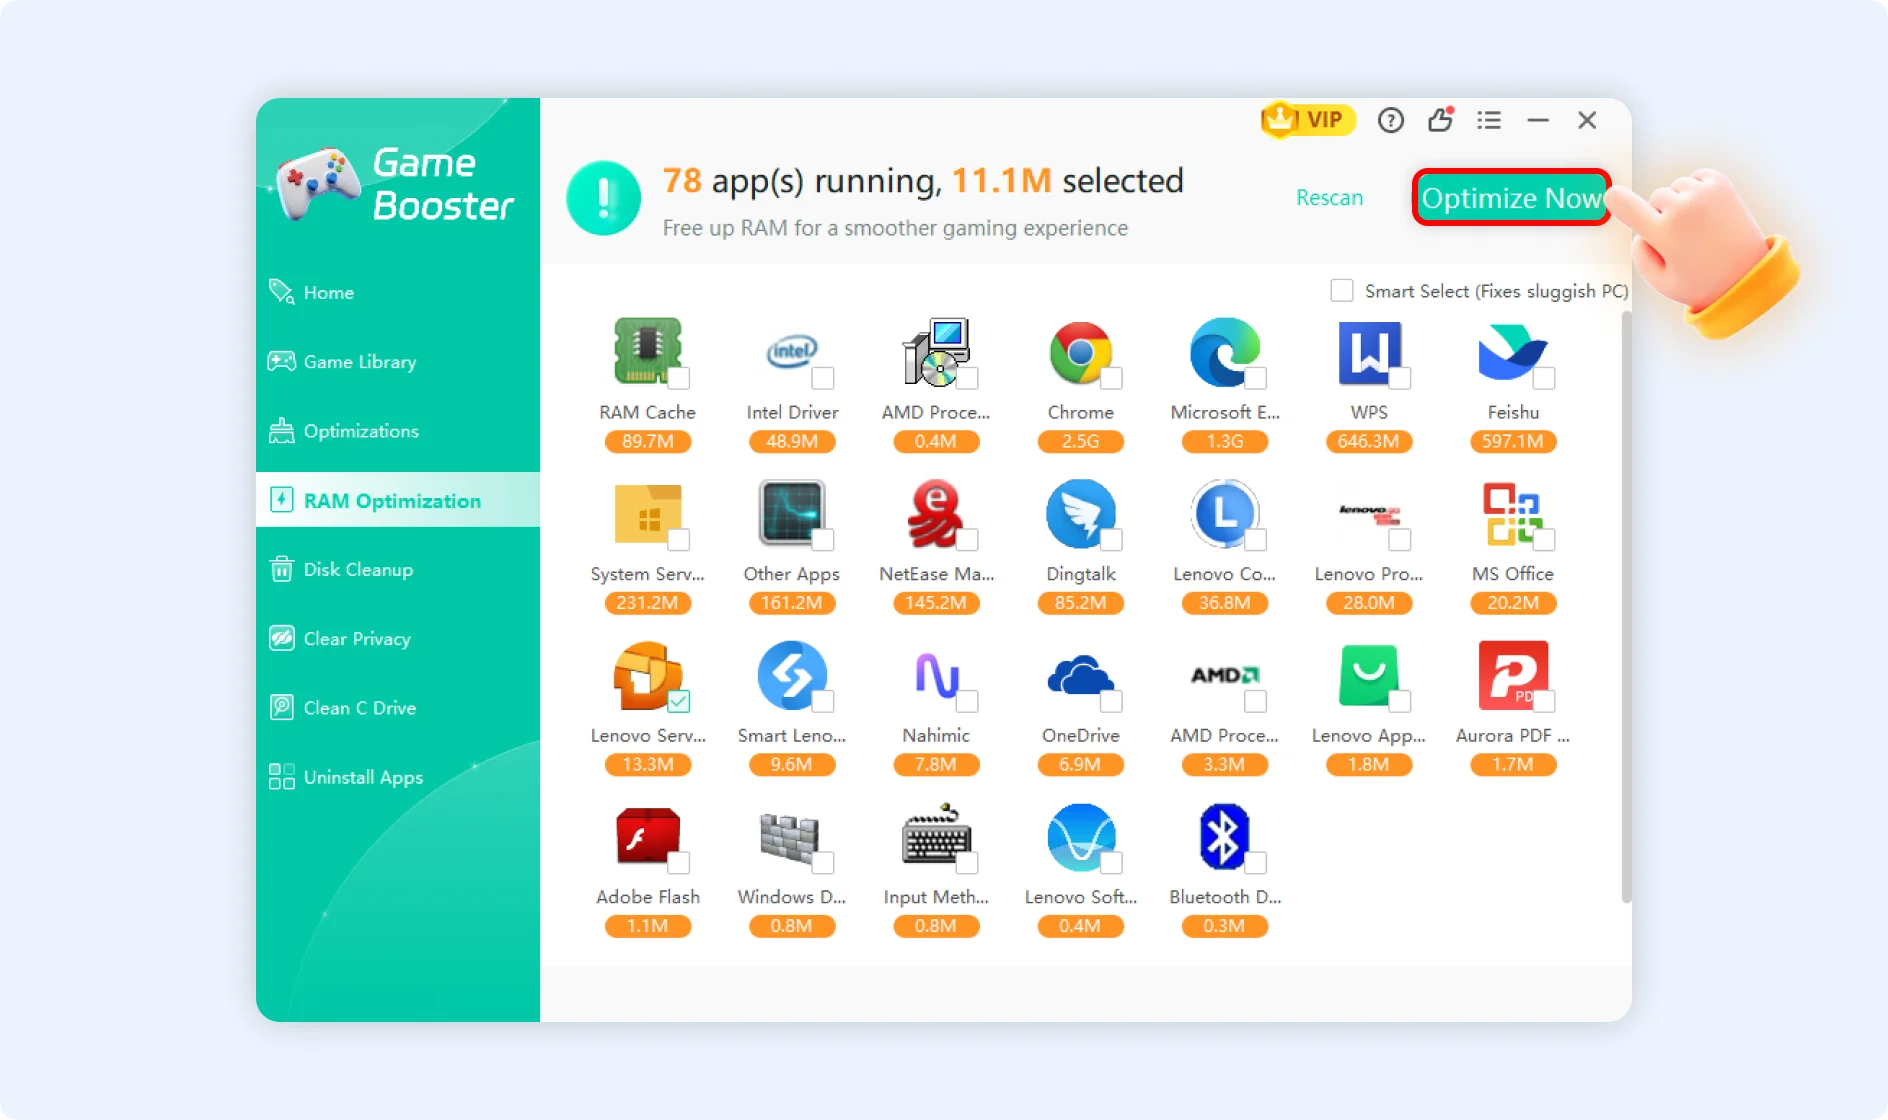
Step 4: Once complete, the interface will display the exact amount of RAM successfully freed (e.g., "11.4M Freed!"), ensuring a clean slate for your next gaming session.