The most common problem for PC users worldwide is running out of disk space. Over time, the accumulation of files, applications, and system data gradually fills up disk space, resulting in slower system performance.
When space runs out, the most common method is to detect space-consuming files. However, usual methods require manually validating each folder, right-clicking to view its properties, and then confirming sizes. This process is time-consuming and inefficient.
WMaster Cleanup's "Disk Analyzer" feature is designed to handle the challenge of disk space analysis. With its advanced visualization tools, "Disk Analyzer" quickly scans your disk and then displays file and folder space consumption in a clear, graphical way. This lets you instantly identify the files or folders that are taking up the most space.
Advantages of WMaster Cleanup Disk Analyzer
- Lets you quickly check and analyze one or all of your disks.
- Indicates how much storage space files and folders are taking up with intuitive graphs.
- Sorts files and folders automatically from largest to smallest by size.
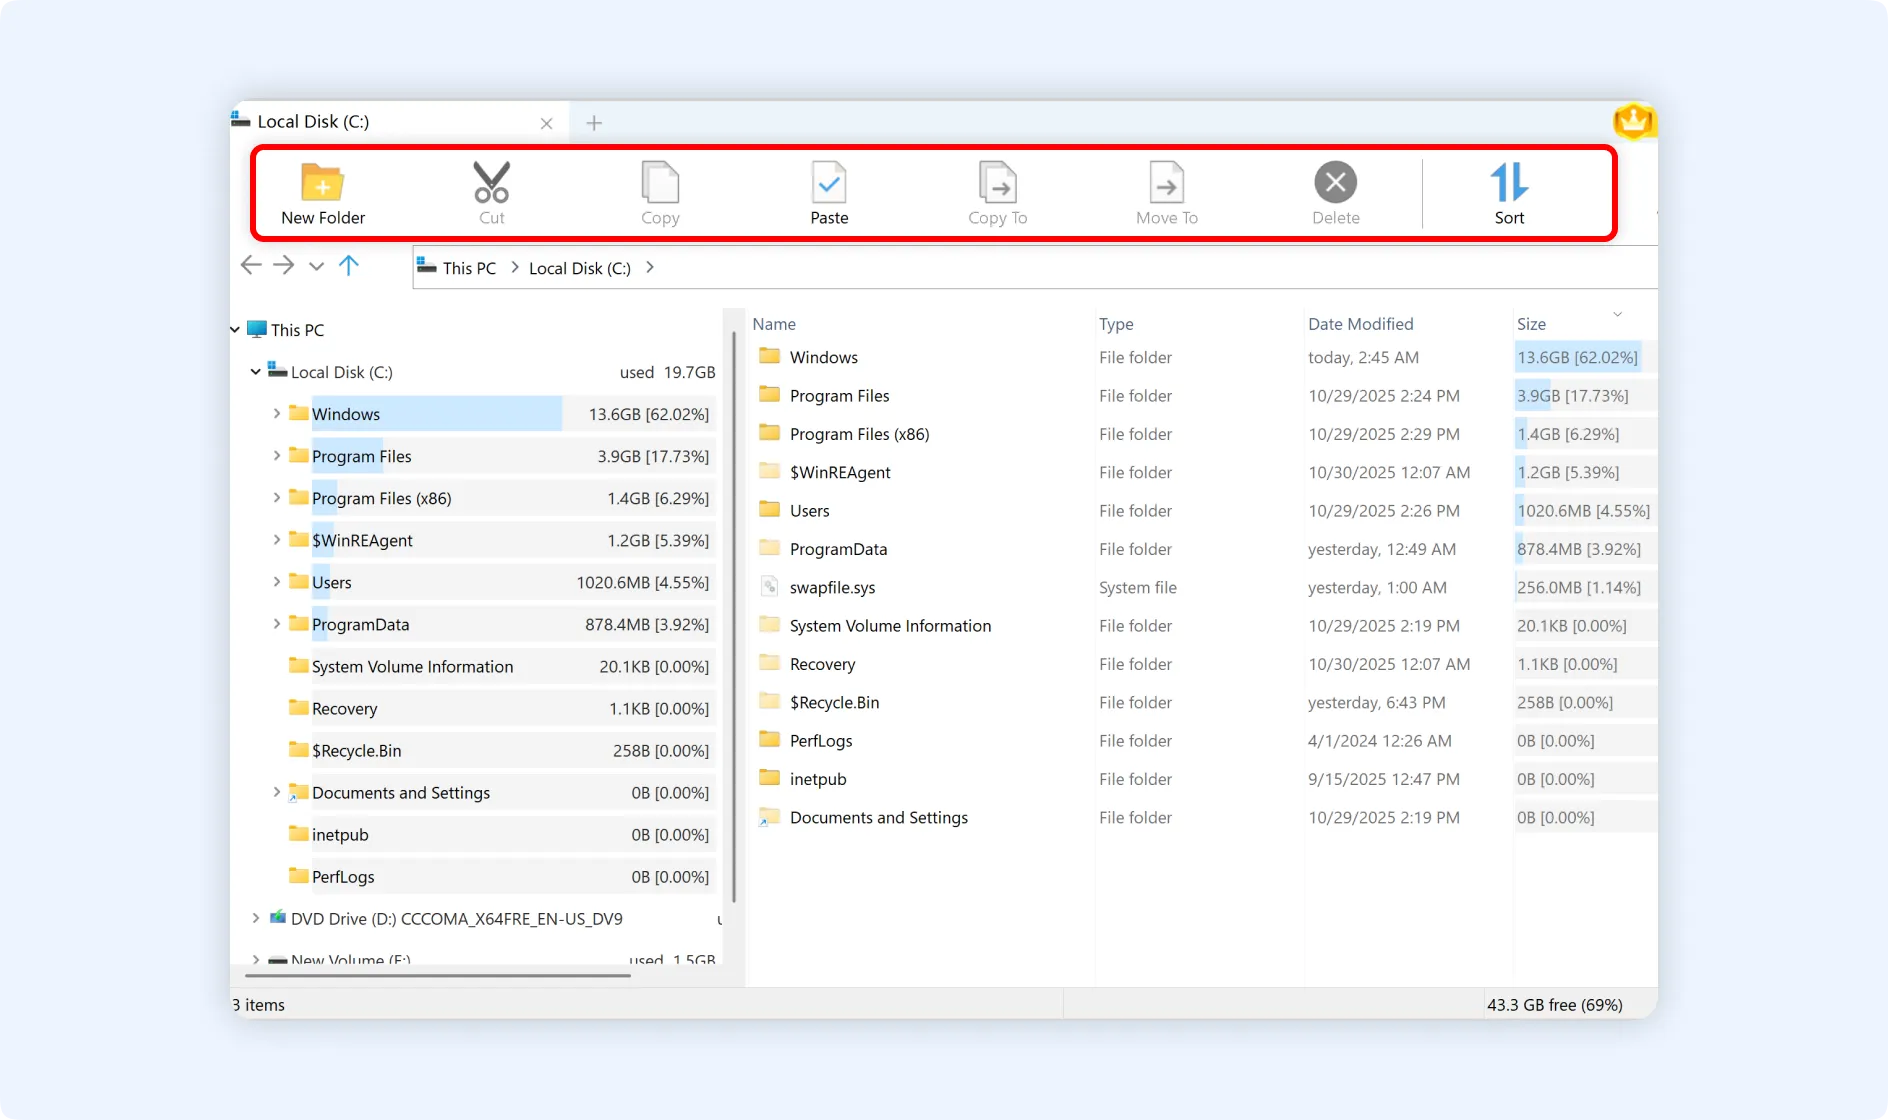
- It includes file management tools for creating, cutting, copying, pasting, moving, and deleting files.
- It can be launched straight from the app or through a shortcut in the right-click menu.
How to launch WMaster Cleanup's Disk Analyzer?
You may launch WMaster Cleanup Disk Analyzer in two distinct methods. Regardless of the method you choose, make sure WMaster Cleanup is downloaded and installed on your PC.
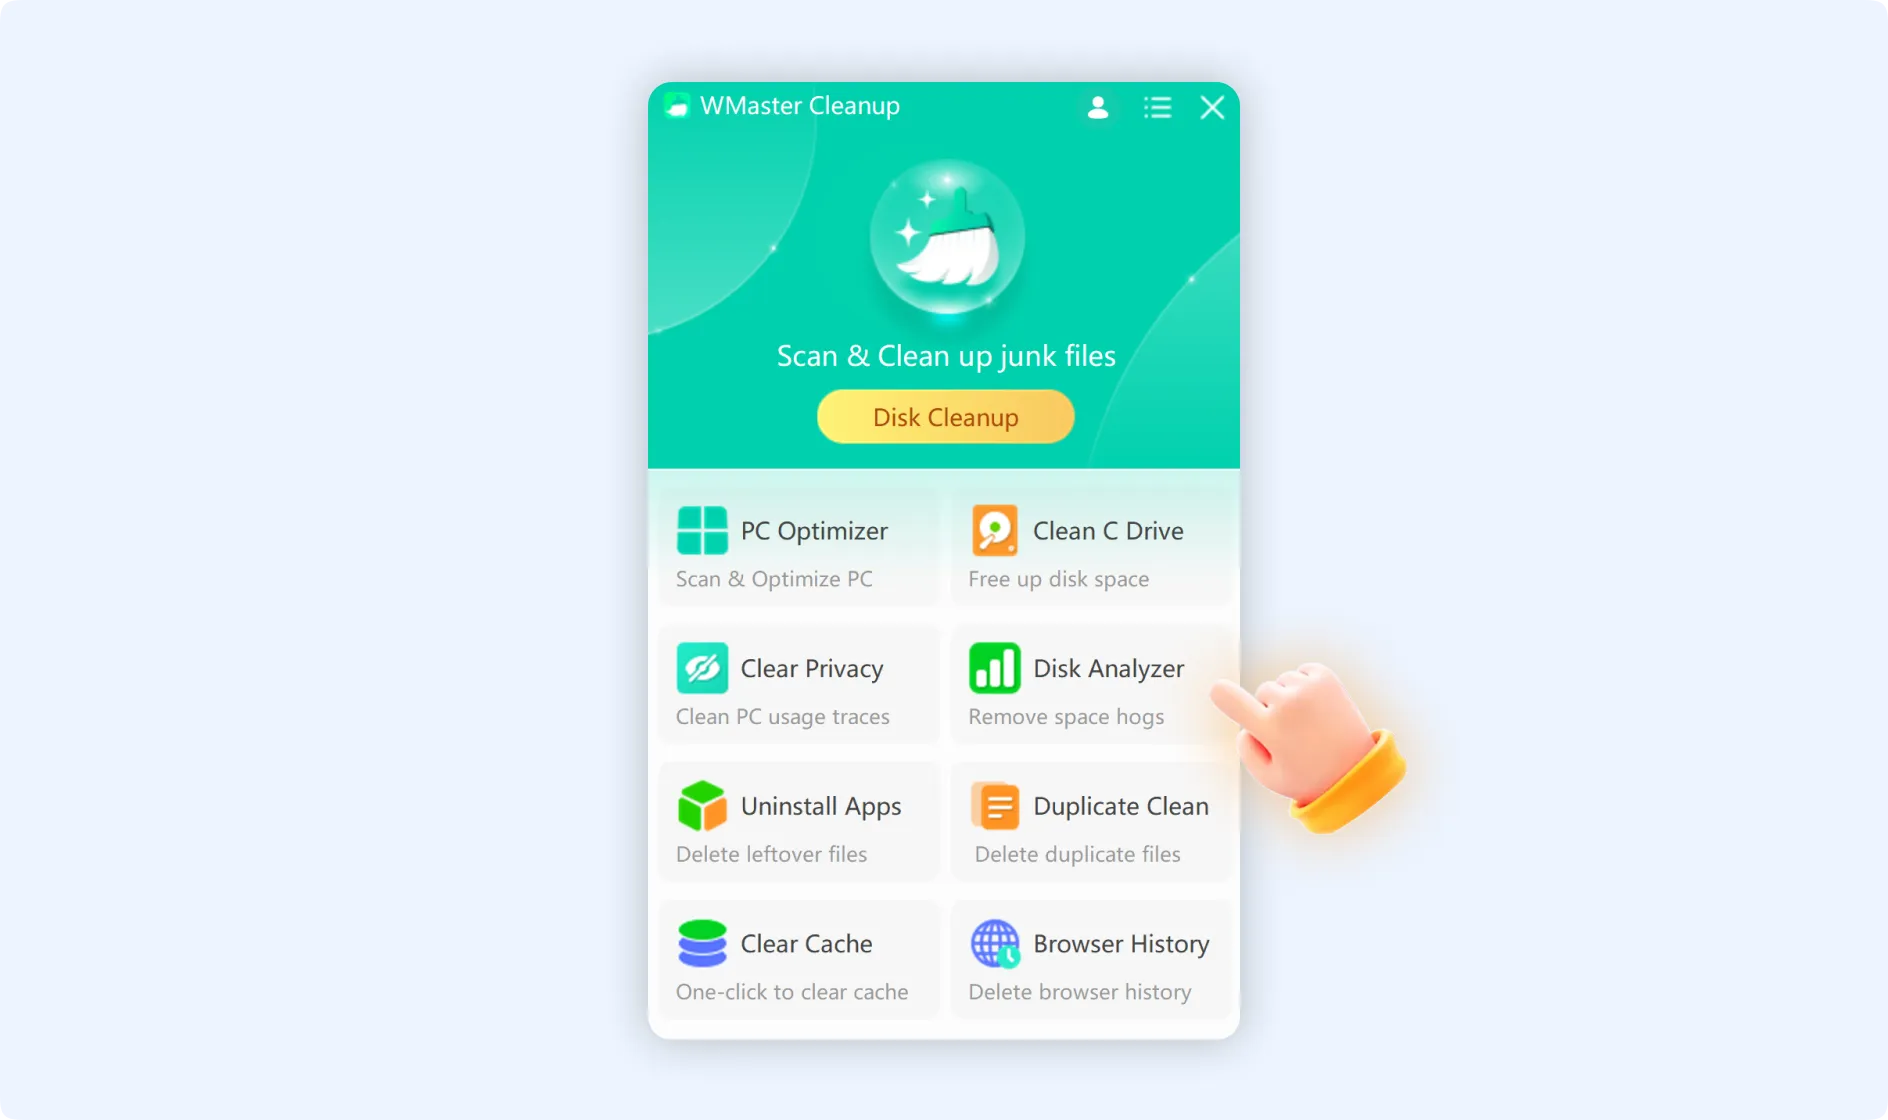
Method 1:Double-click the WMaster Cleanup icon to start the application. Now click "Disk Analyzer," available in the main interface, to navigate to the feature function page.
Method 2: Double-click "This PC" on the desktop of your computer. Right-click on any disk (C drive, D drive, etc.) in the disk list that you want to analyze. First, click the "Duplicate Clean/Big File Finder" option in the pop-up context menu and then select "Disk Space Analyzer" from the expanded submenu.
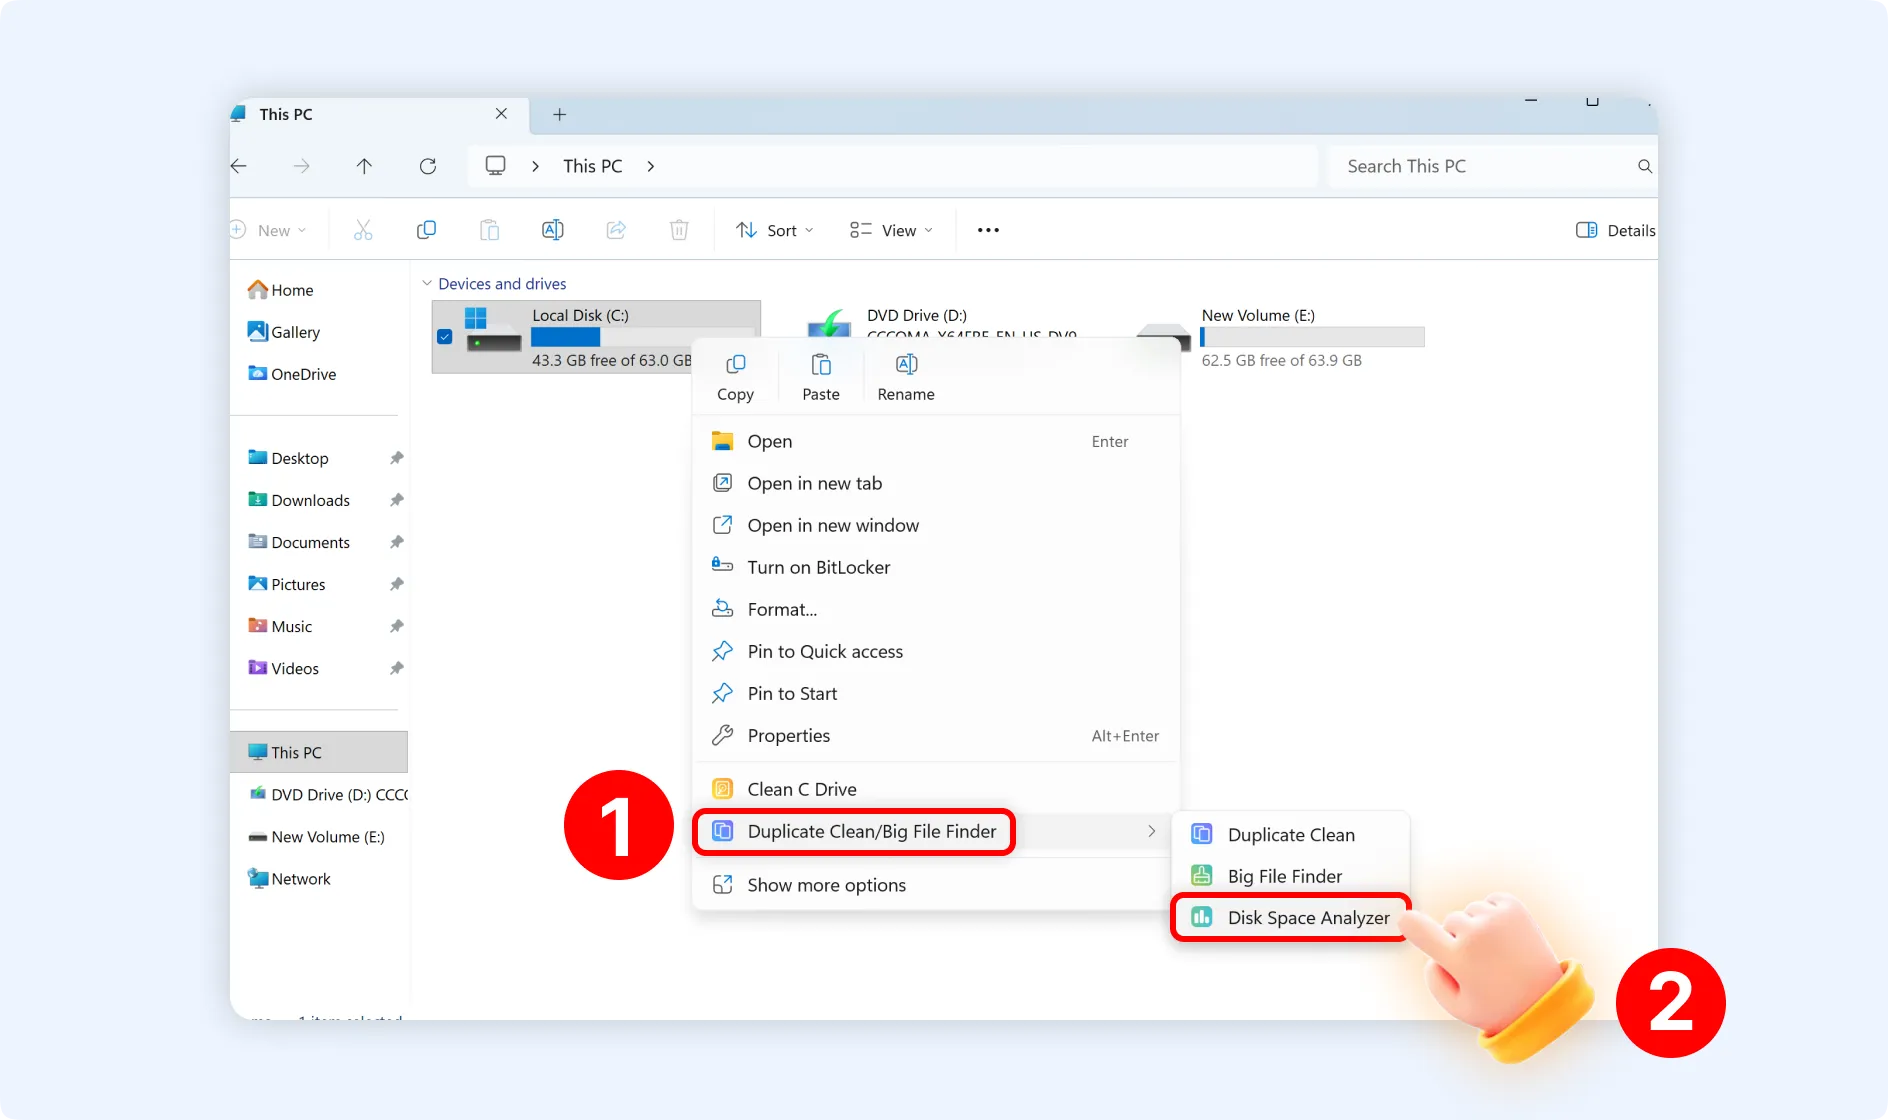
💡Tips:Disk analysis will start straight away after selecting "Disk Analyzer" from the right-click menu.
Part 3. How to Use WMaster Cleanup Disk Analyzer?
💡Tips:Do not delete or move any file if you don't know its purpose or are unfamiliar with it. Please get in touch with us, and we will help you shortly if you are not sure whether a file can be moved or deleted.
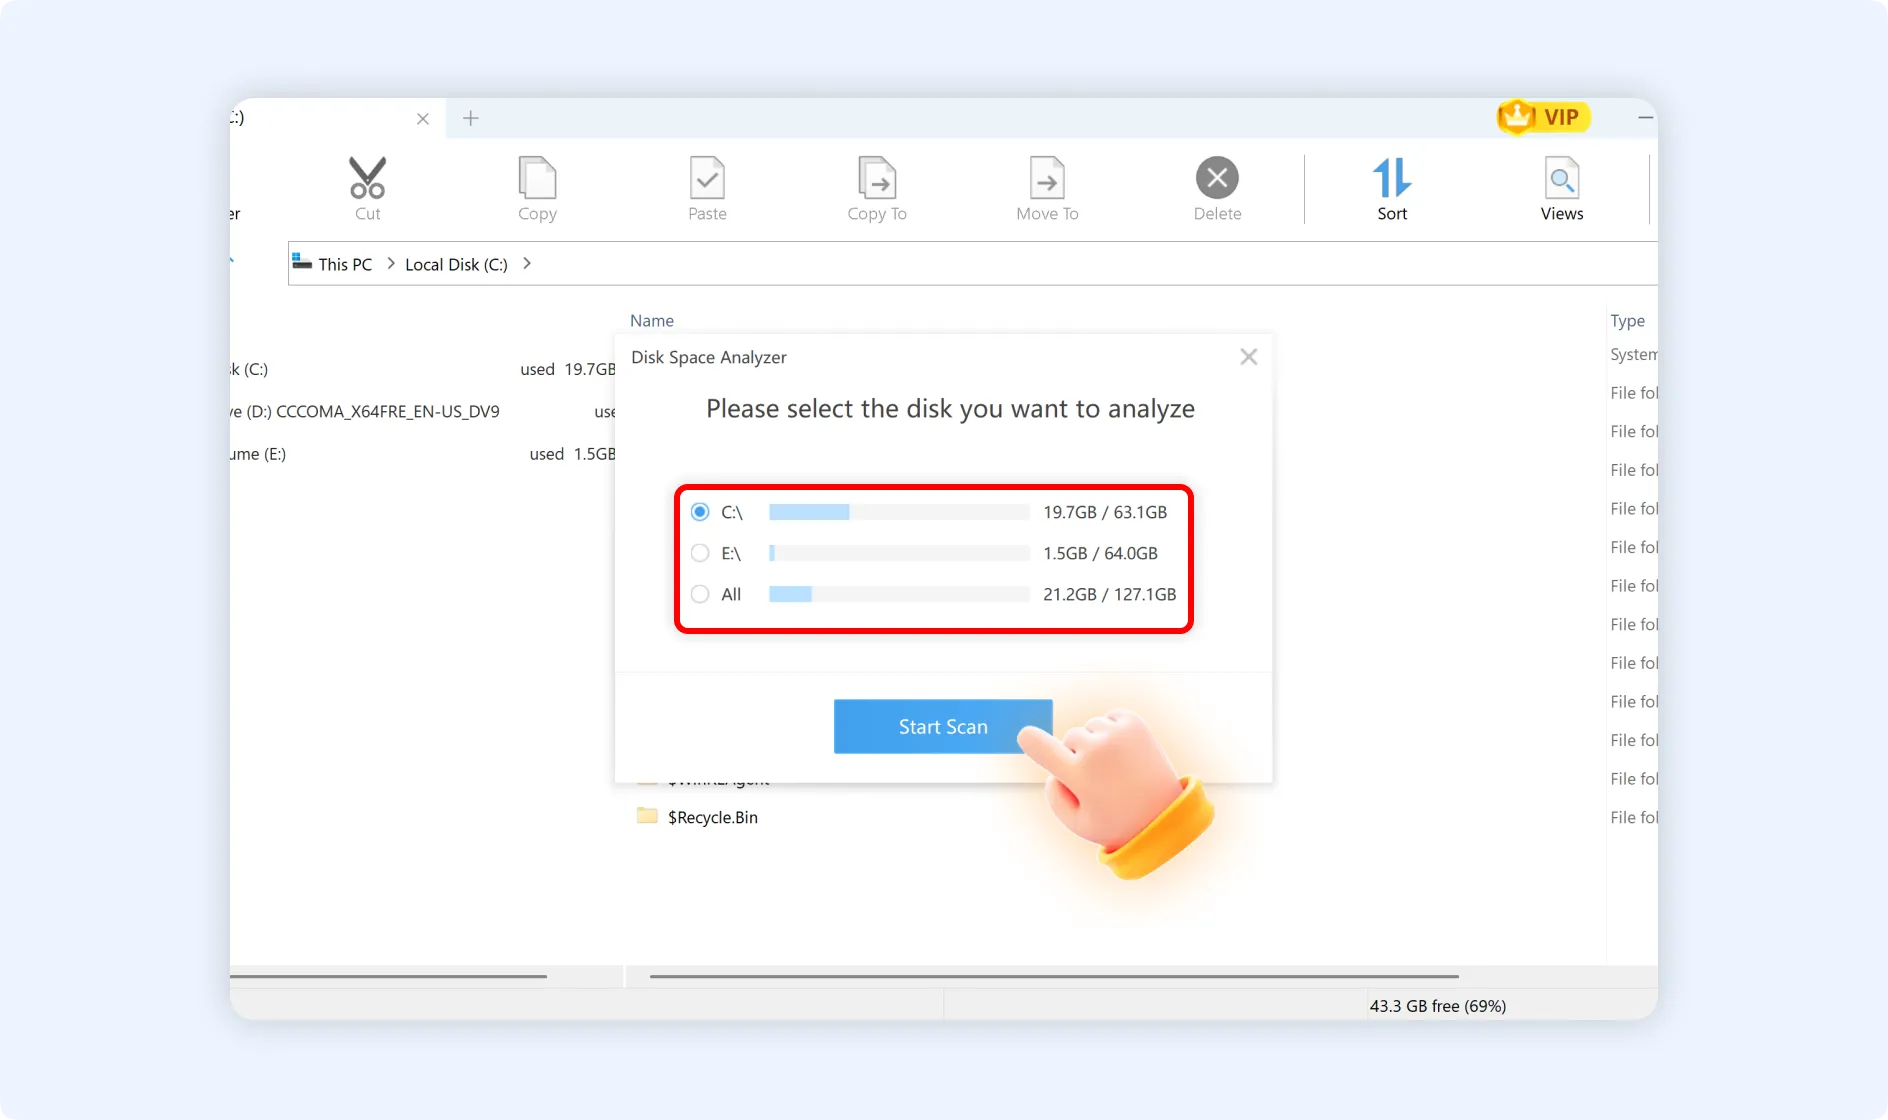
Step 1: Choose the disk you want to analyze individually or select "All" to analyze all of the disks on your computer after launching "Disk Analyzer." If you are following method 1, initiate the scan by clicking the "Start Scan" button.
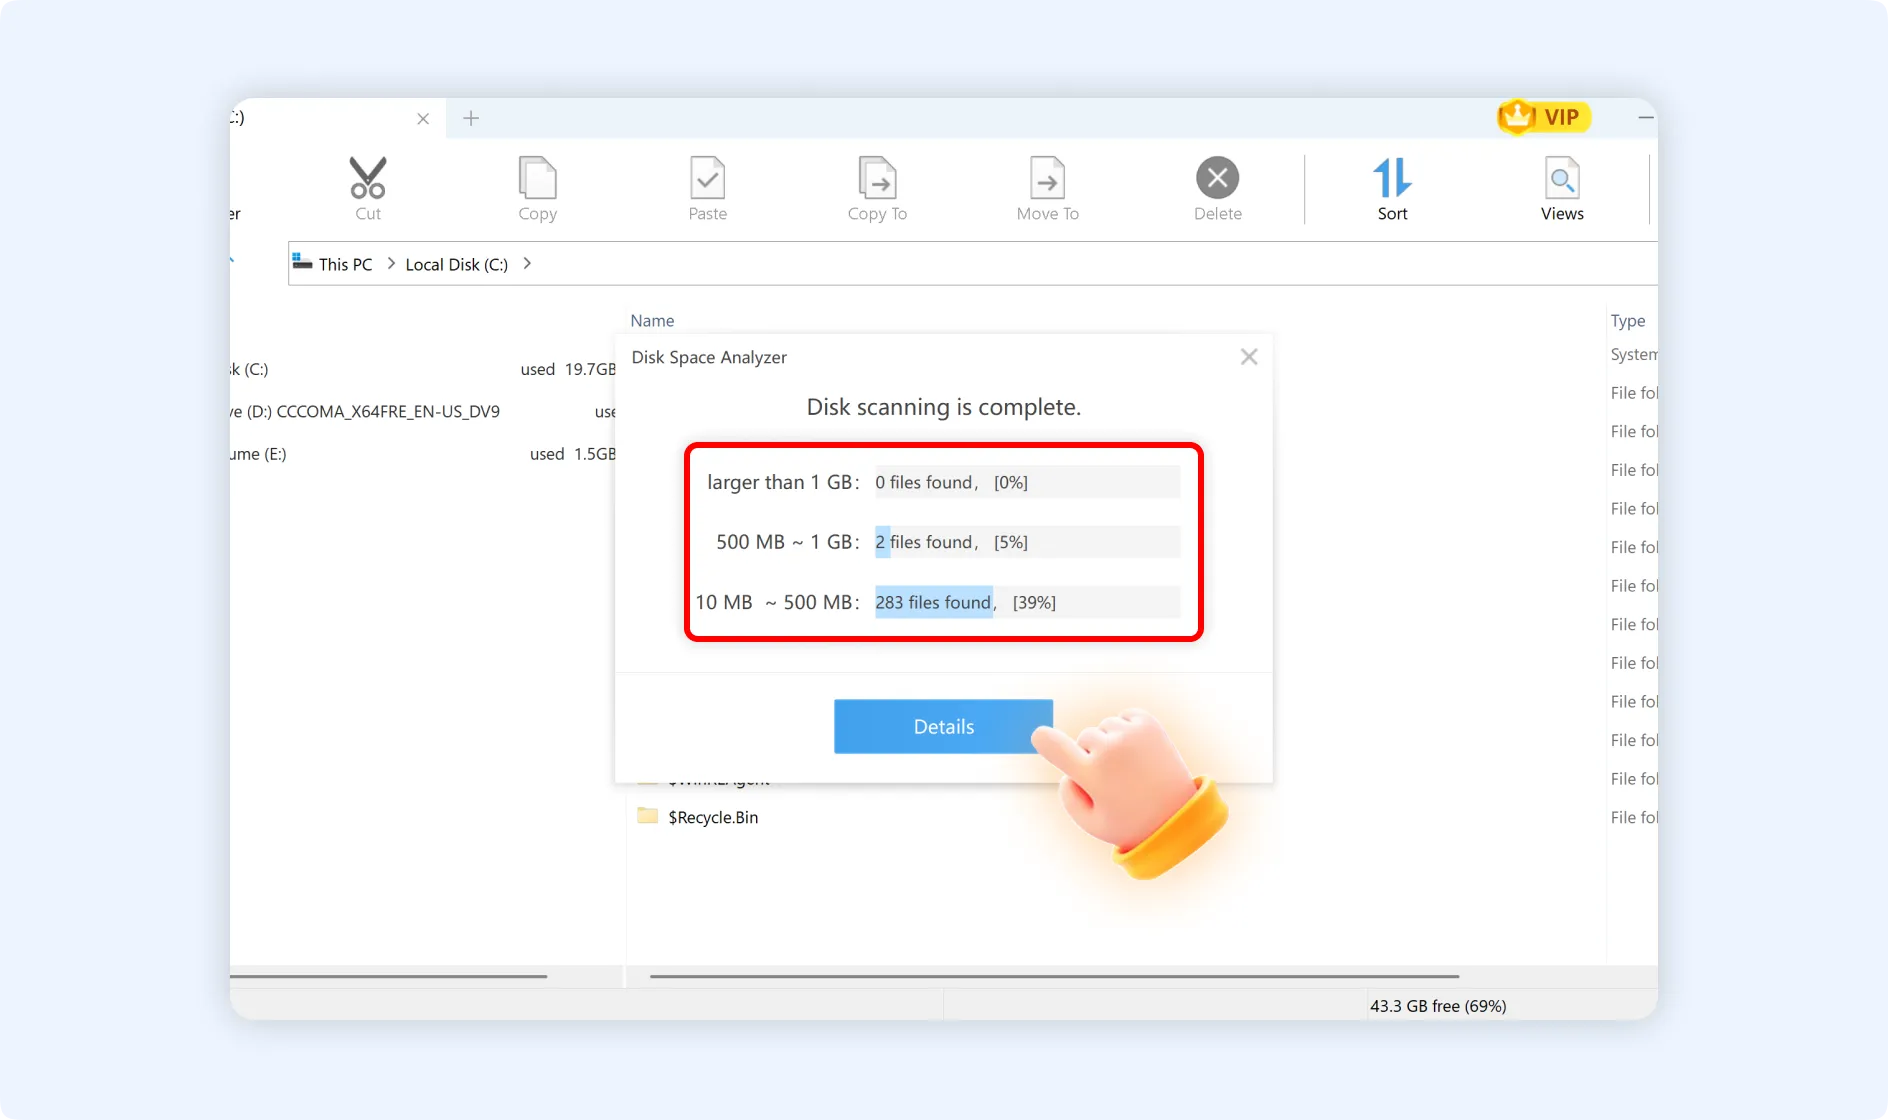
Step 2: Once the scanning process is complete, a summary of the disk space analysis displays in the "Disk Space Analyzer" window. Click the "Details" button in this window to view a thorough visualization of your disk space usage by navigating to the analysis results page.
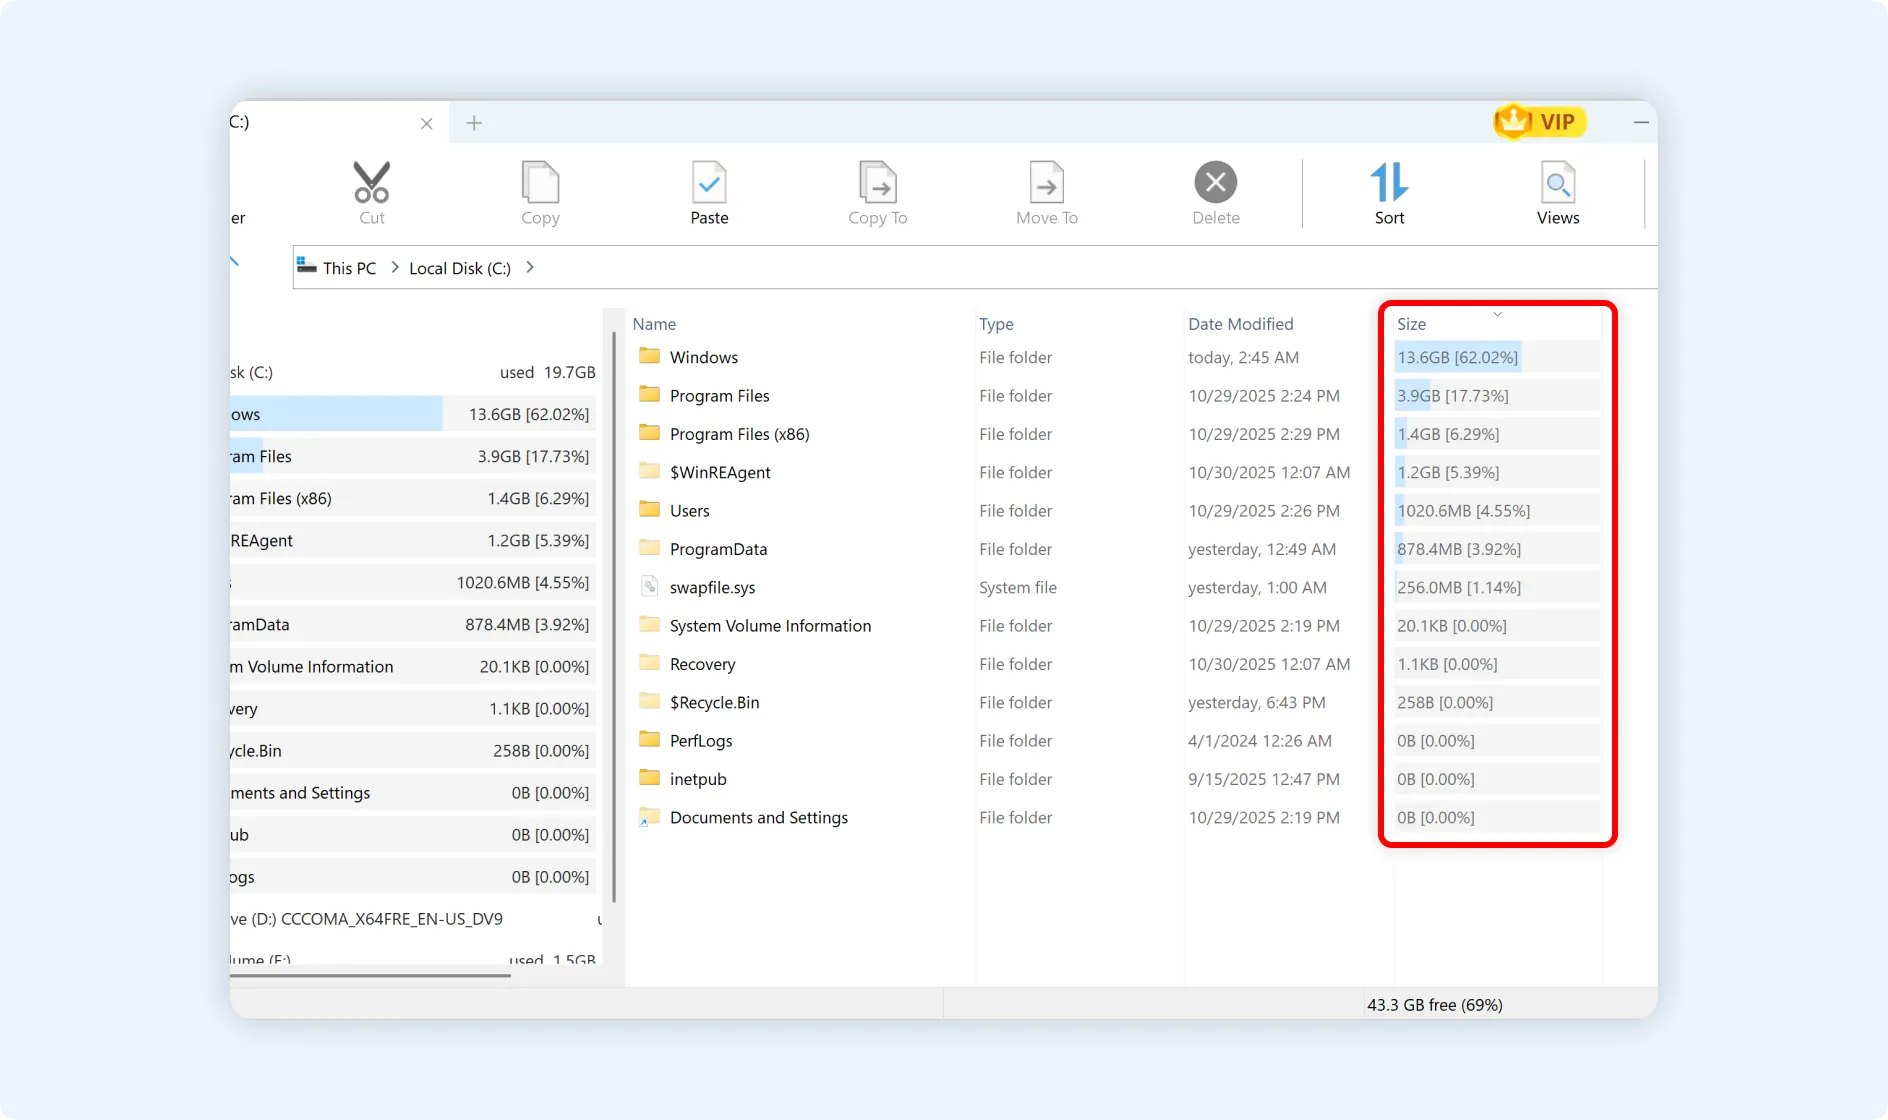
Step 3: Click any folder from the list to look through its files and subfolders.
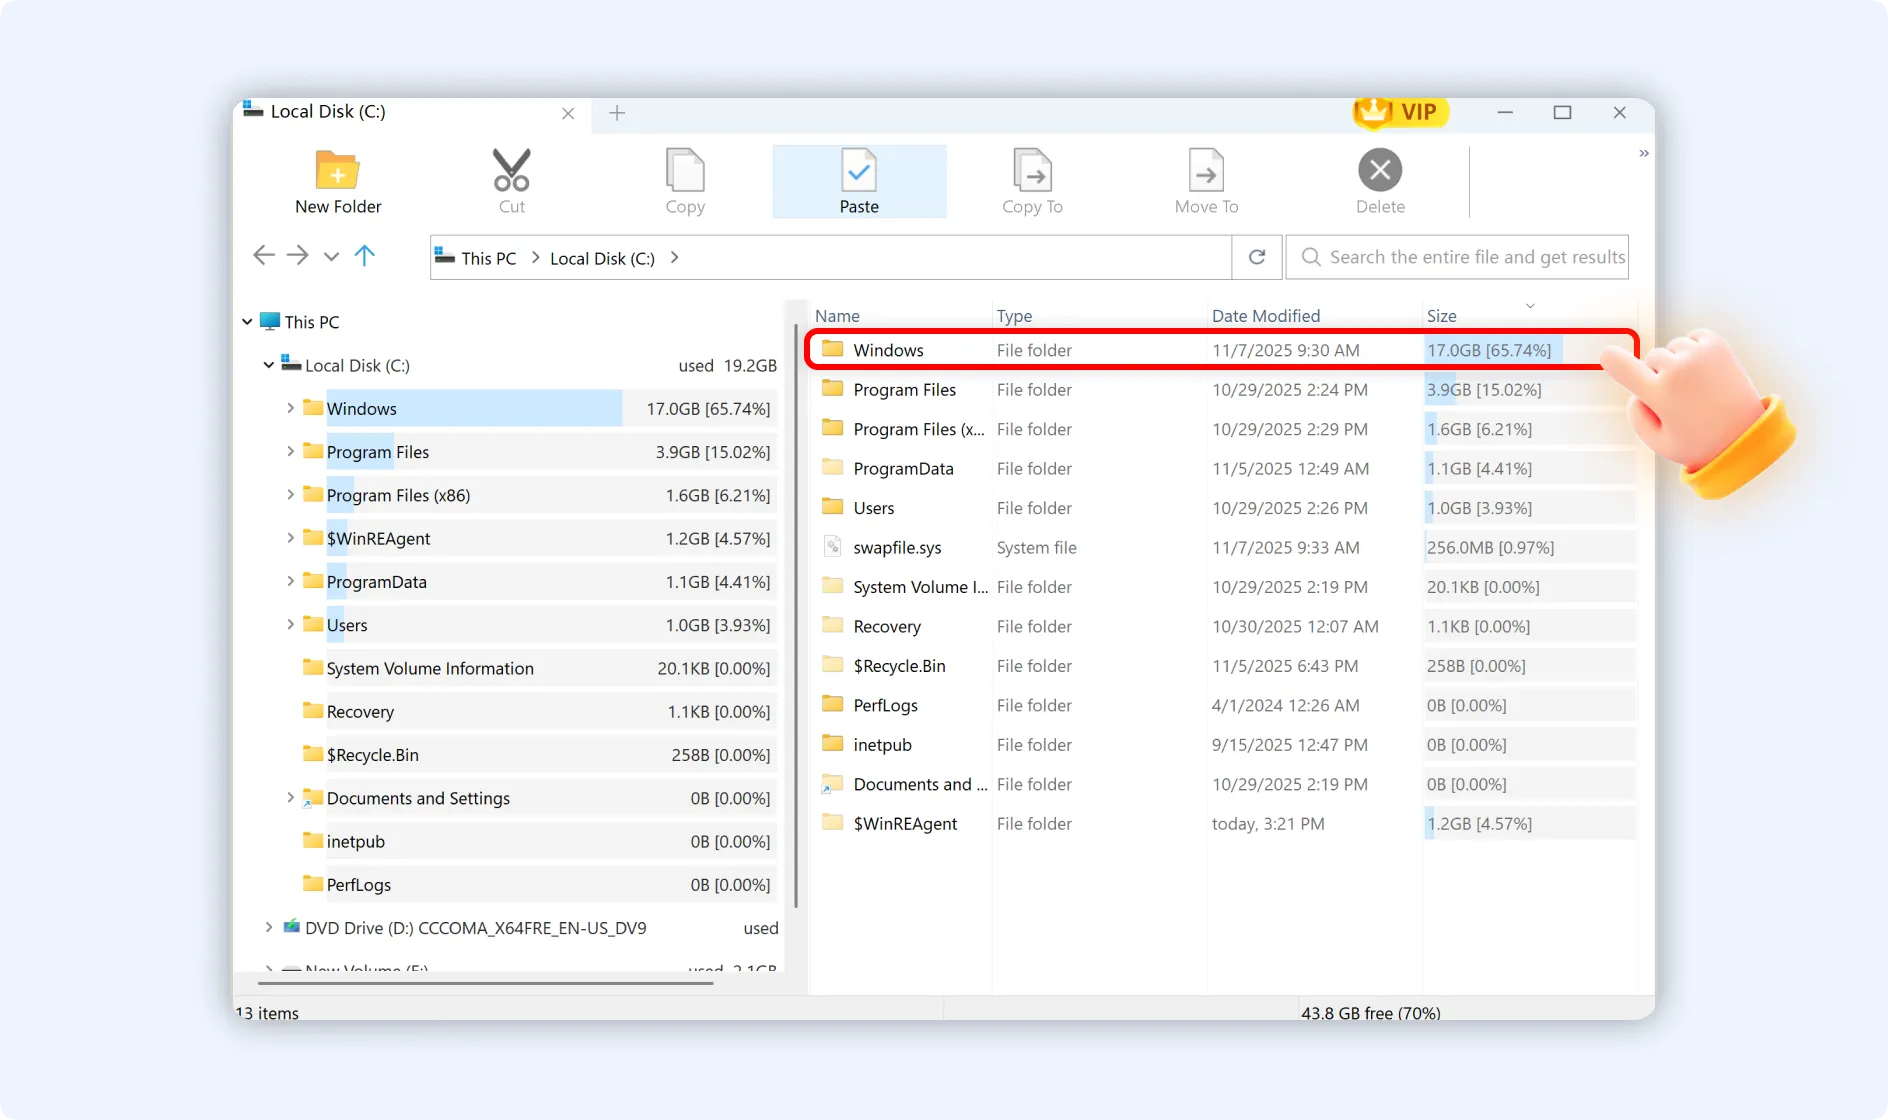
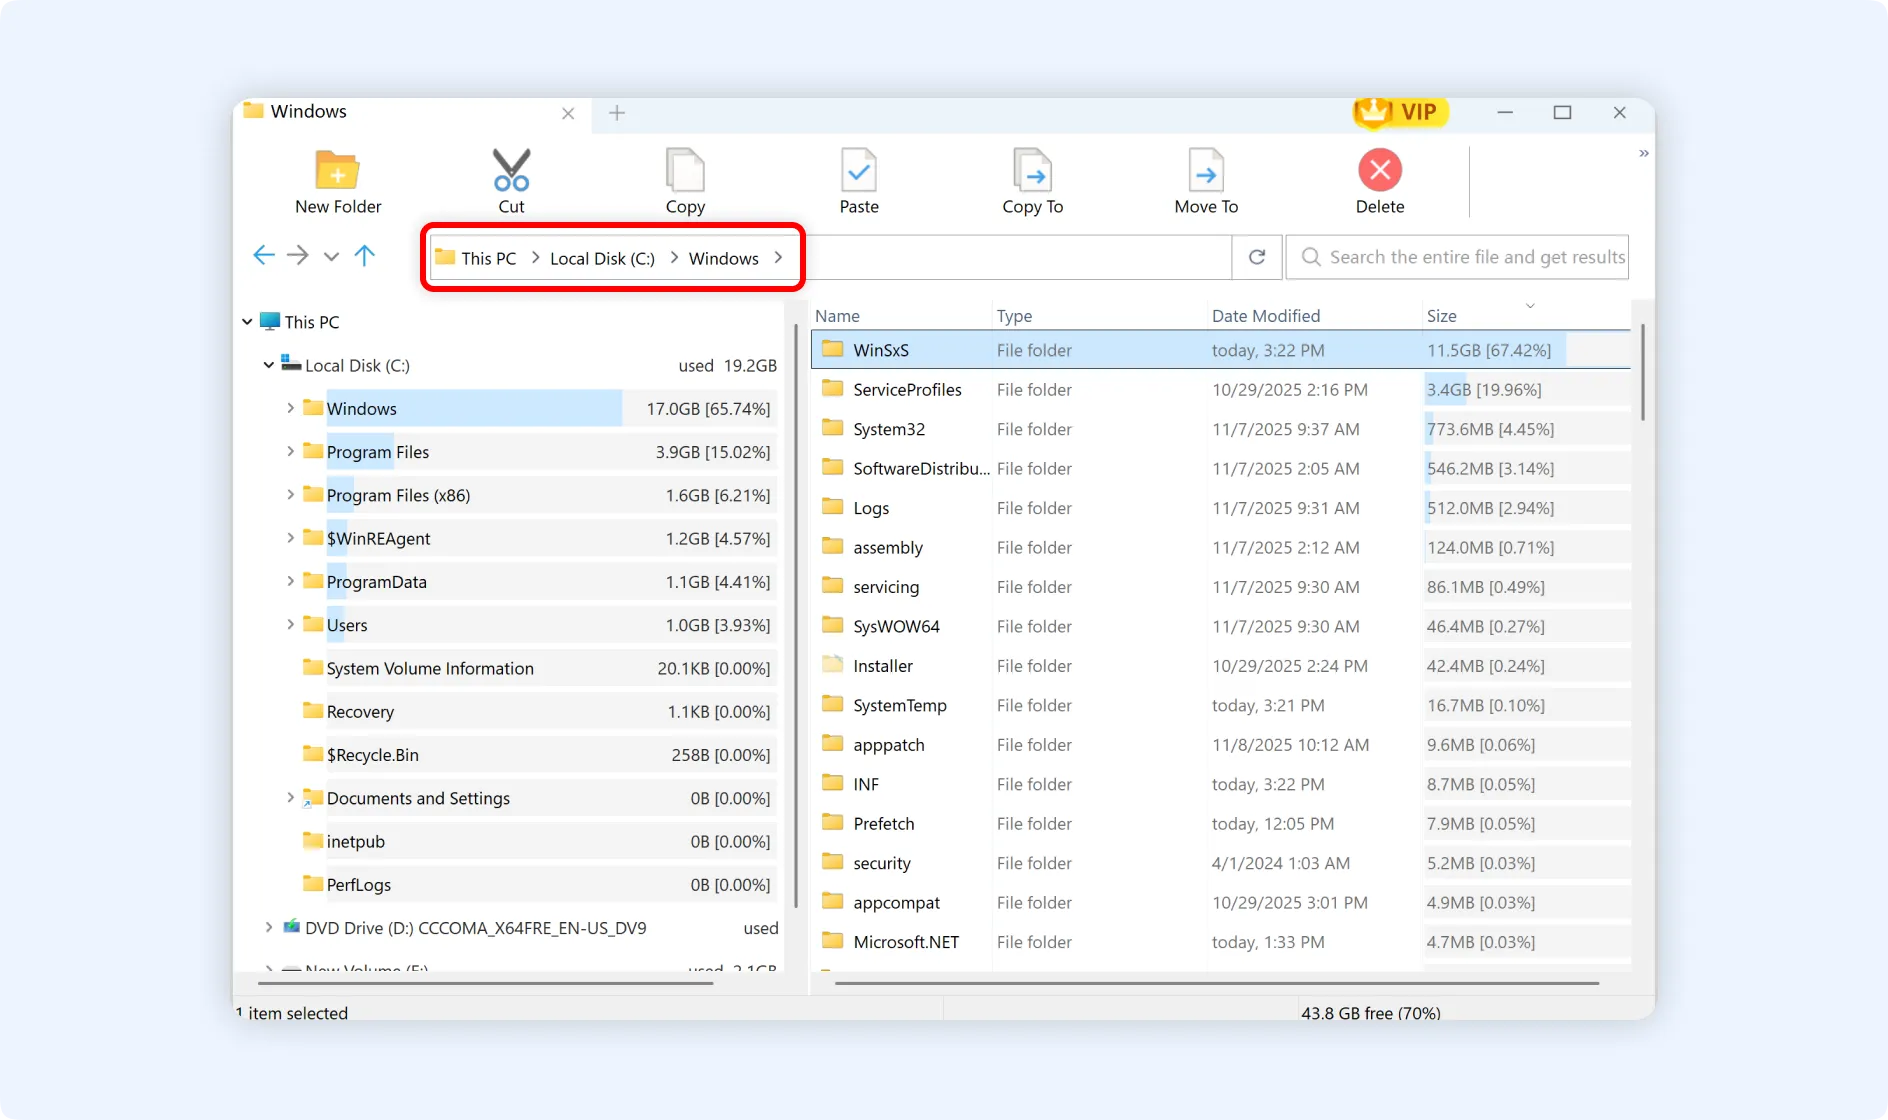
💡Tips:The navigation bar at the top of the "Disk Analyzer" panel allows you to effortlessly perform operations like "New Folder," "Cut," "Copy," "Paste," "Copy to," "Move to," and "Delete."