Over time, computer disks fill up with lots of video files, HD images, installation packages, and other large files. These files are often spread out in different folders, which makes them hard to find and slows down the process of freeing up disk space.
The "Big File Finder" feature in WMaster Cleanup helps you get rid of big files from your hard drive. It intelligently scans your whole disk, finds all of your large files, and offers safe, effective, and batch-cleanup options to help you quickly free up space on your disk and make your system perform more efficiently.
Part 1. The Main Features of Big File Finder
- Quickly finds all of your big files without manually searching folder by folder.
- You can view files by type or by location.
- Allows batch selection and deletion, which makes cleanup much faster.
Part 2. How to Use the Big File Finder Feature of WMaster Cleanup
Make sure you downloaded and set up the WMaster Cleanup software on your computer before you use the Big File Finder tool.
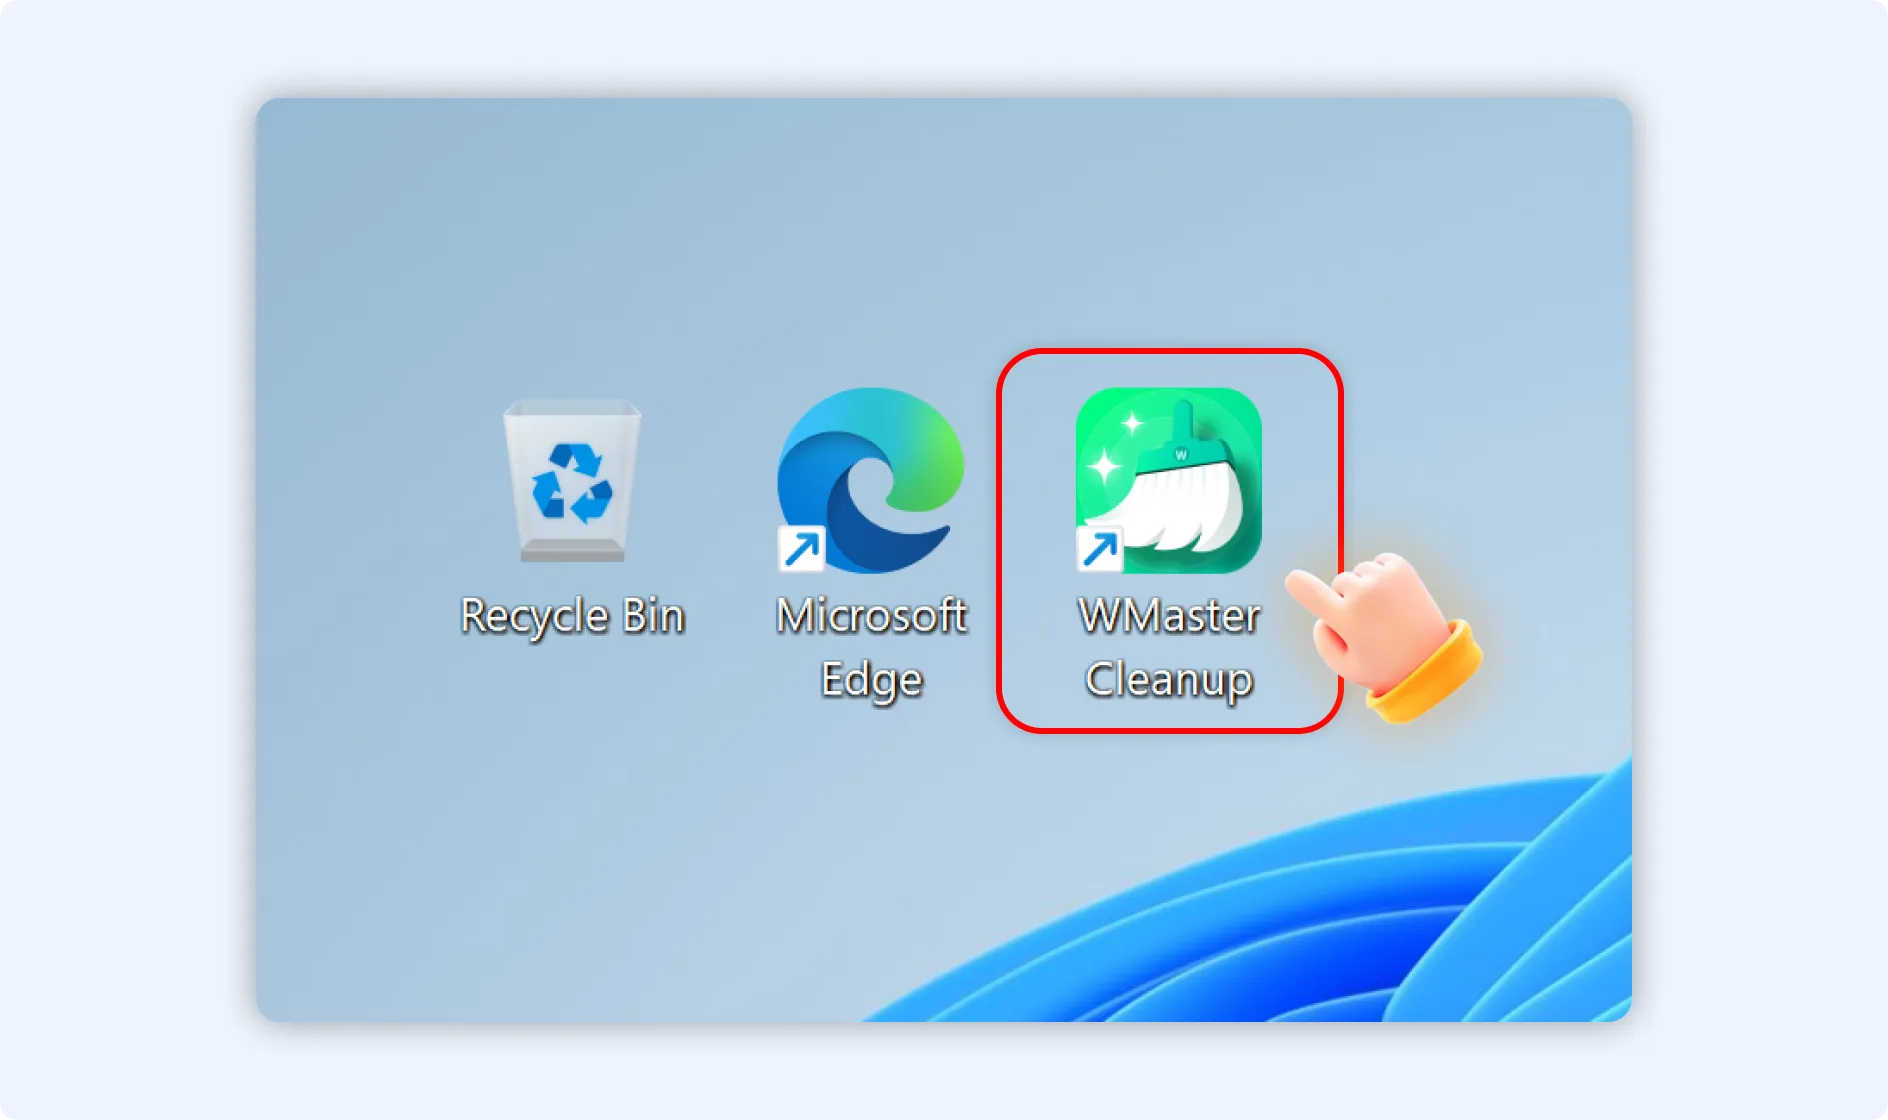
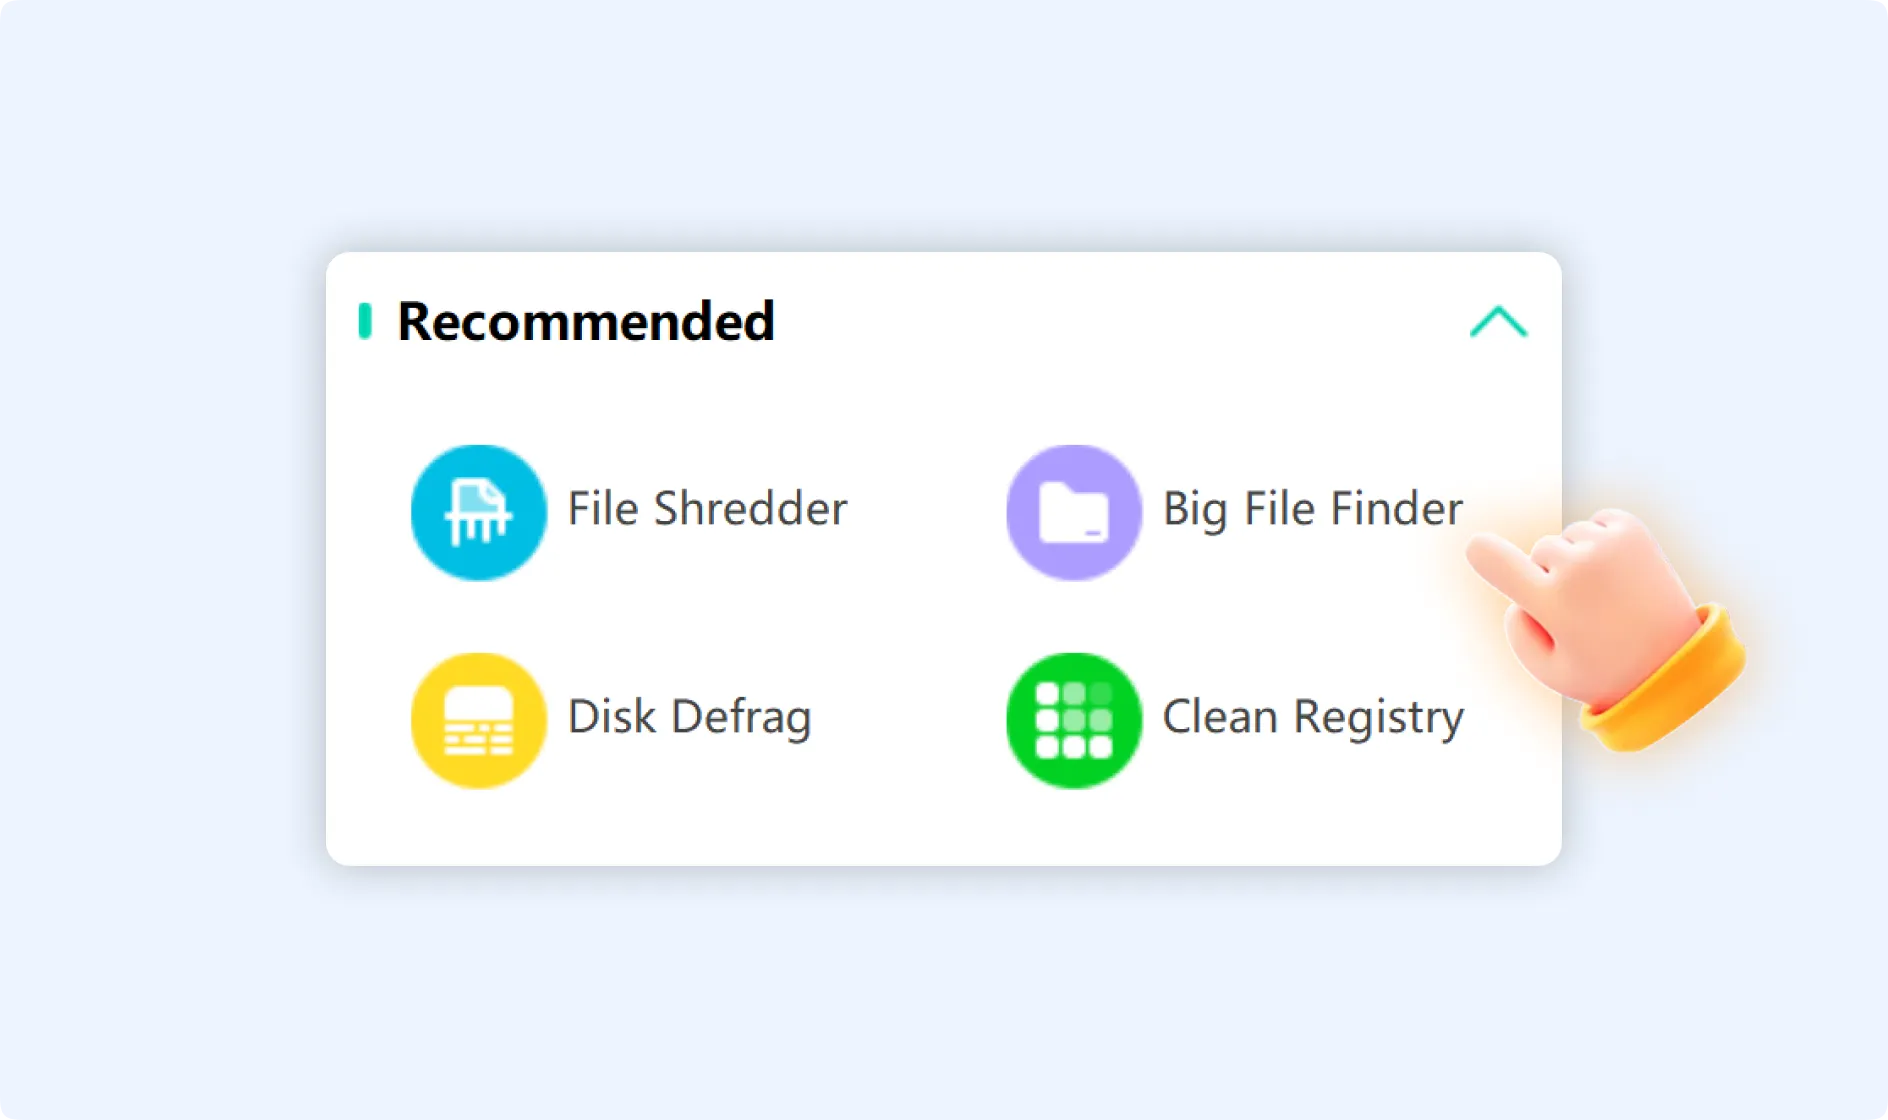
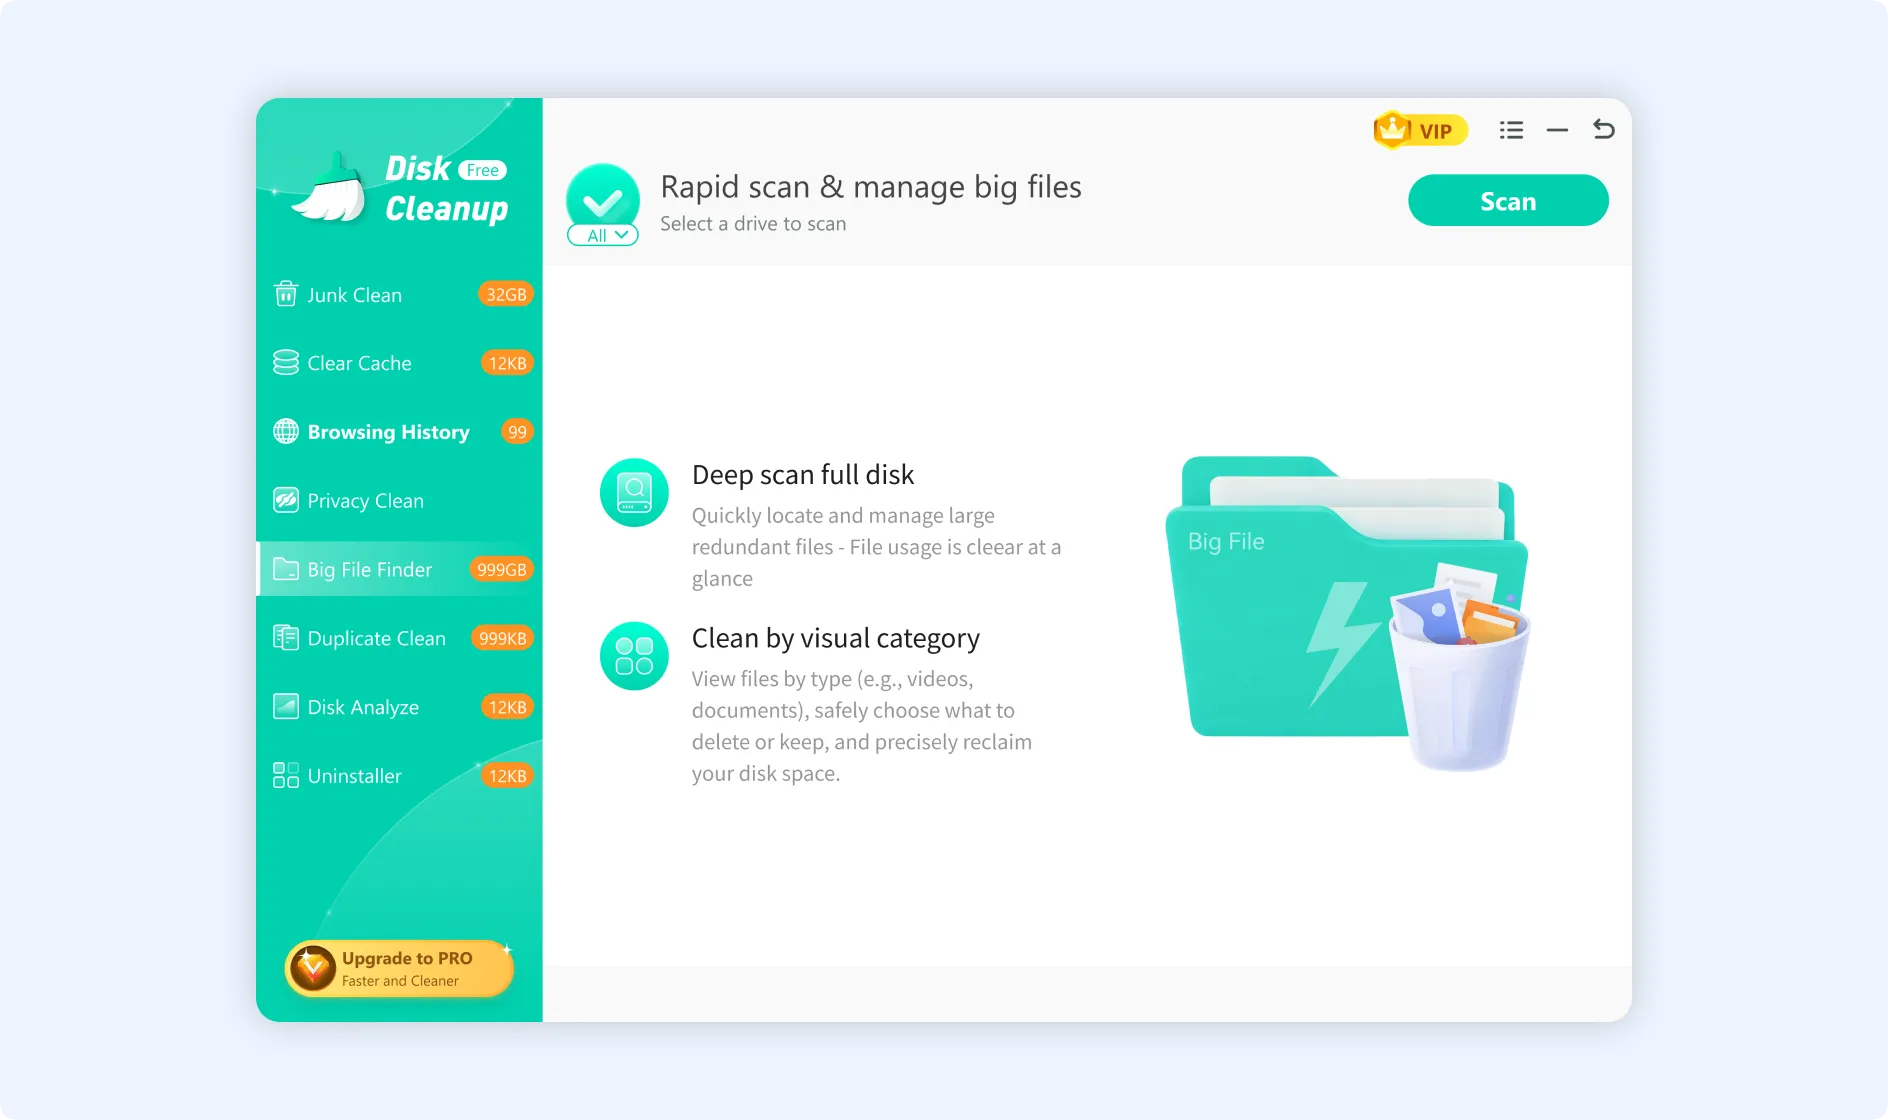
Step 1: Double-click the WMaster Cleanup icon to launch the application on your desktop. In the “Recommended” section of the main interface, click the “Big File Finder” feature.
💡Tips: Now click the “Scan” button, available in the top-left corner of the panel, and tap on the partition button (All ▼) to select a specific disk for scanning.
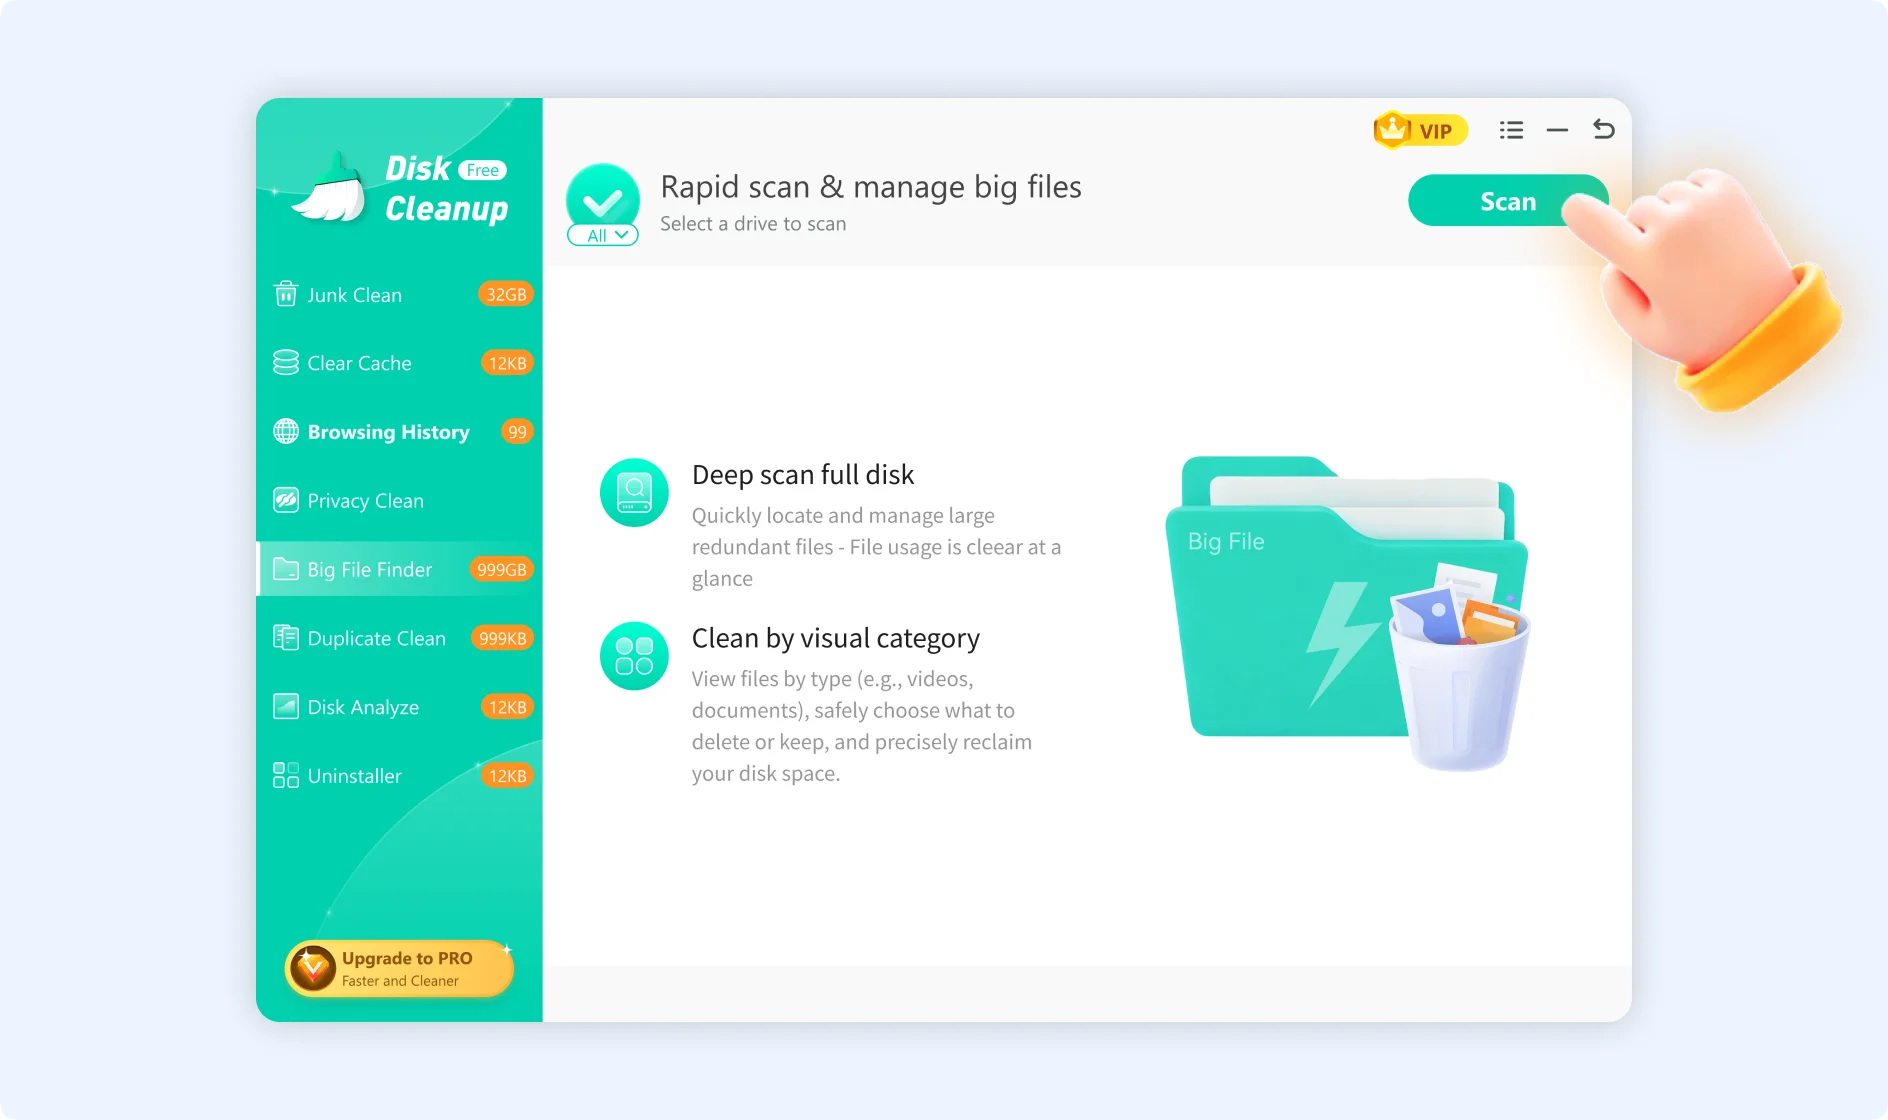
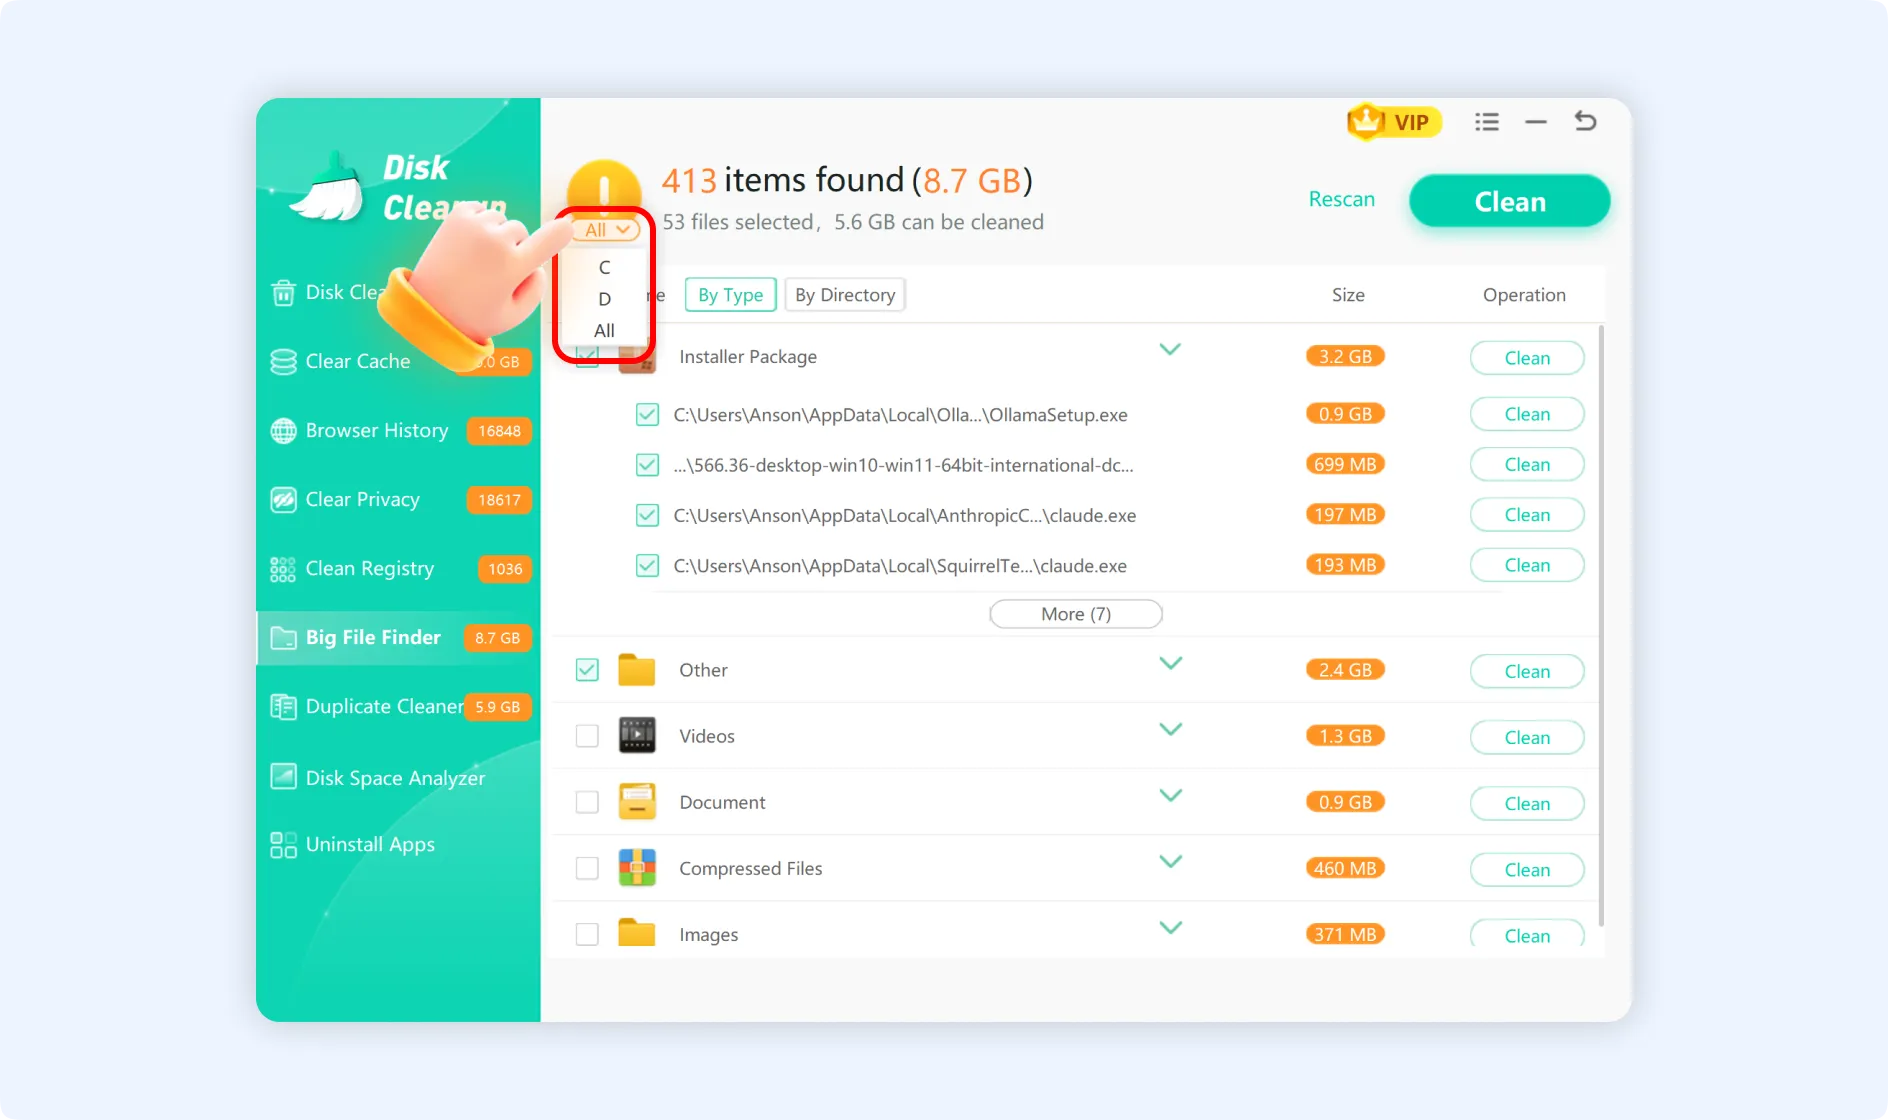
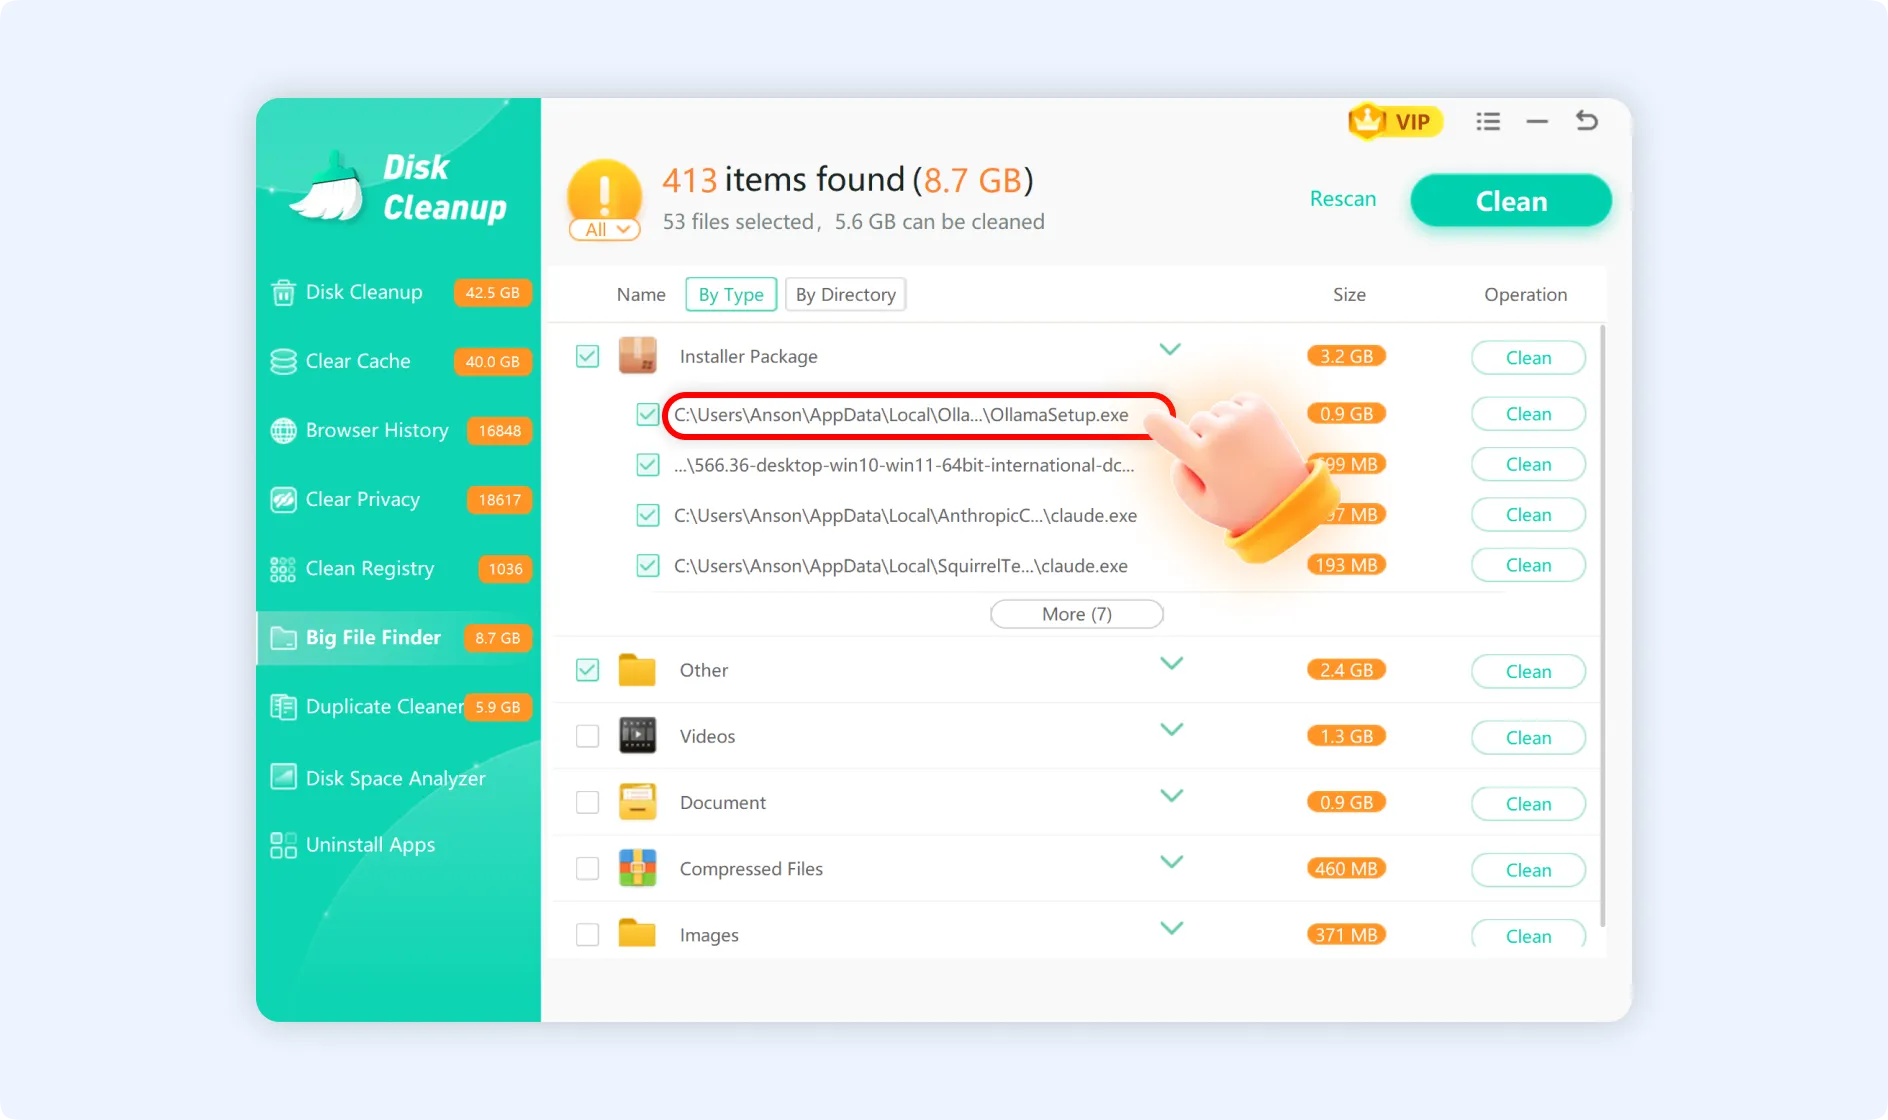
Step 2: After entering the Big File Finder scan panel, click "Scan". Big File Finder will instantly begin scanning your disk for all images, videos, compressed files, and other large-volume files. The duration of scanning depends on your disk space and the number of files.
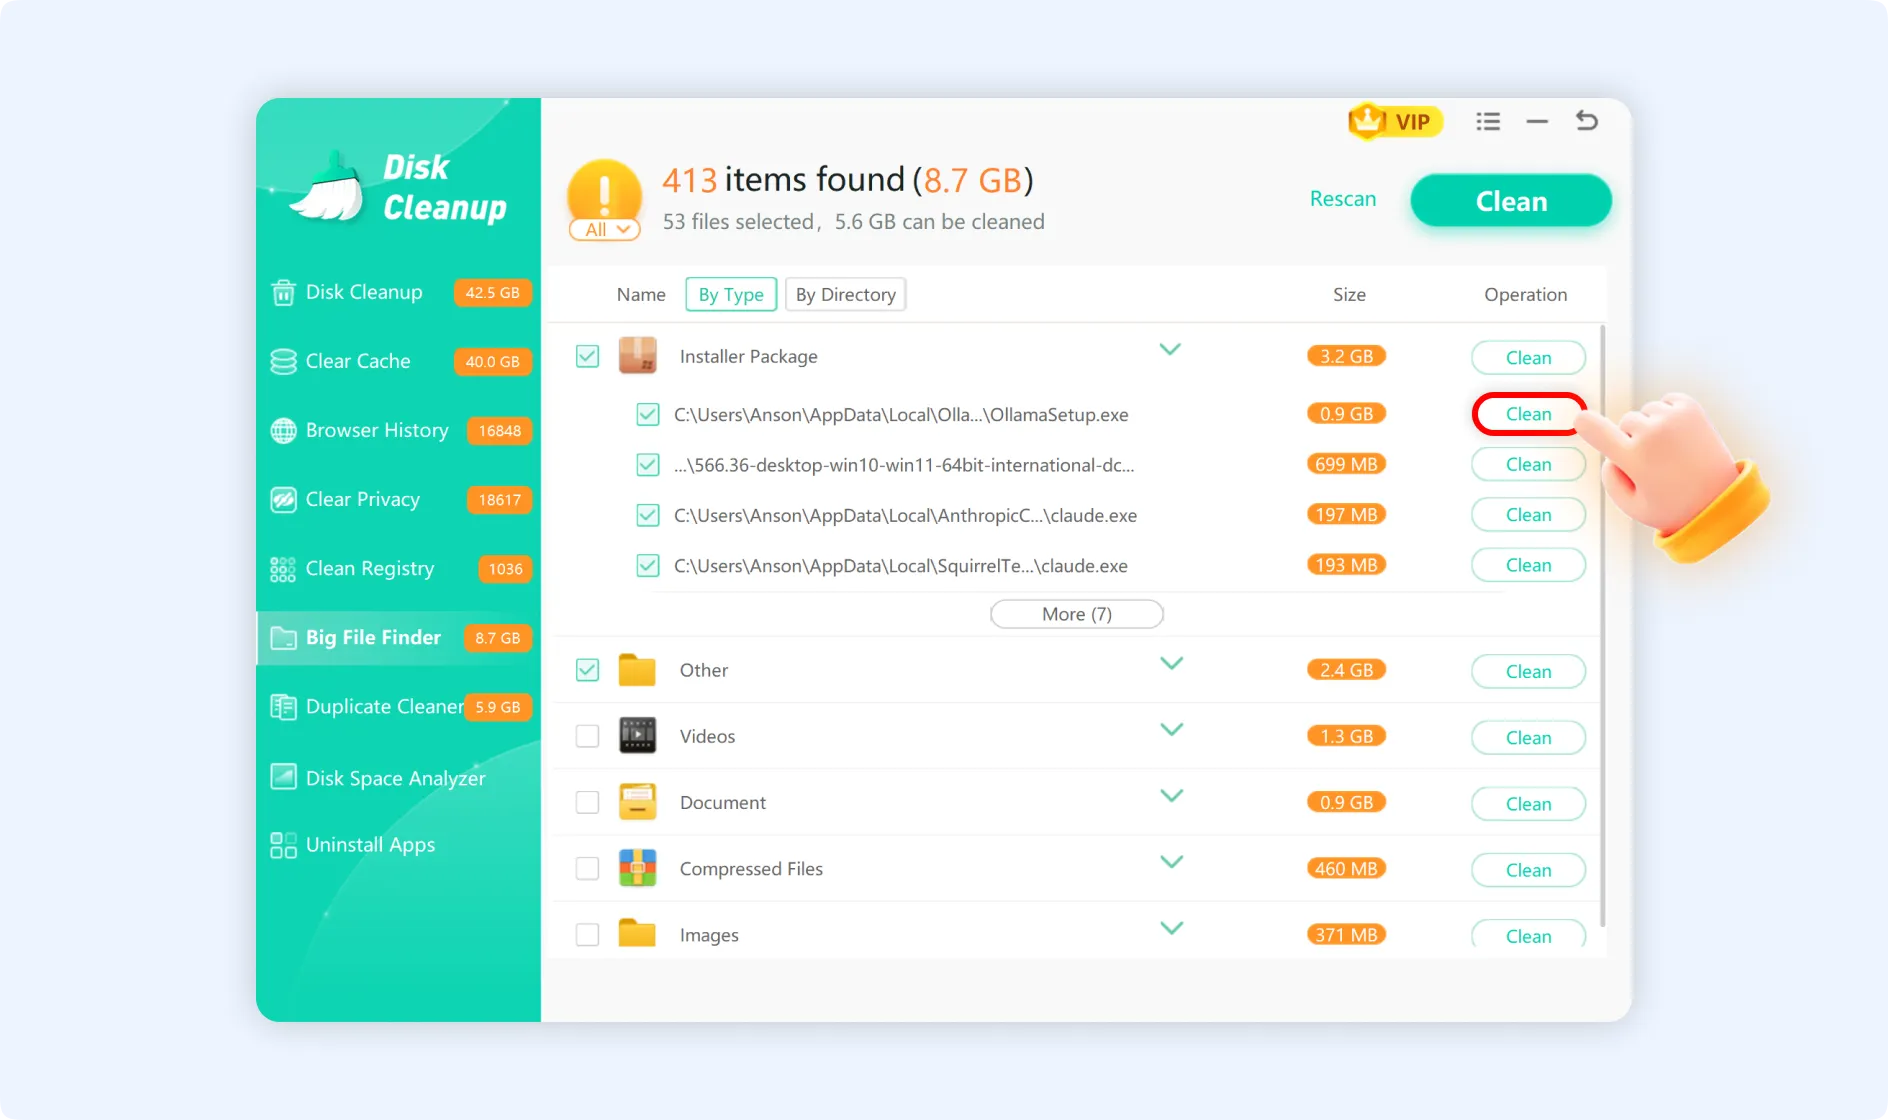
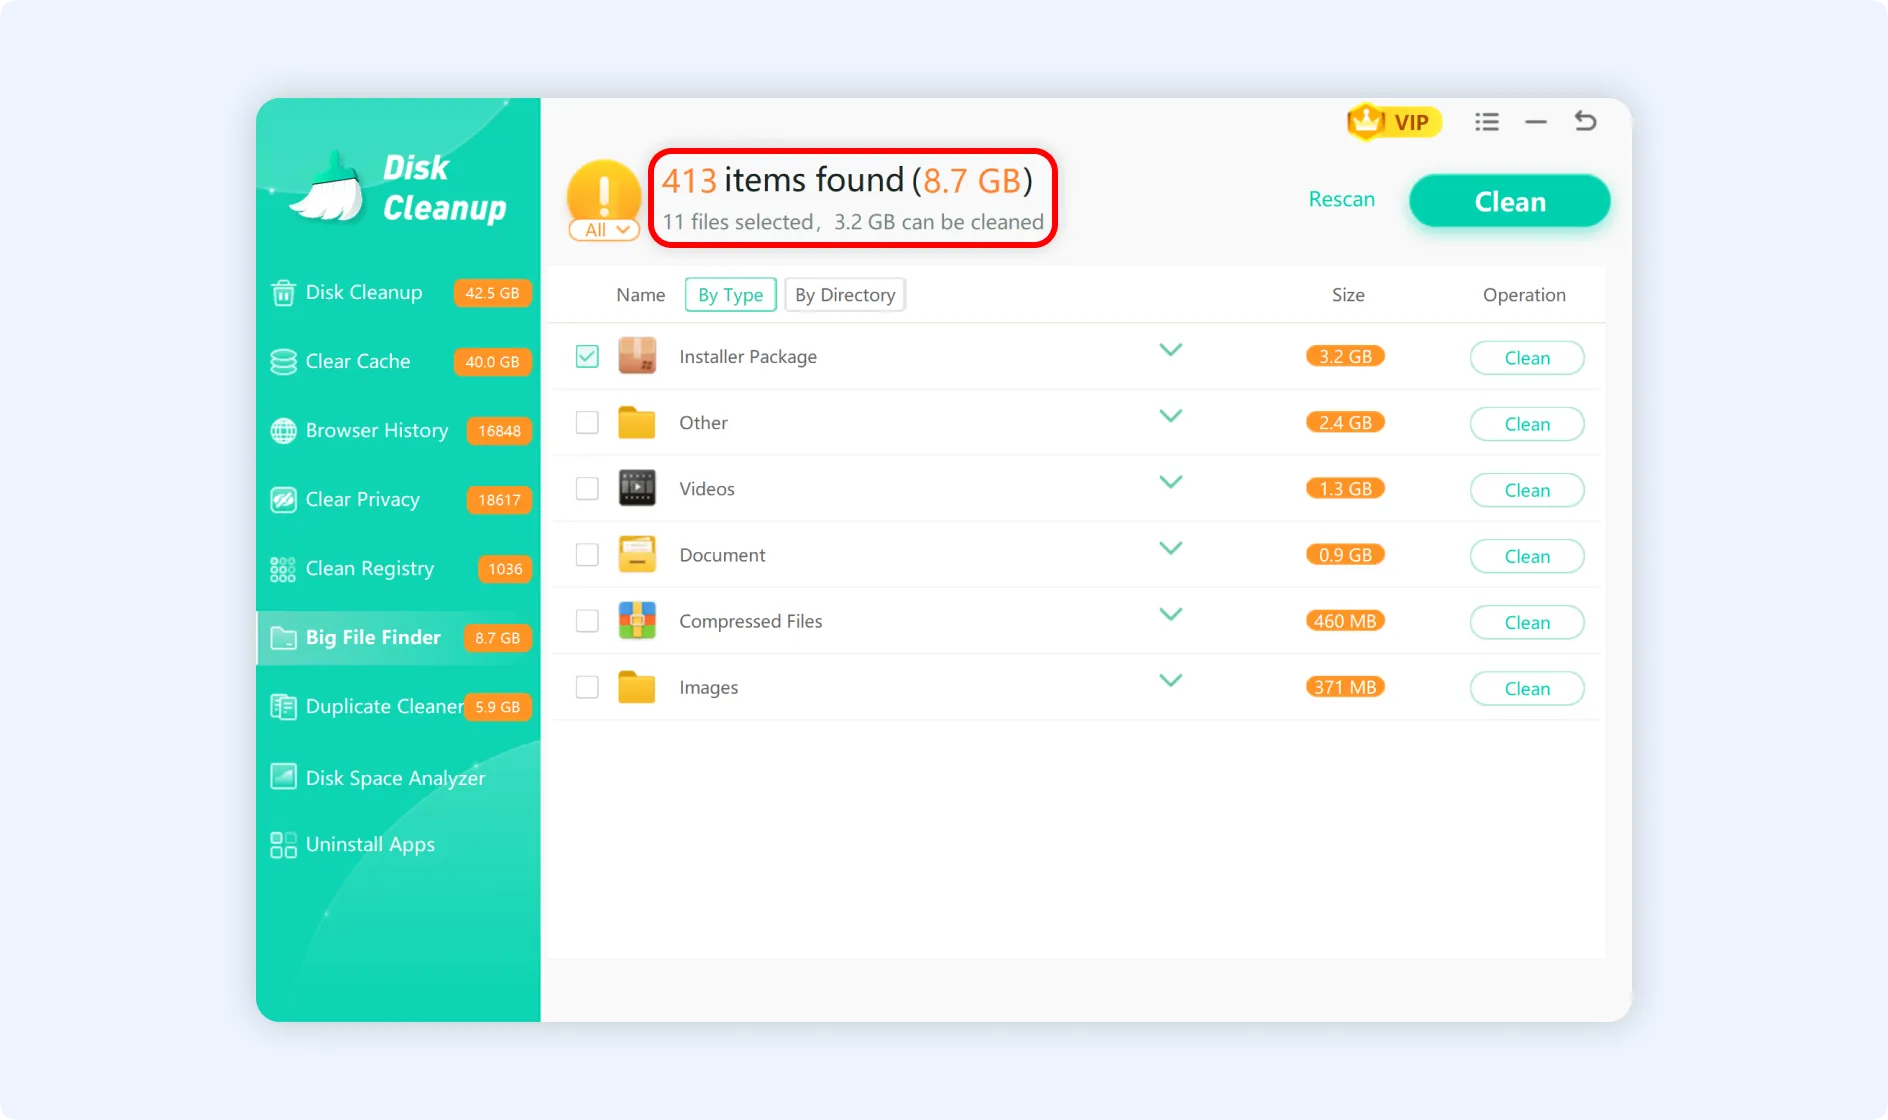
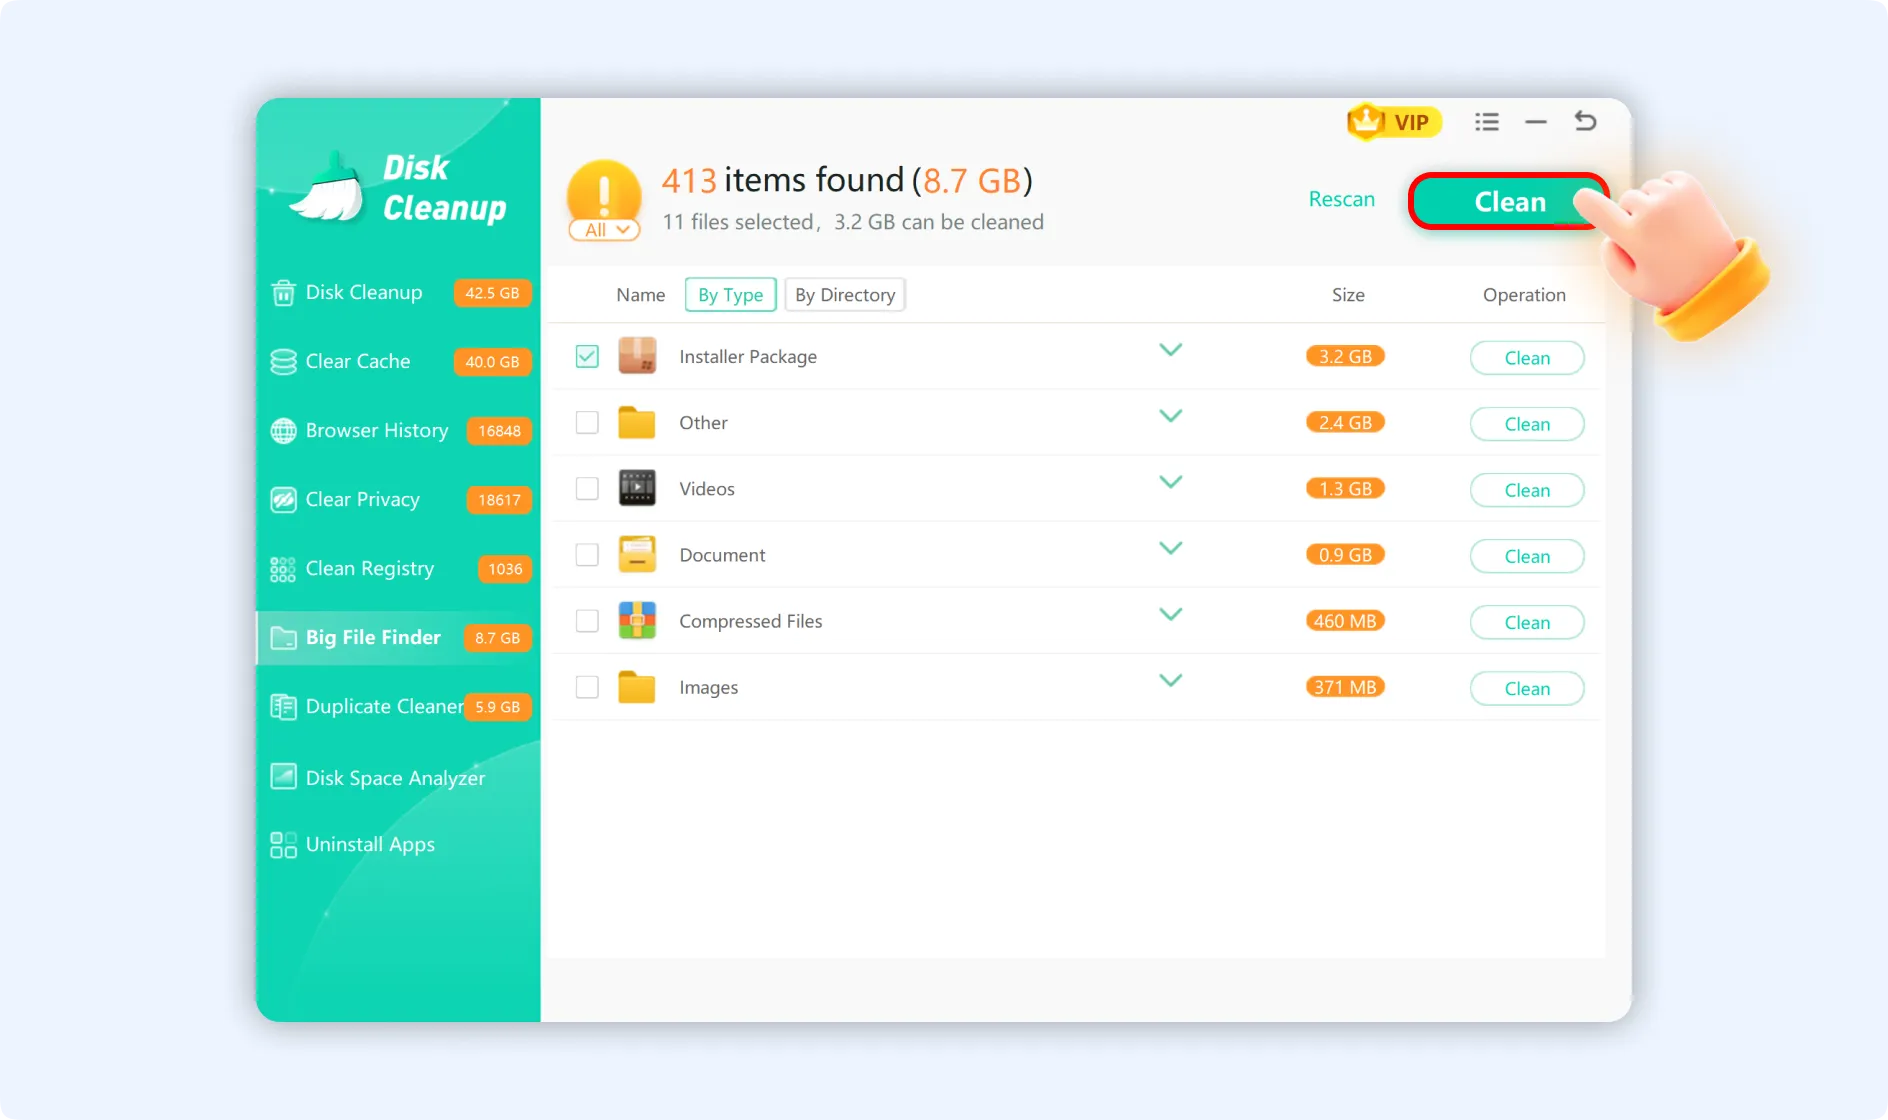
💡Tip 1: Once the scan is complete, Big File Finder will show all detected large files. The top panel will show a summary of scan results:
- Total number of files detected.
- Total recoverable space.
- The total size of the selected files.
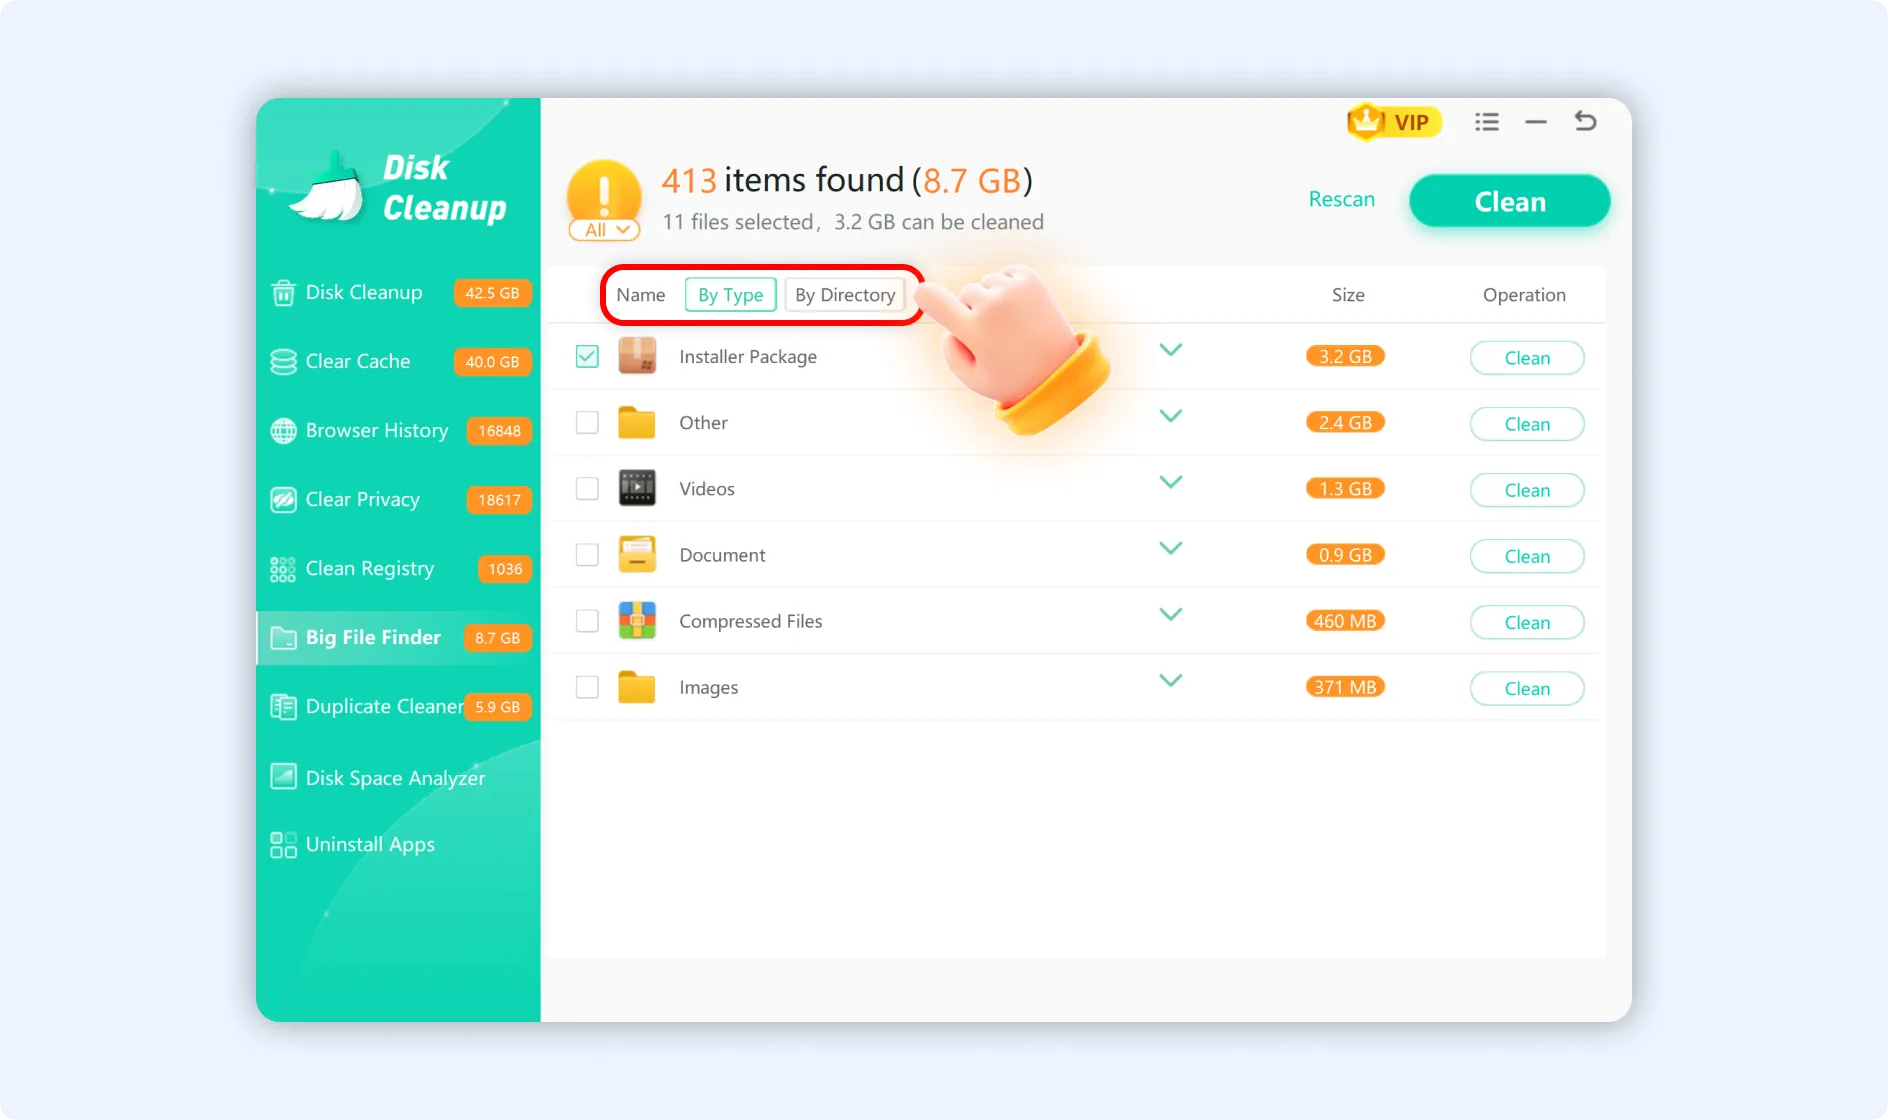
💡Tip 2:You can view scan results in two ways:
- By Type: Files are categorized and listed by their type, such as installers, videos, documents, compressed files, images, etc.
- By Directory: Files are categorized and listed by their directory paths or locations.
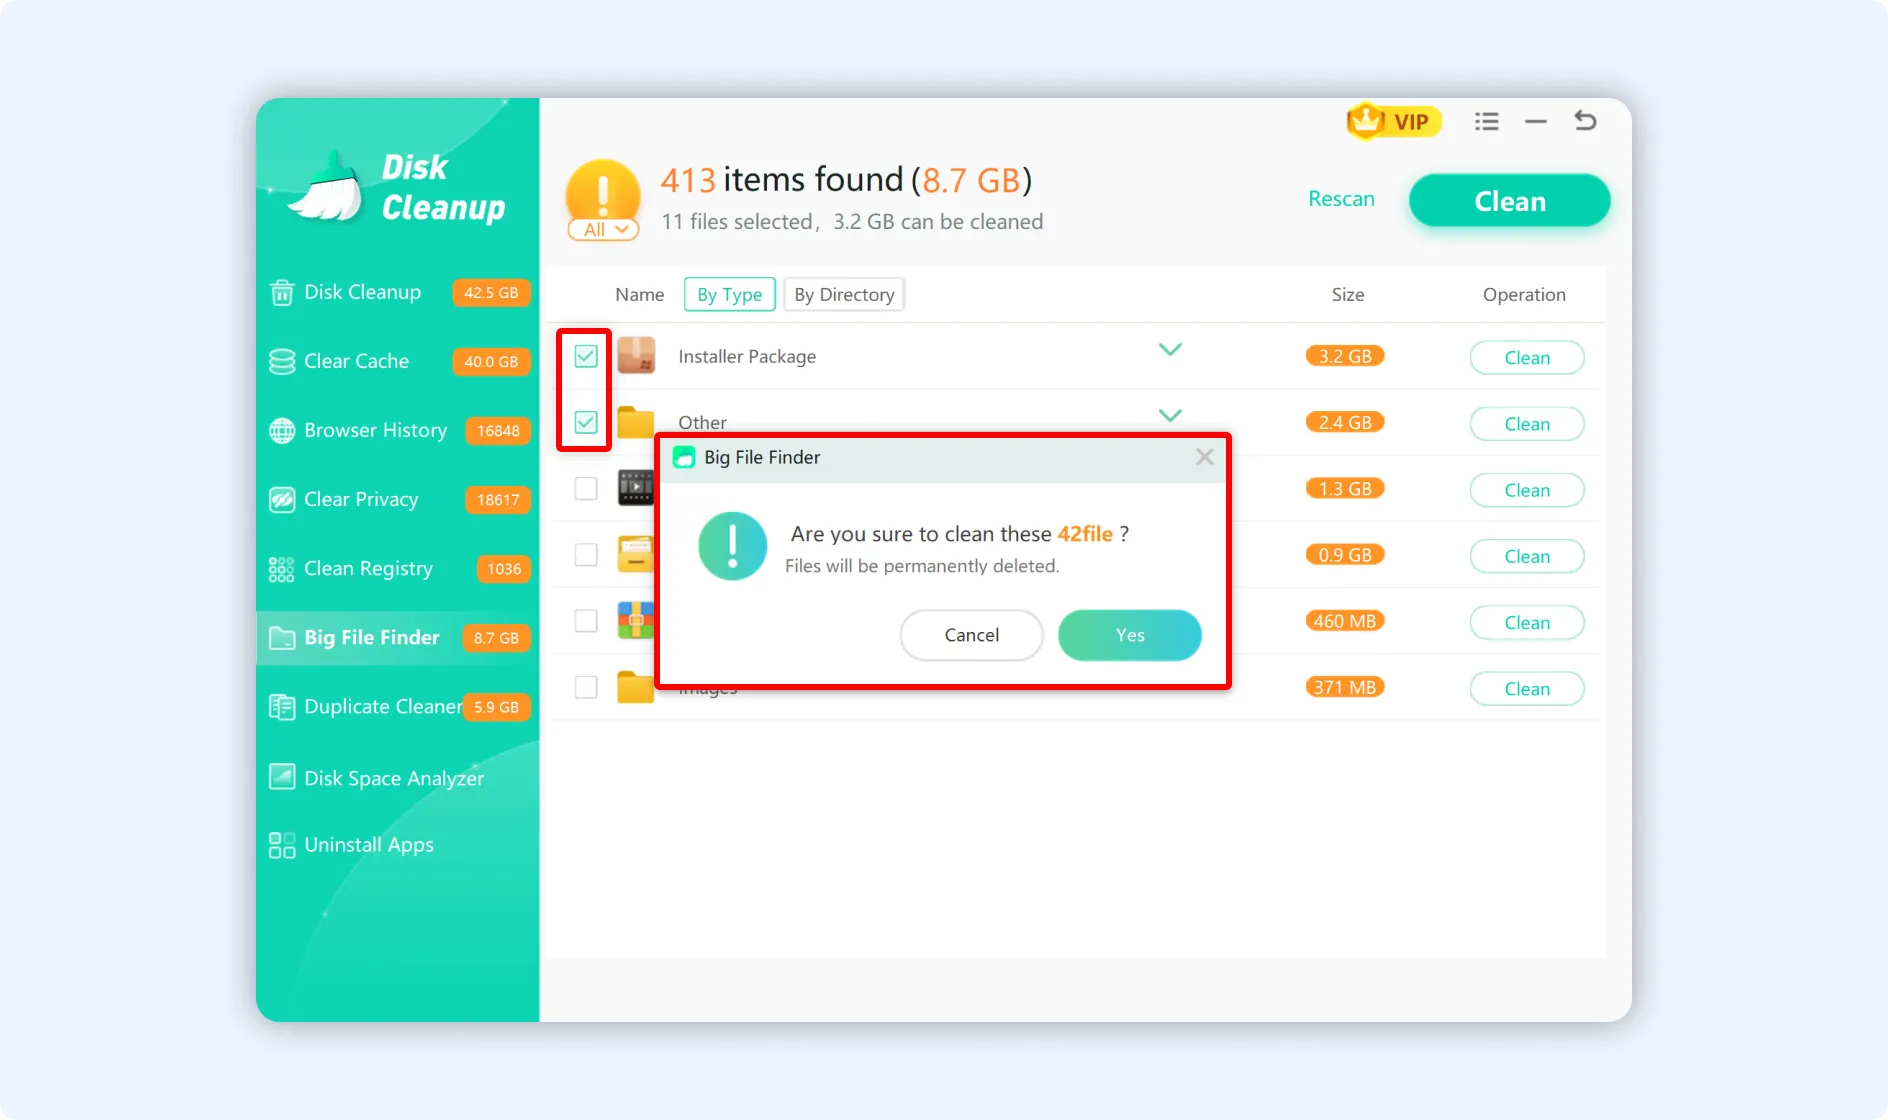
Step 3: Select the large files you want to delete (the app supports batch selection), then click the "Clean" button in the upper-right corner of the panel. Big File Finder will show you a confirmation prompt, where you need to approve deletion again. After reconfirming, WMaster Cleanup will execute the deletion process.
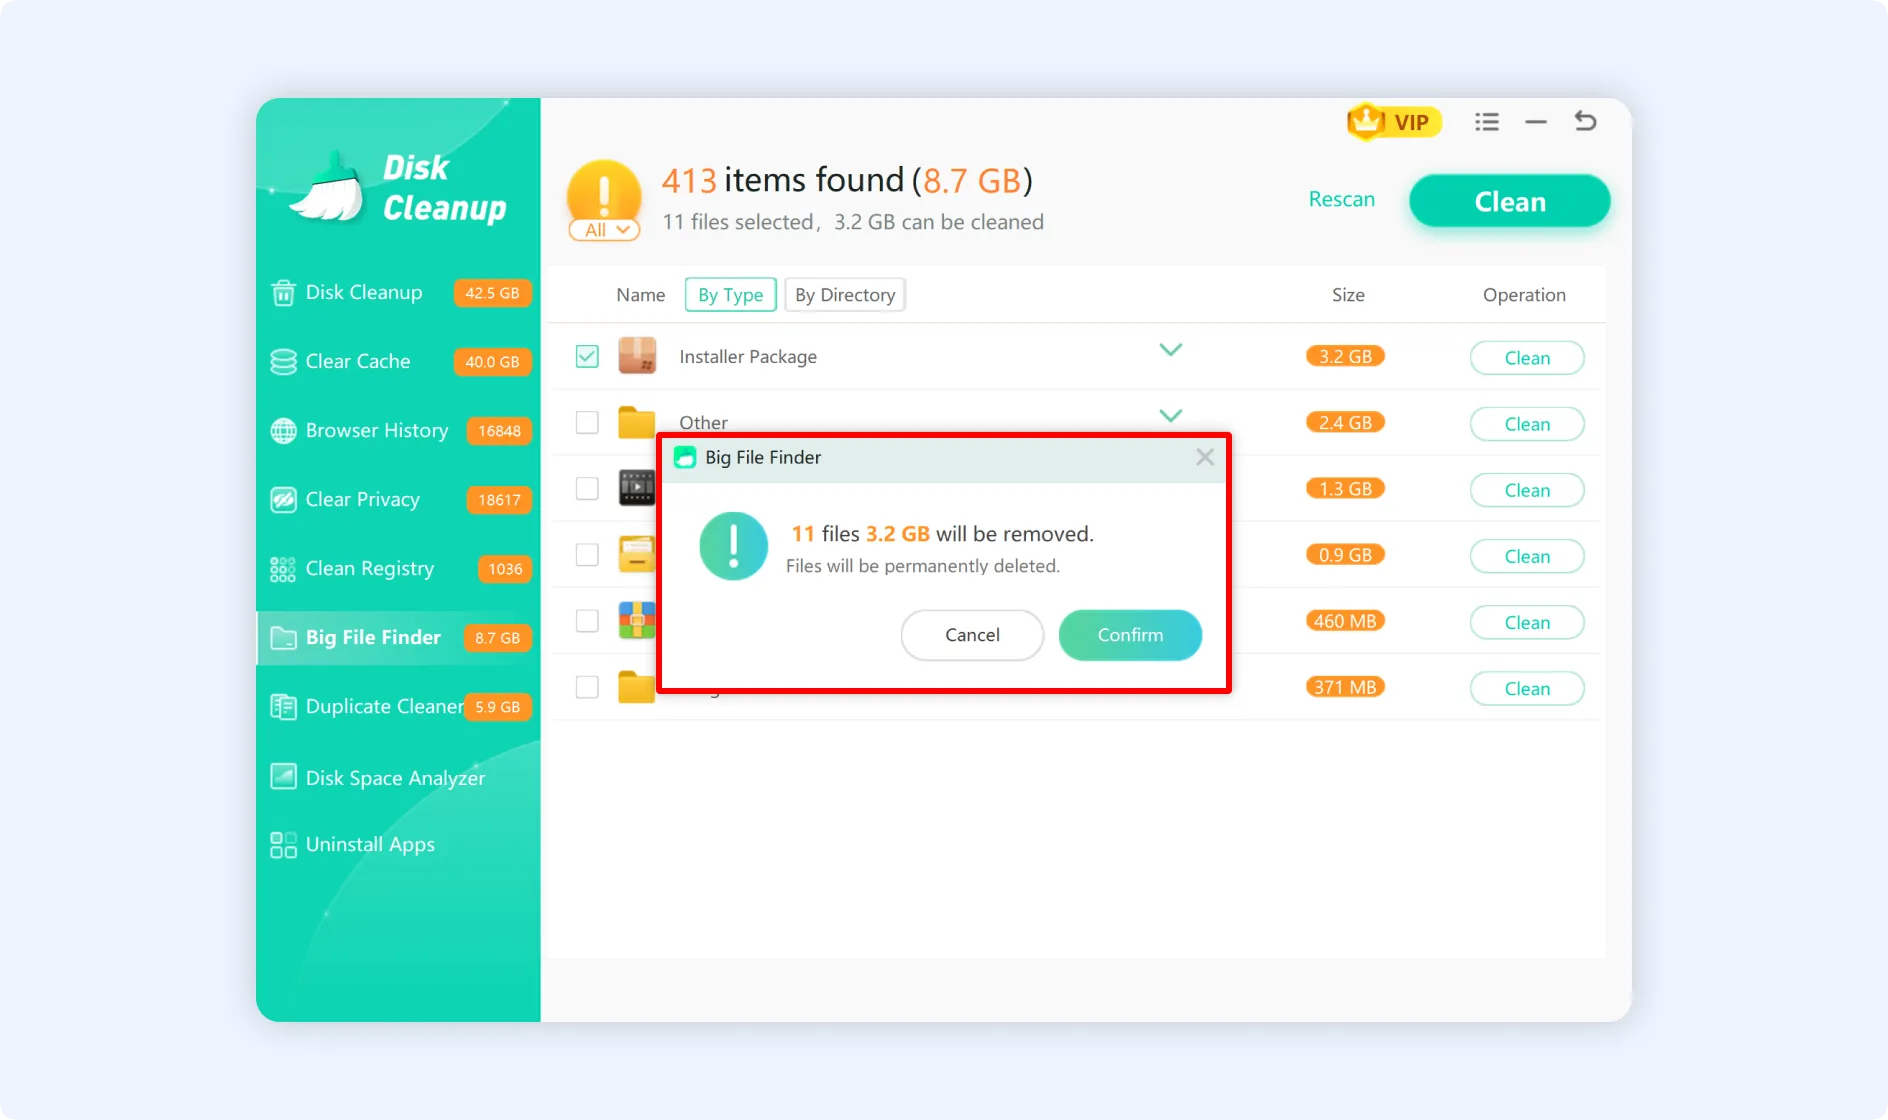
💡Tips:When you select a group of files, you must confirm whether you want to clean all files within that group.
💡Tips 1: To view detailed information about a specific file, click the "triangle symbol (▼)" before that item.
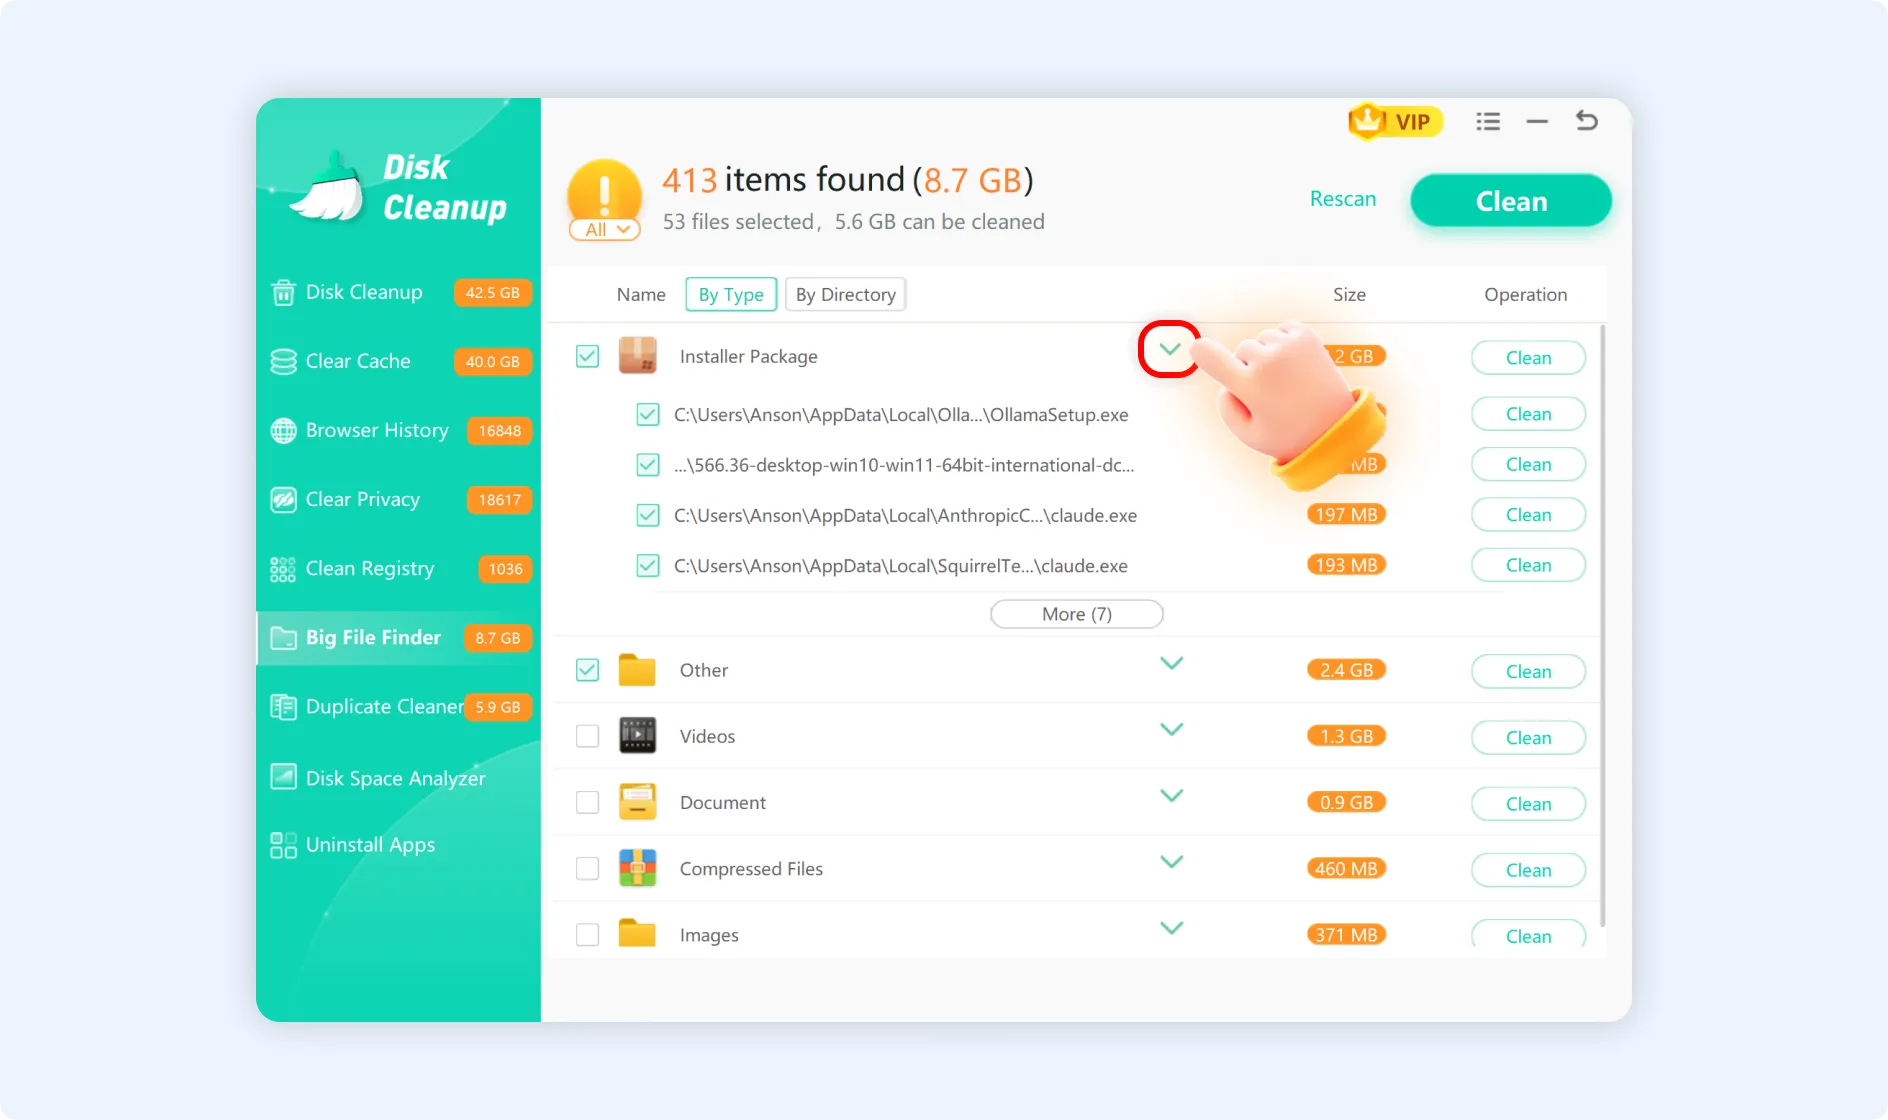
💡Tips 2: To further verify the file's contents, click any file's path information to directly open its folder.
💡Tips 3: To delete a specific file, click the “Clean” button on the right side of that file's row.