
One of the most common problems with computers is running out of disk space. Too many temporary files, system patches, and other files made by the operating system, software, browsers, and other programs are the main reasons why there isn't enough disk space.
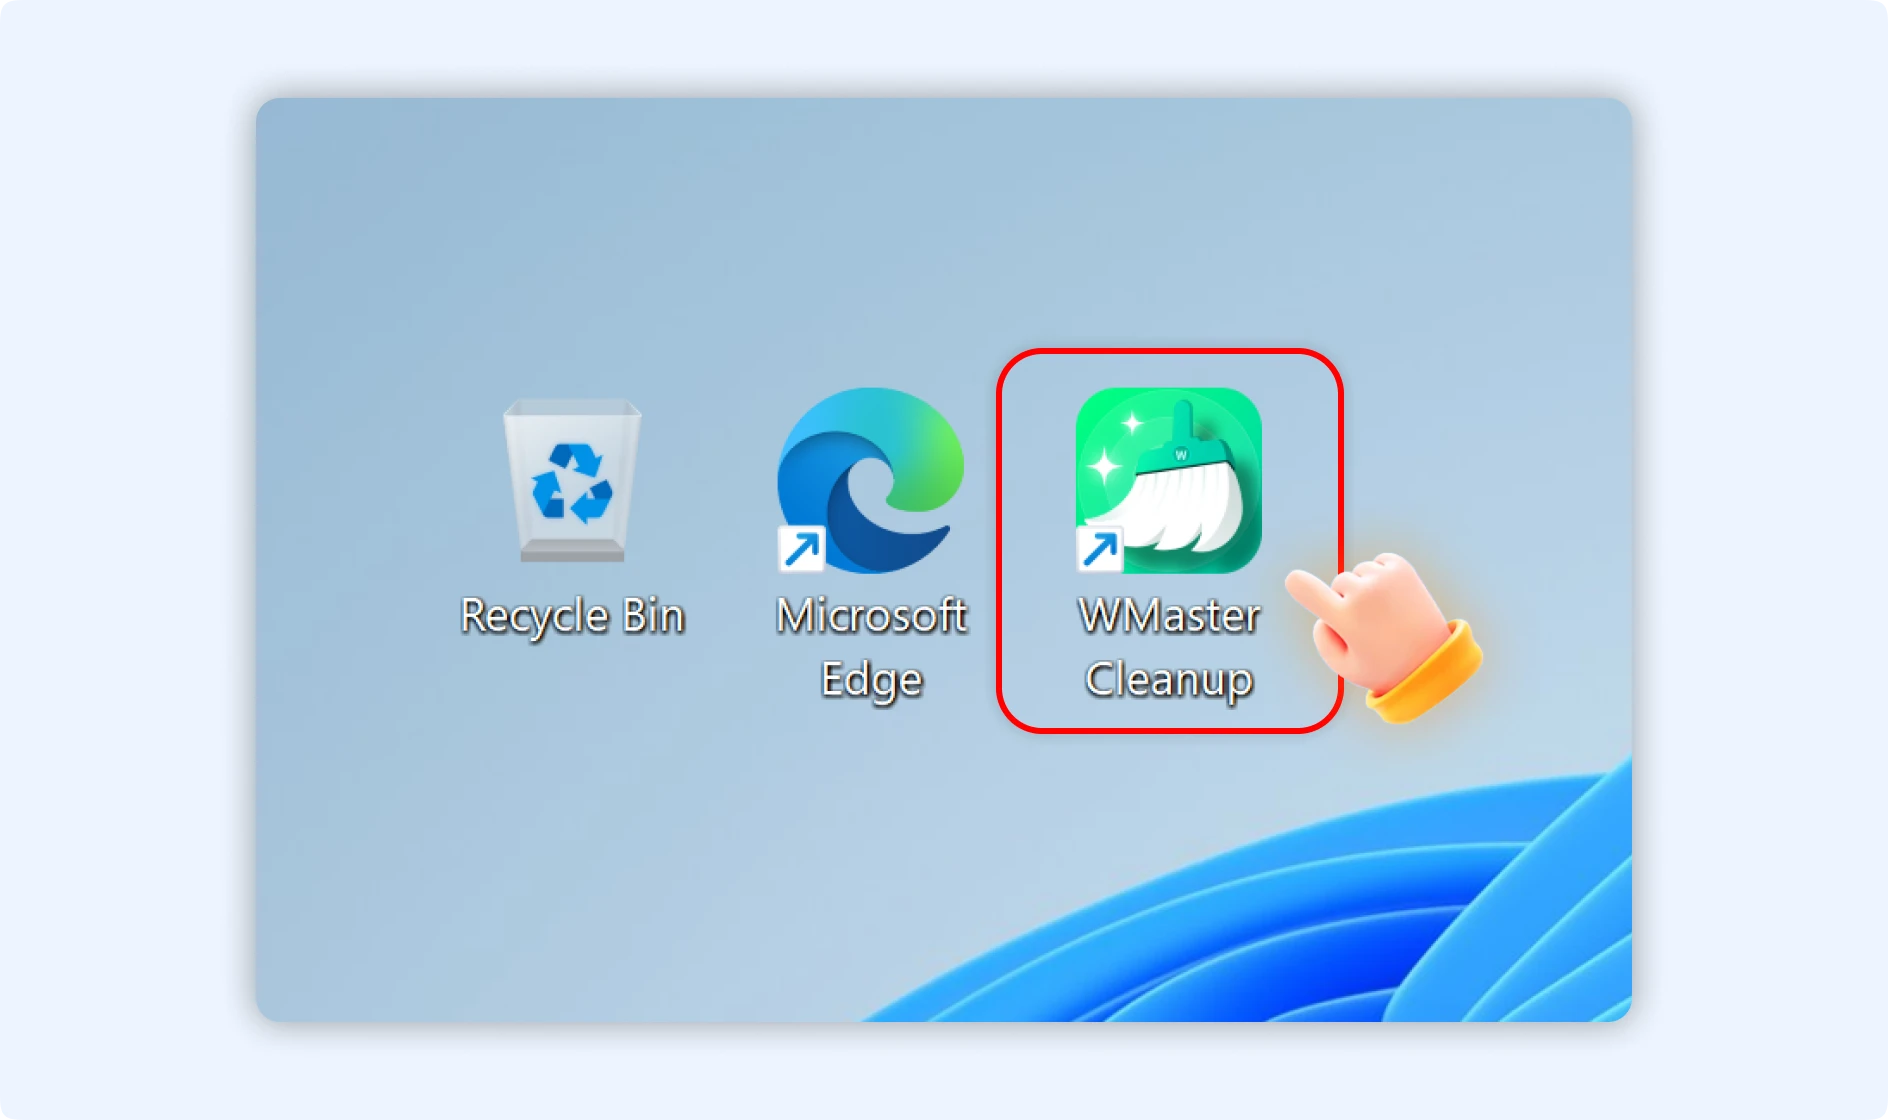
Please launch WMaster Cleanup on your computer now. You can download and install it from the official WMaster Cleanup website if you haven't already.
Part 1.Guide to Clean Disk by WMaster Cleanup
You can use the WMaster Cleanup disk cleanup function in two ways:
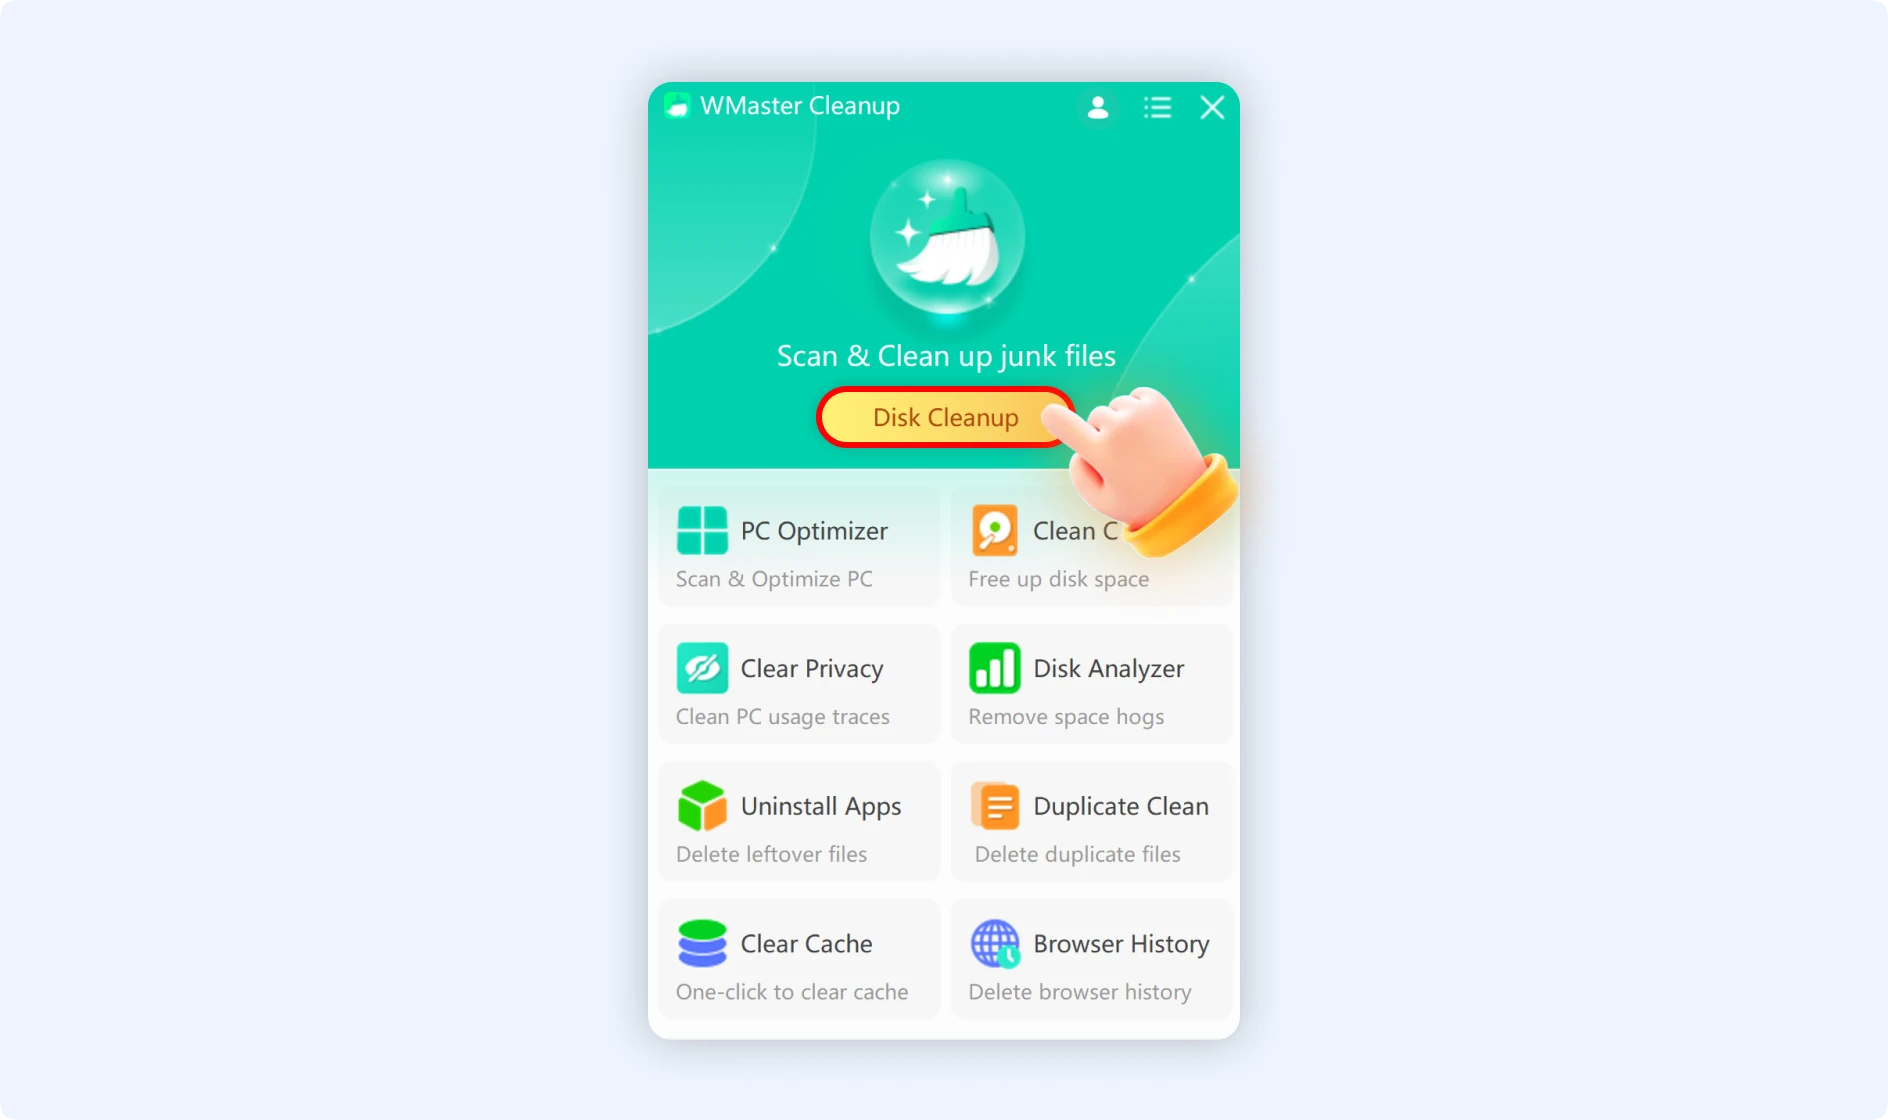
Method 1: Start WMaster Cleanup and select Disk Cleanup
To open WMaster Cleanup on your desktop, double-click it and then click "Disk Cleanup."
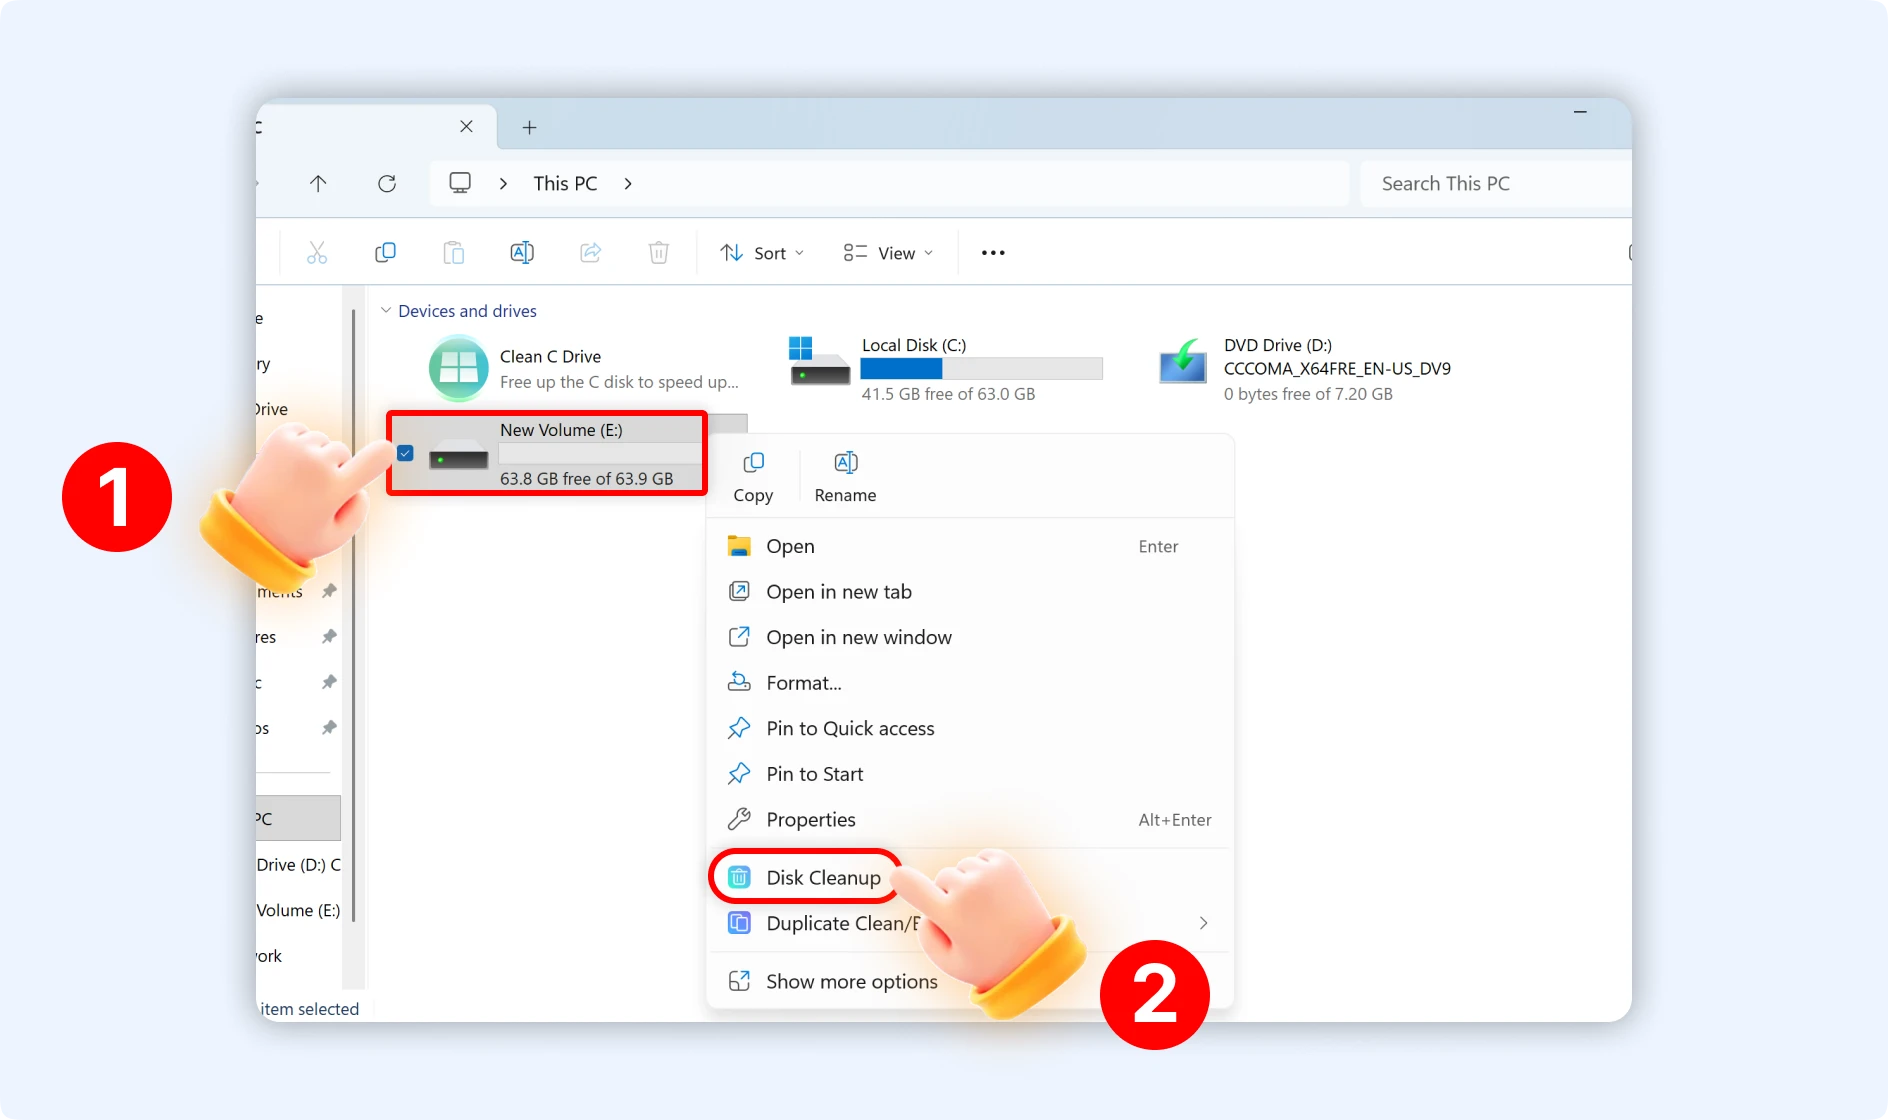
Method 2: Use This PC to Open Disk Cleanup
Open This PC in File Explorer or on your desktop. Choose "Disk Cleanup" from the menu when you right-click any drive other than C: (such as D:, E:, or F:).
Part 2.How Can I Use the Disk Cleanup Feature of WMaster Cleanup?
Step 1: Click "Disk Cleanup" from the main interface and then tap on "Scan Now" to initiate the scanning process.
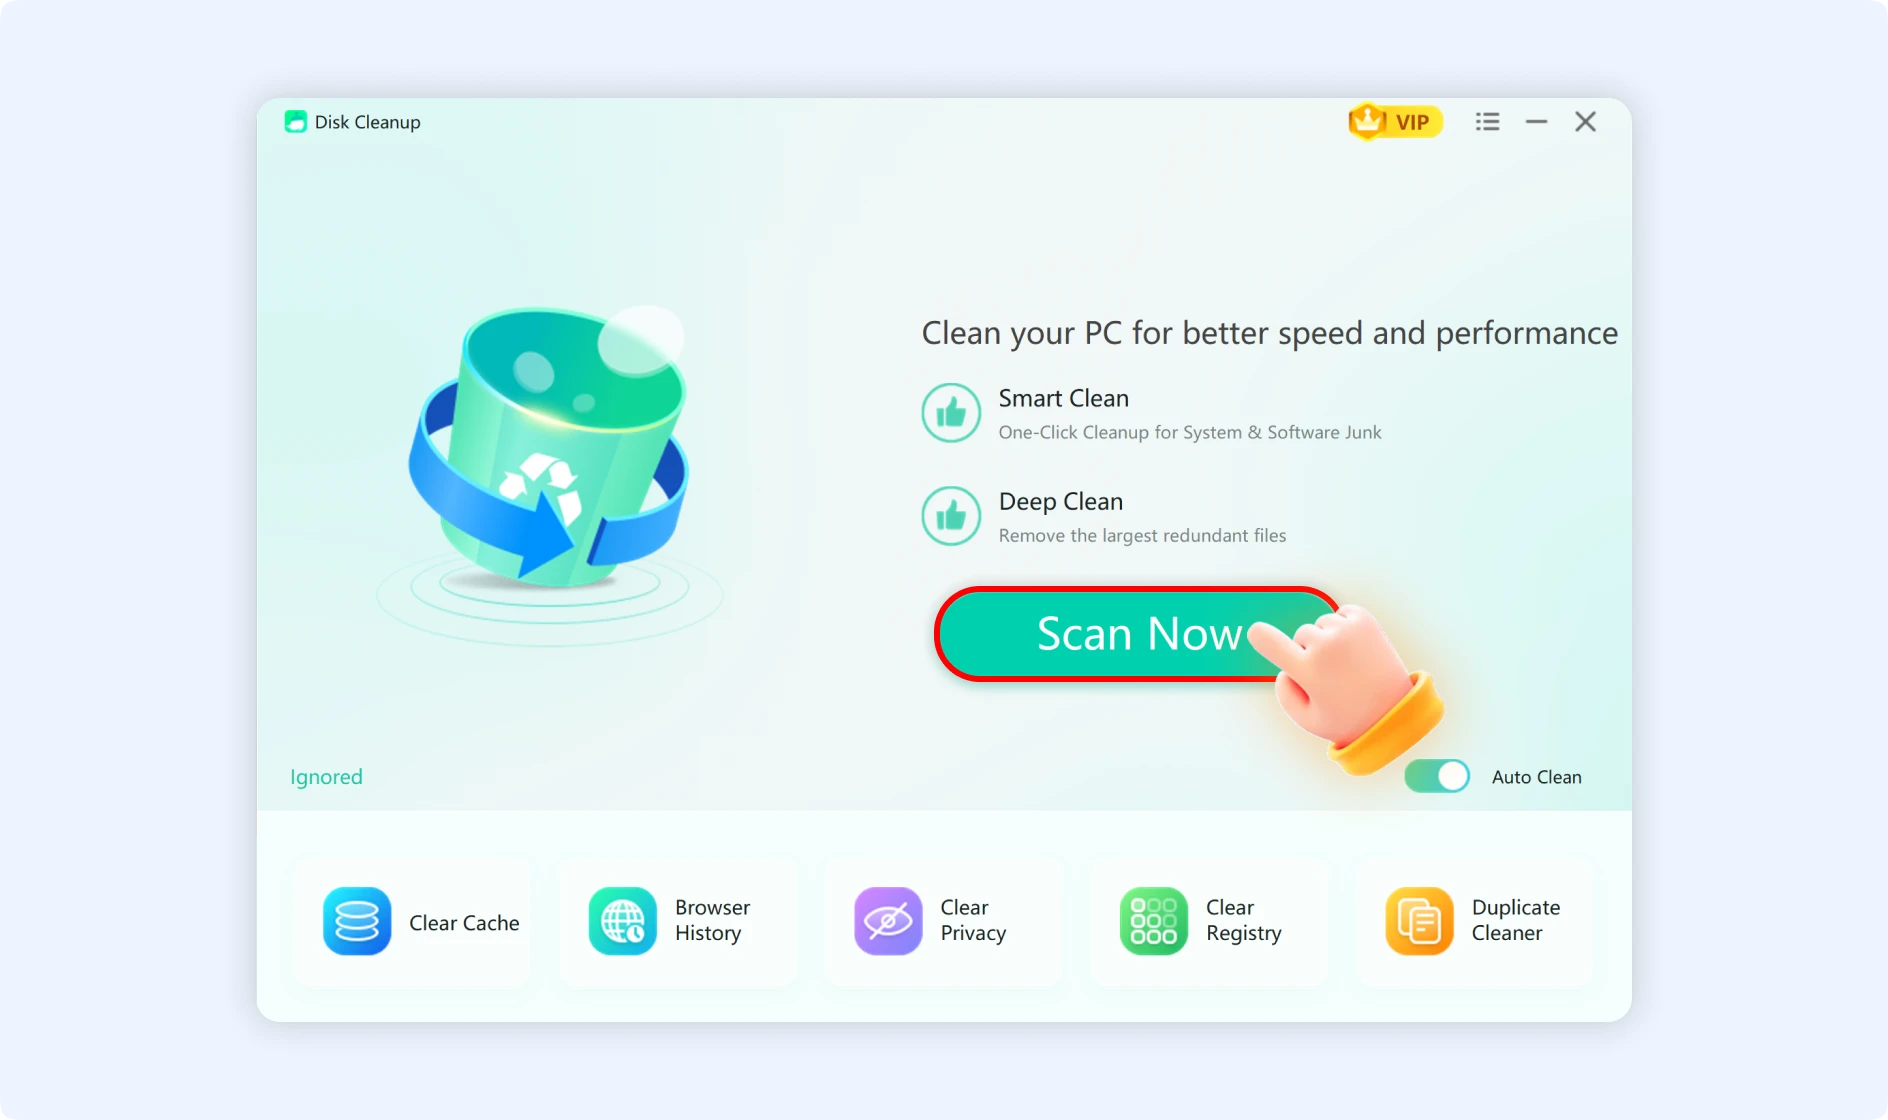
Step 2: Wait for WMaster Cleanup to complete the scan. At the top of the interface, the total size of the junk files that have been found will appear.
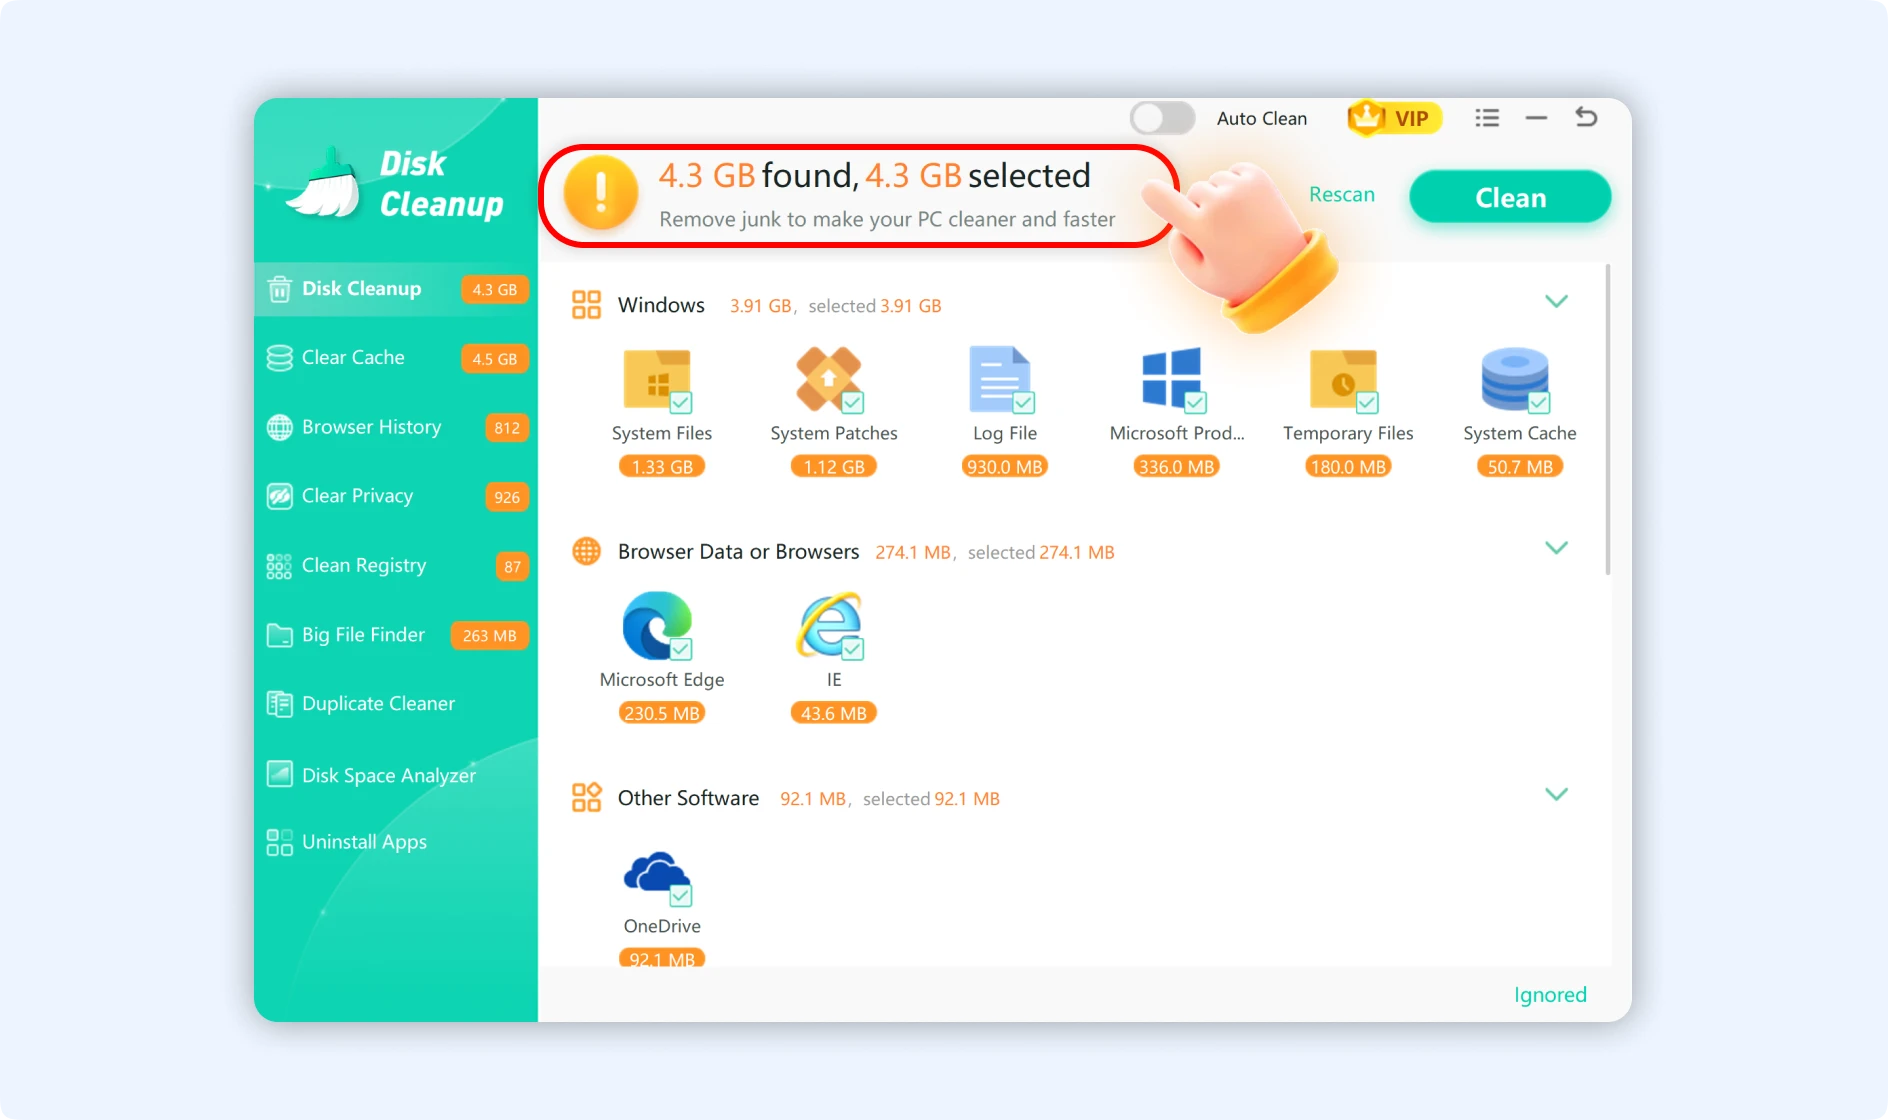
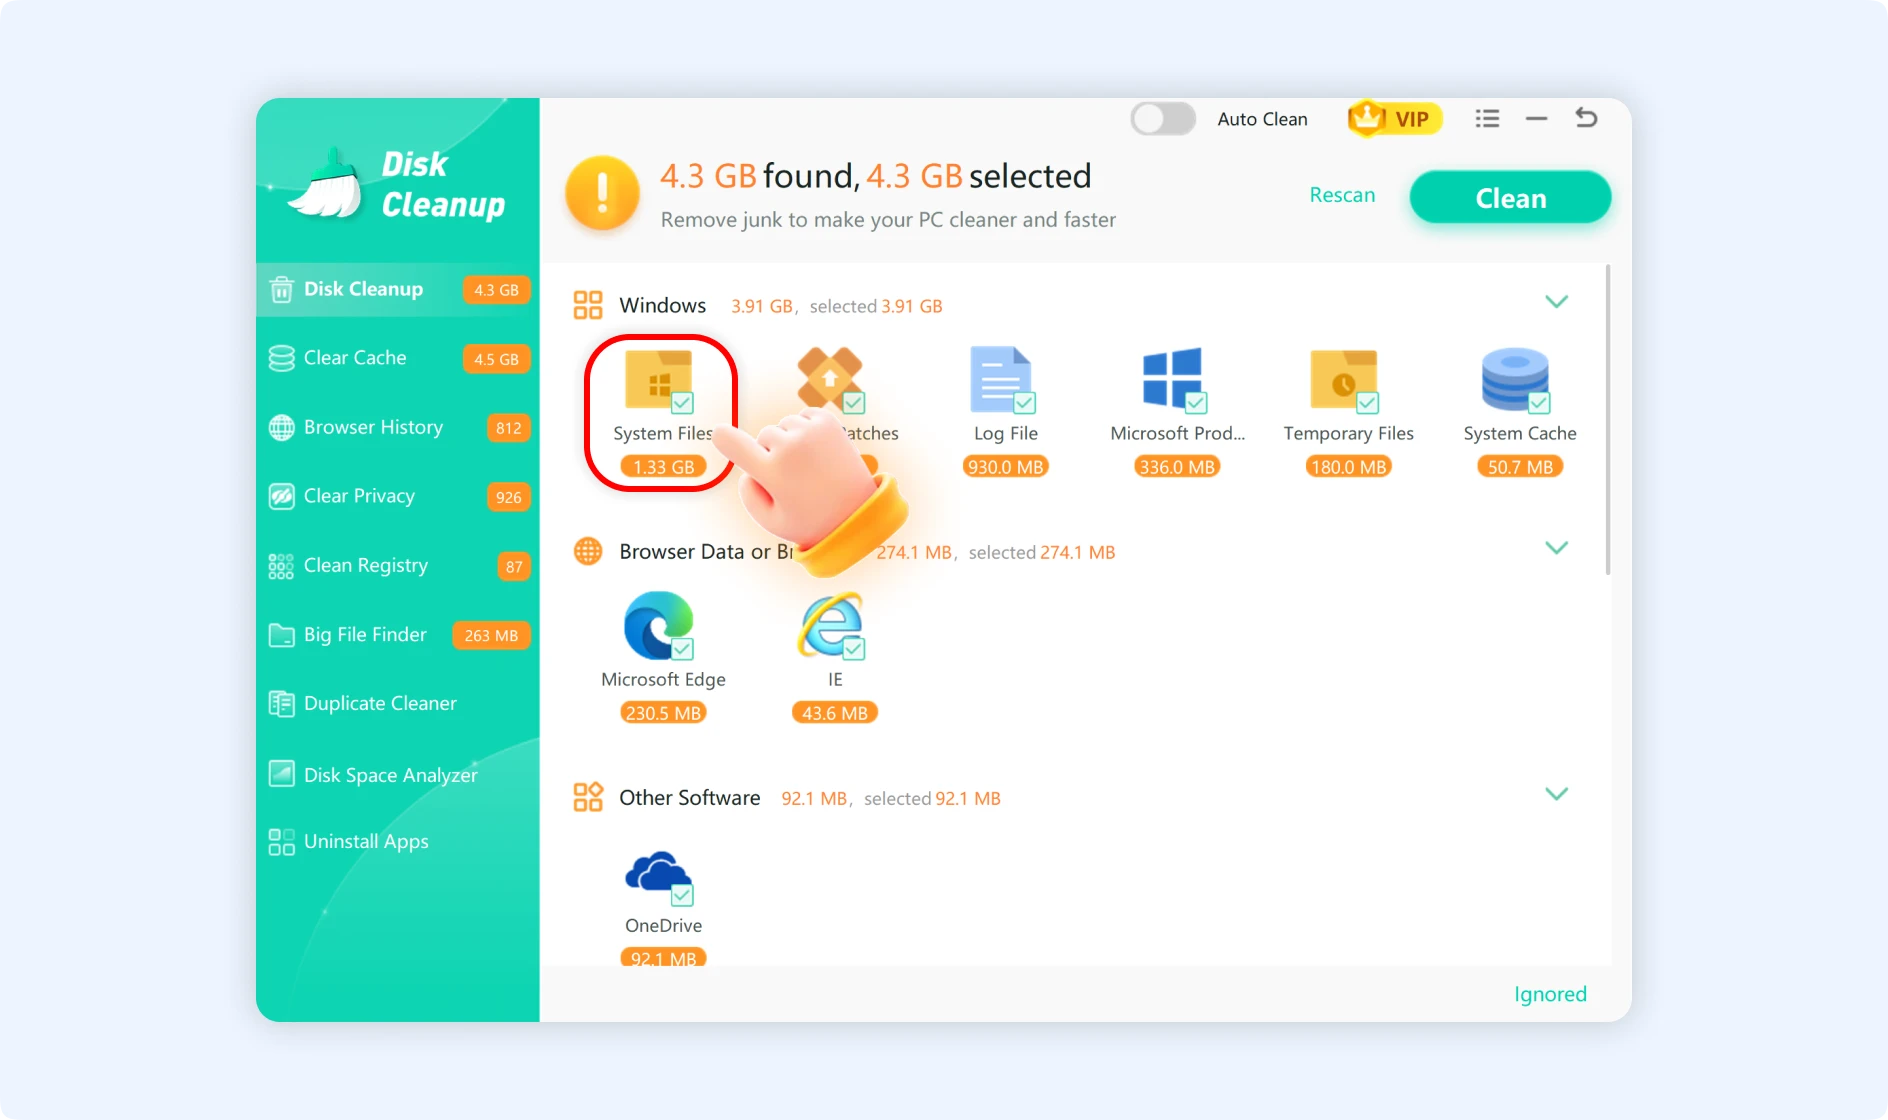
💡Tips:When the scan is done, you may click on each item that can be cleaned to view what's inside and decide whether to “Clean” it or “Ignore” it . If you don't know how to do certain tasks on a computer, you can click "Clean," available on the top right corner of the Disk Cleanup function interface, to free up space on your hard drive. You can use this procedure with confidence because it will not delete any system files.
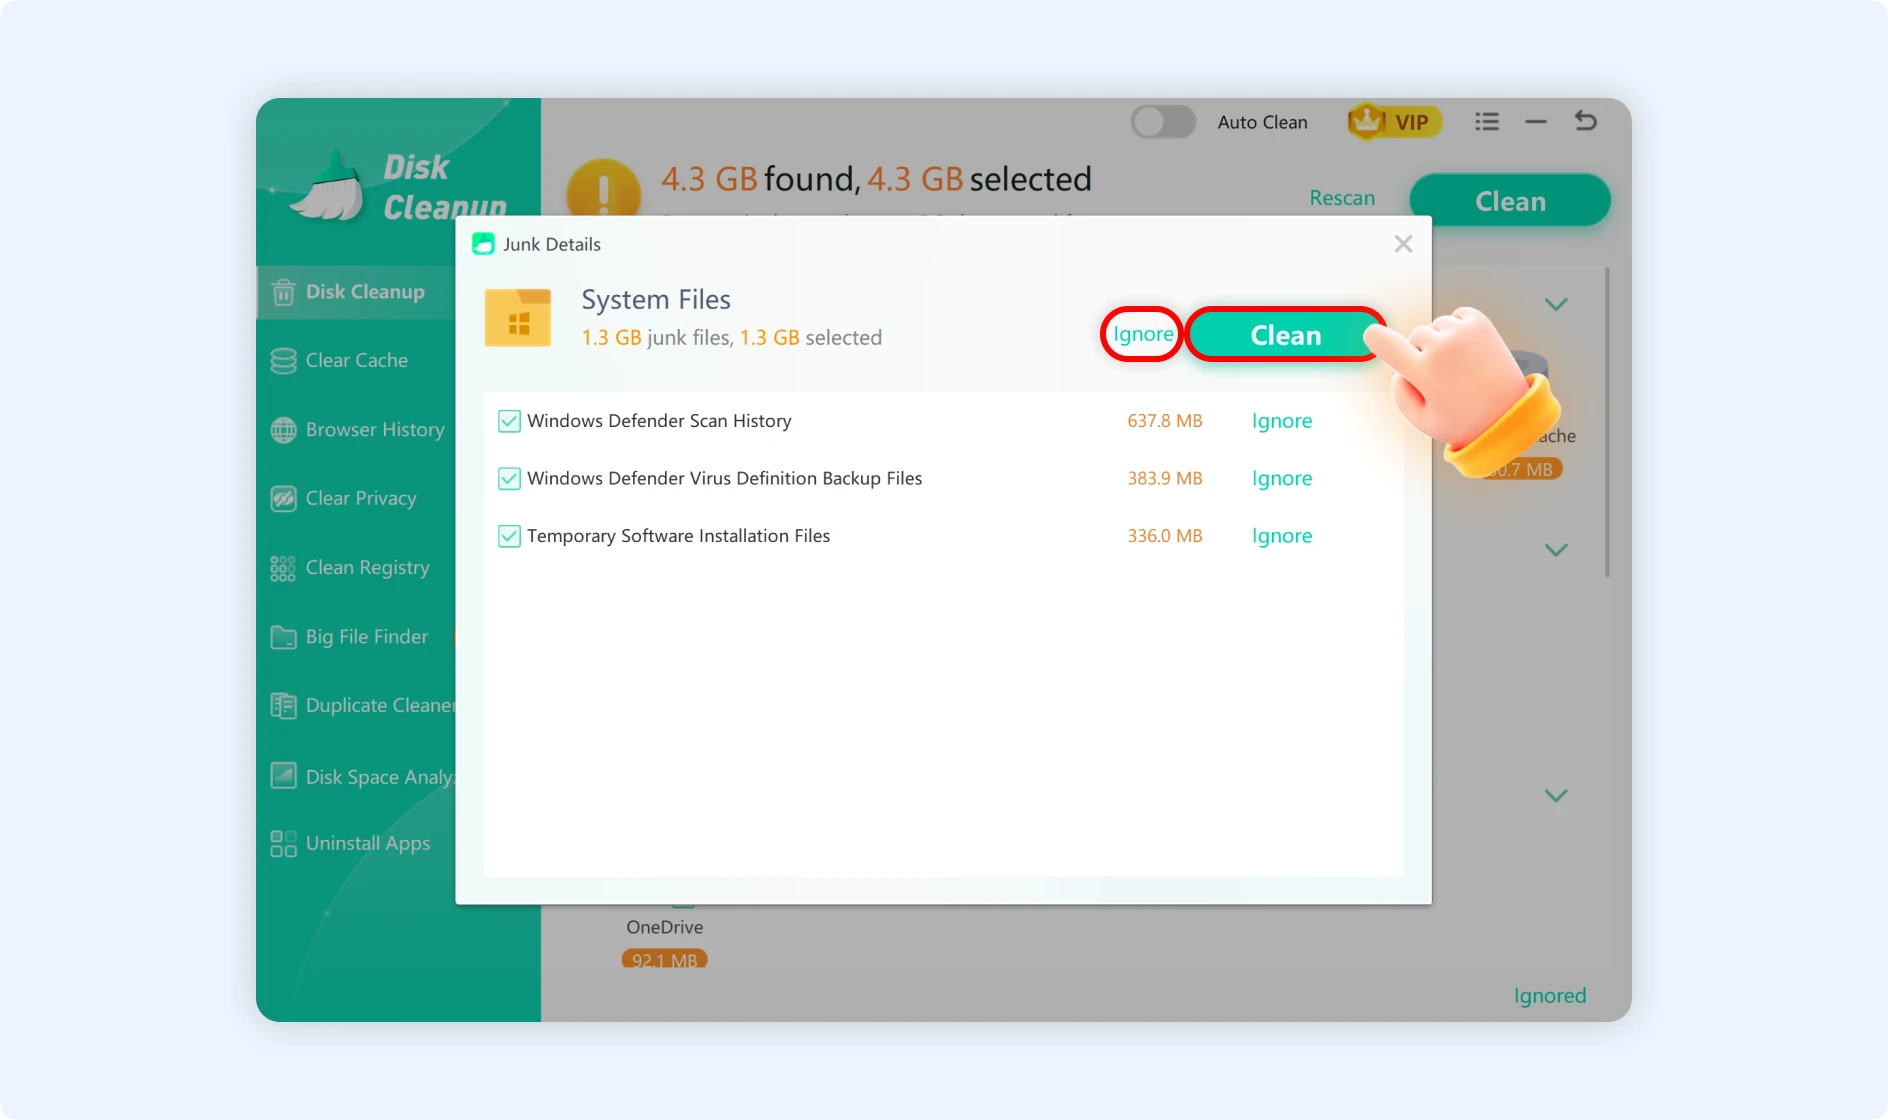
Step 3: Click "Clean" to begin removing all of the junk files you have chosen after verifying the items to be deleted.
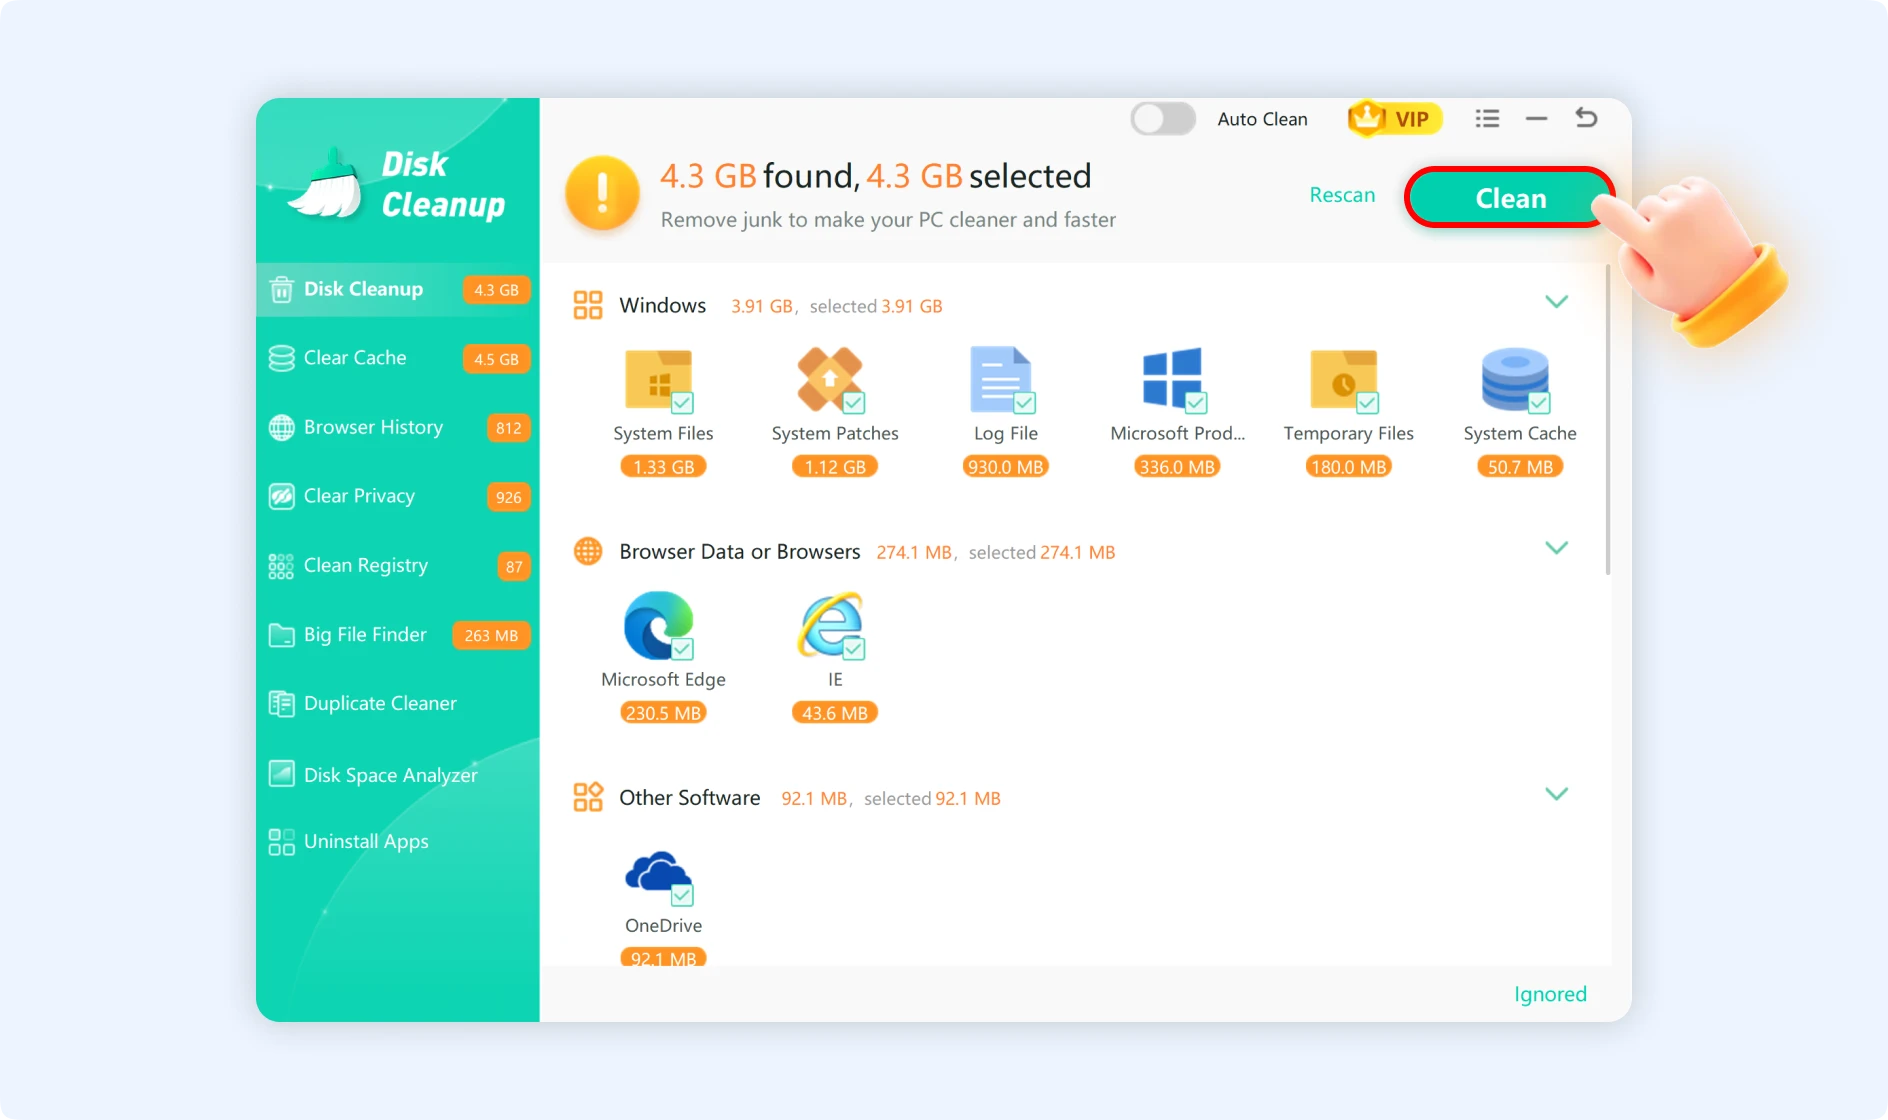
Step 4: The size of the freed space will be shown after it is completed.

Part 3. How to Turn on the Auto Clean Feature of WMaster Cleanup?
There are two ways to activate the auto clean feature.
Method 1:There are two ways to activate the auto clean feature.
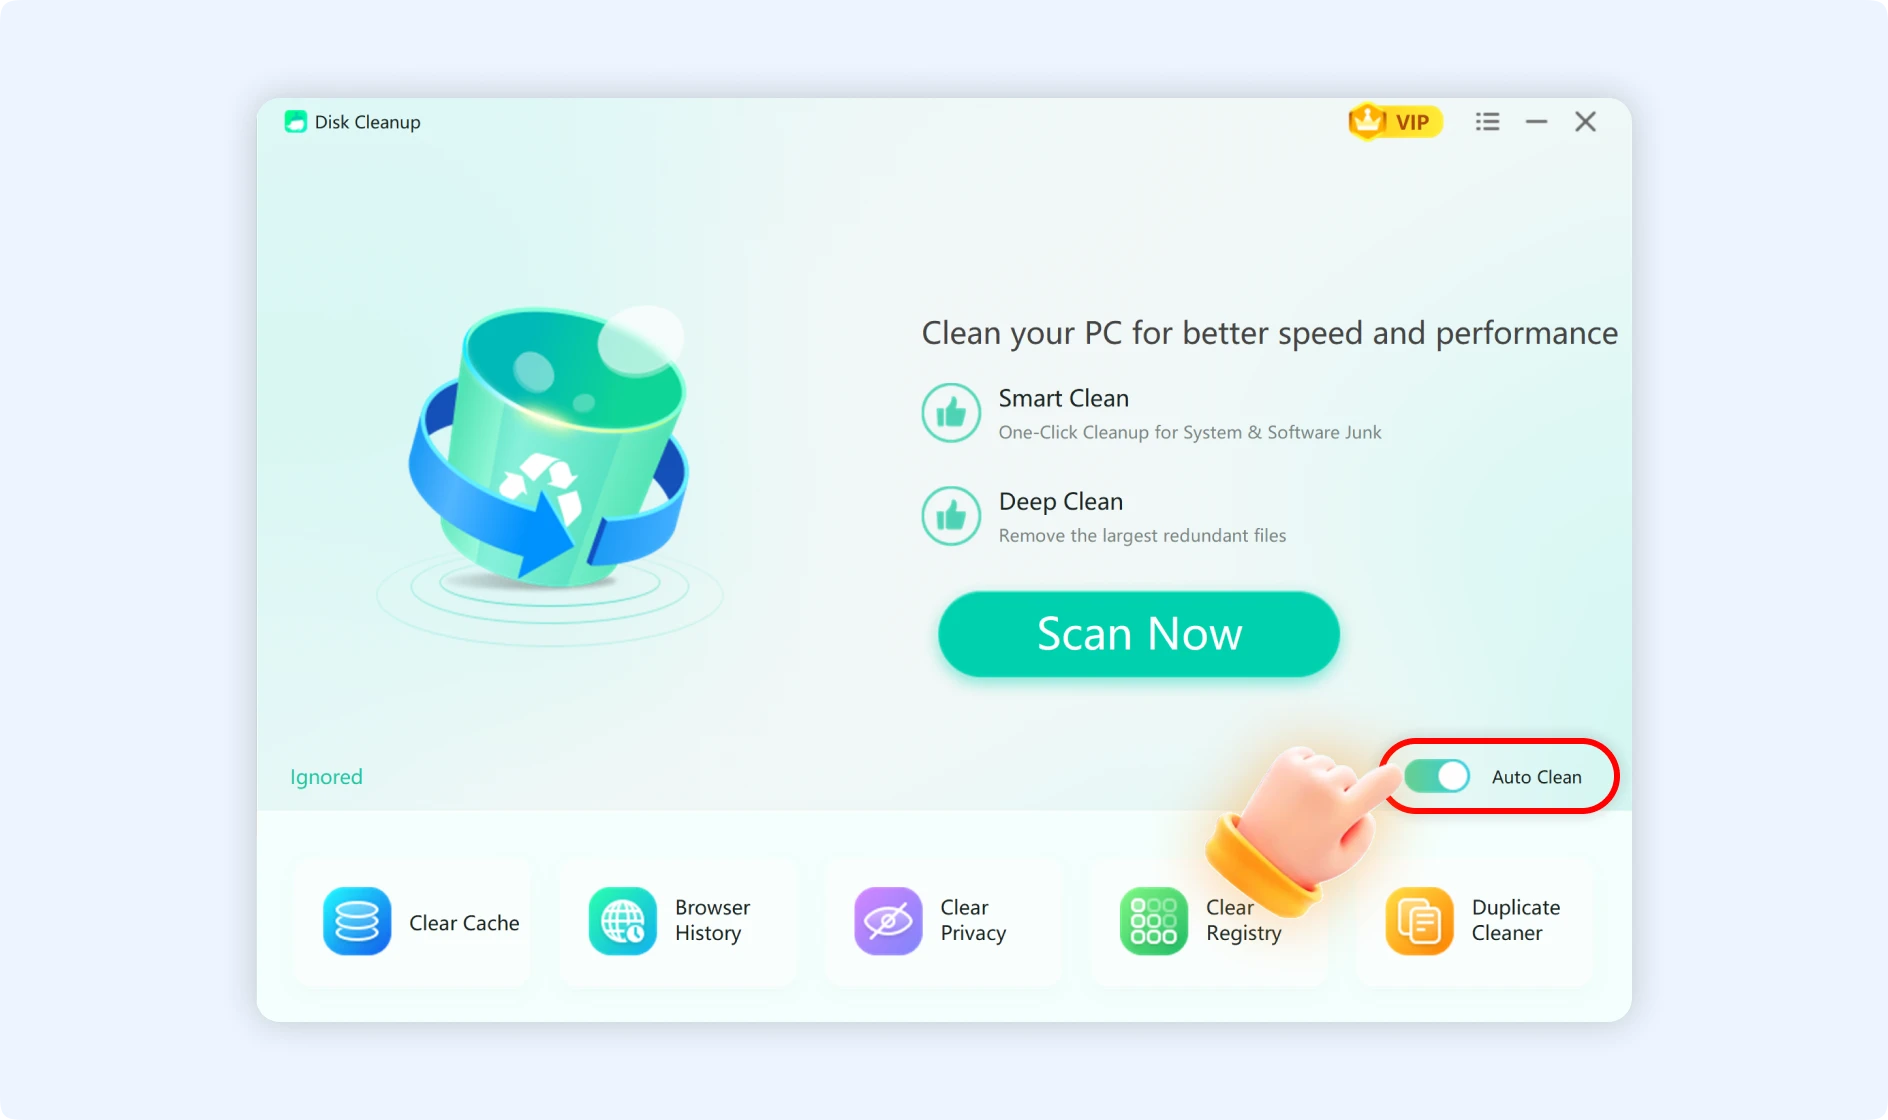
Method 2: Enable the Auto Clean function that is available at the top of the Disk Cleanup function interface.

Part 4. How to Use WMaster Cleanup's Automatic Cleaning Function
If you turned on the Auto Clean feature using the steps above, WMaster Cleanup will clean your computer automatically when it is not in use. You can change the settings to clean once a week or once a day.
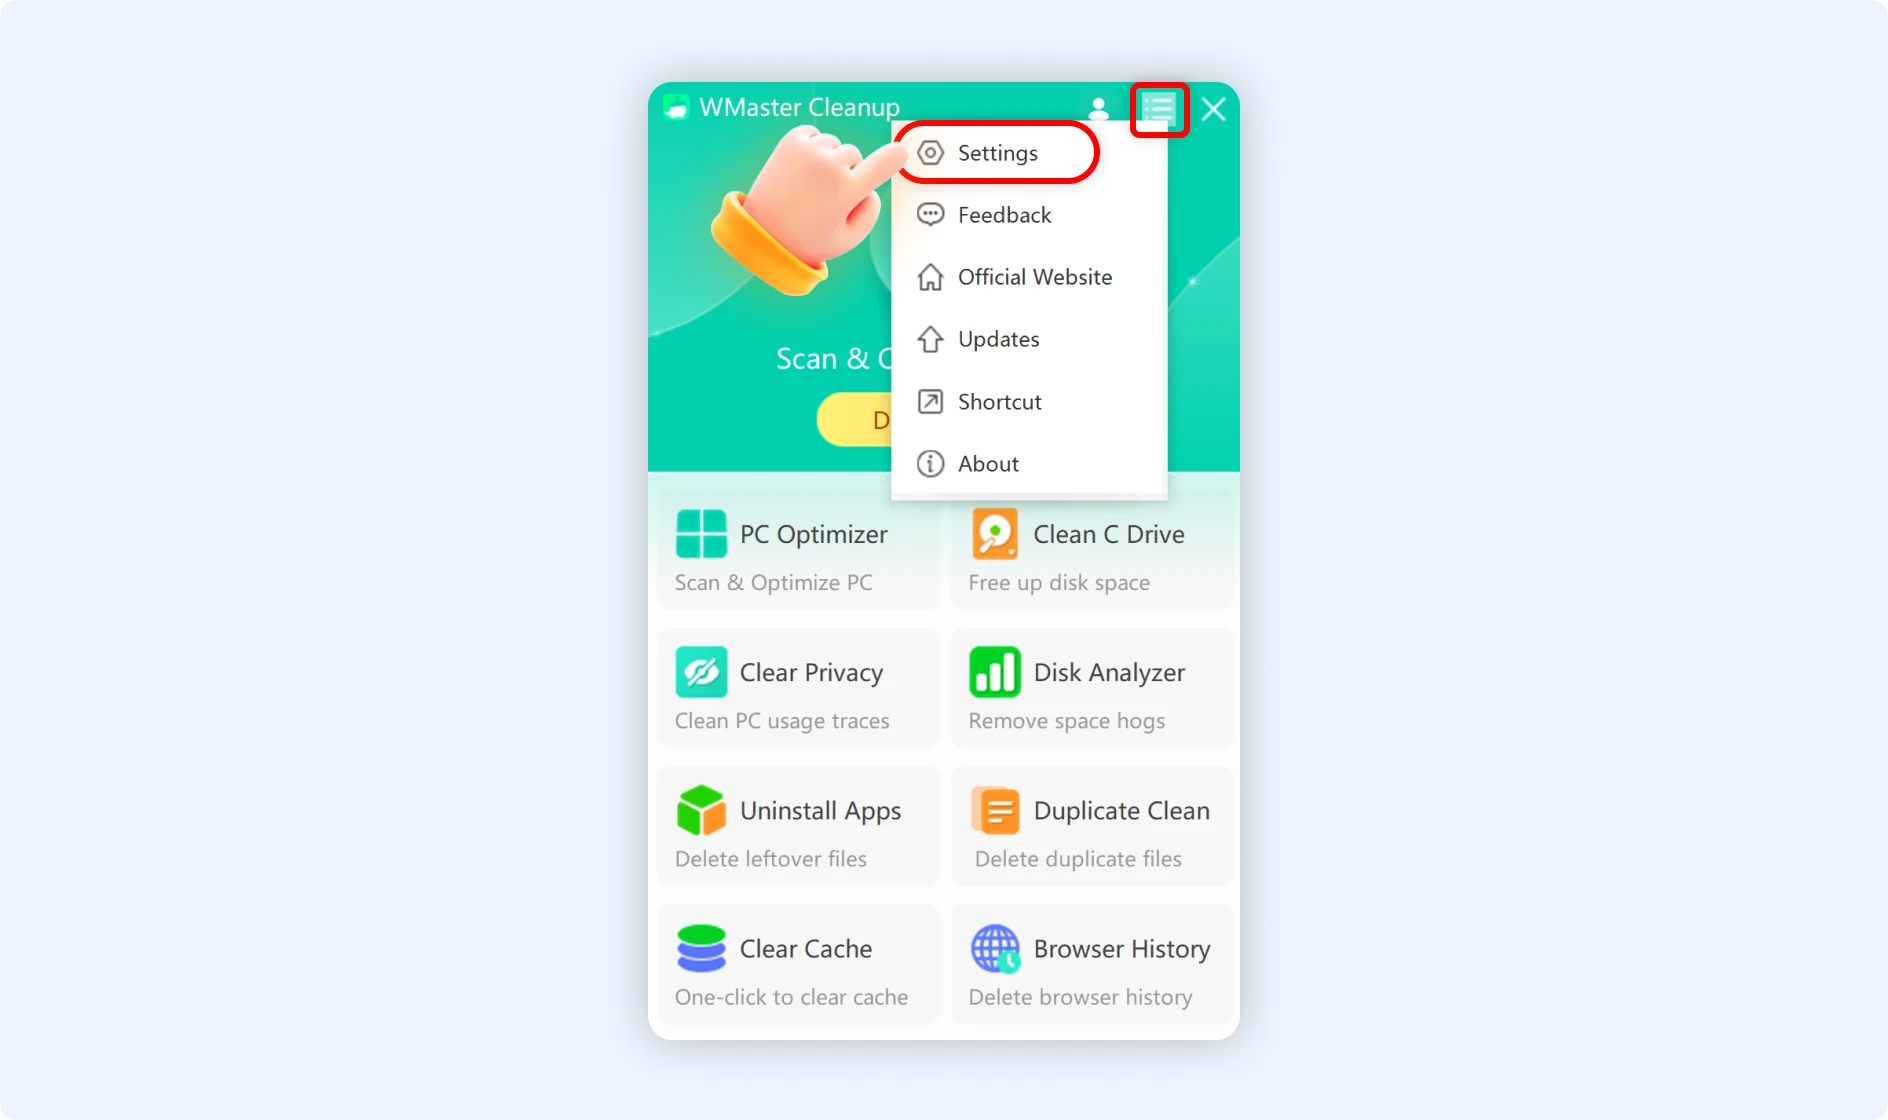
Step 1: Locate the "Menu" icon in the top right corner of the main WMaster Cleanup interface. Click it, then choose Settings.
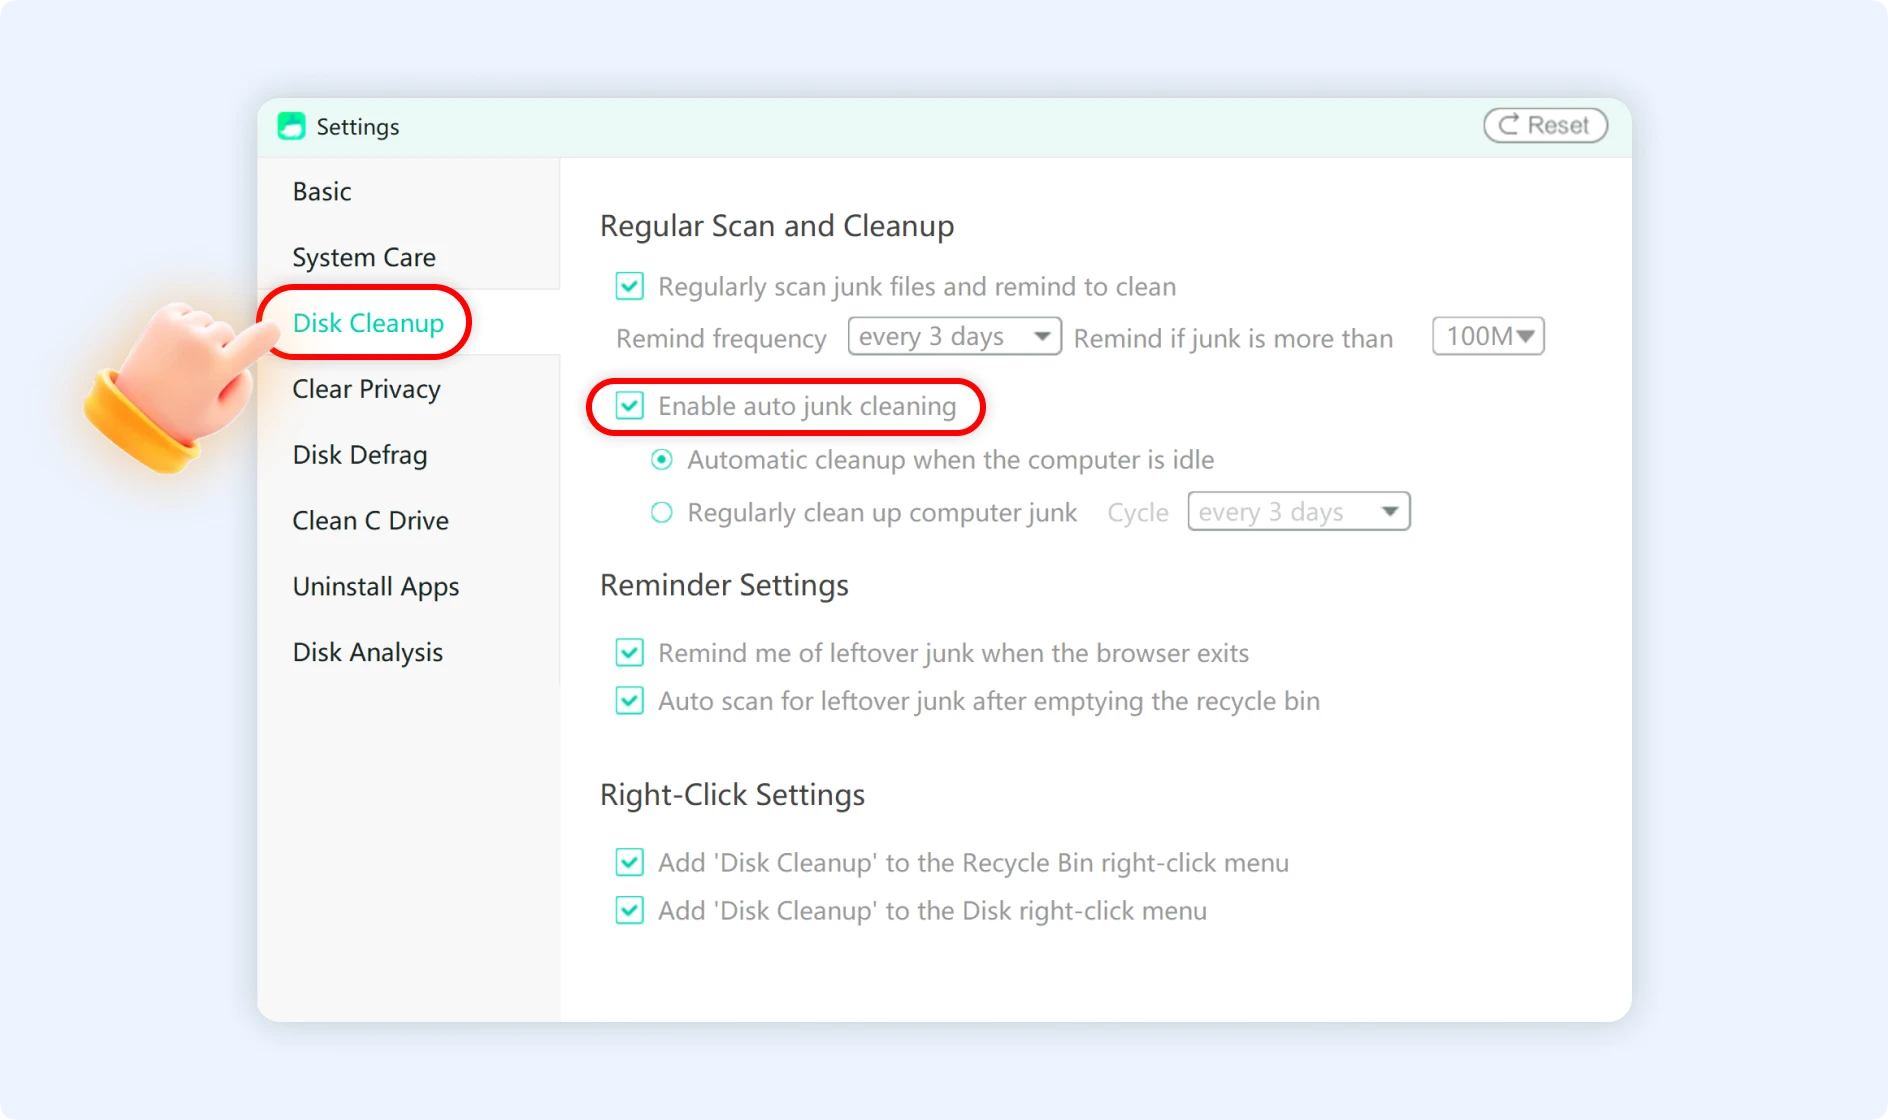
Step 2: Choose "Disk Cleanup" from the settings interface. Tick the checkbox "Enable auto junk cleaning" after navigating to the "Disk Cleanup" panel.
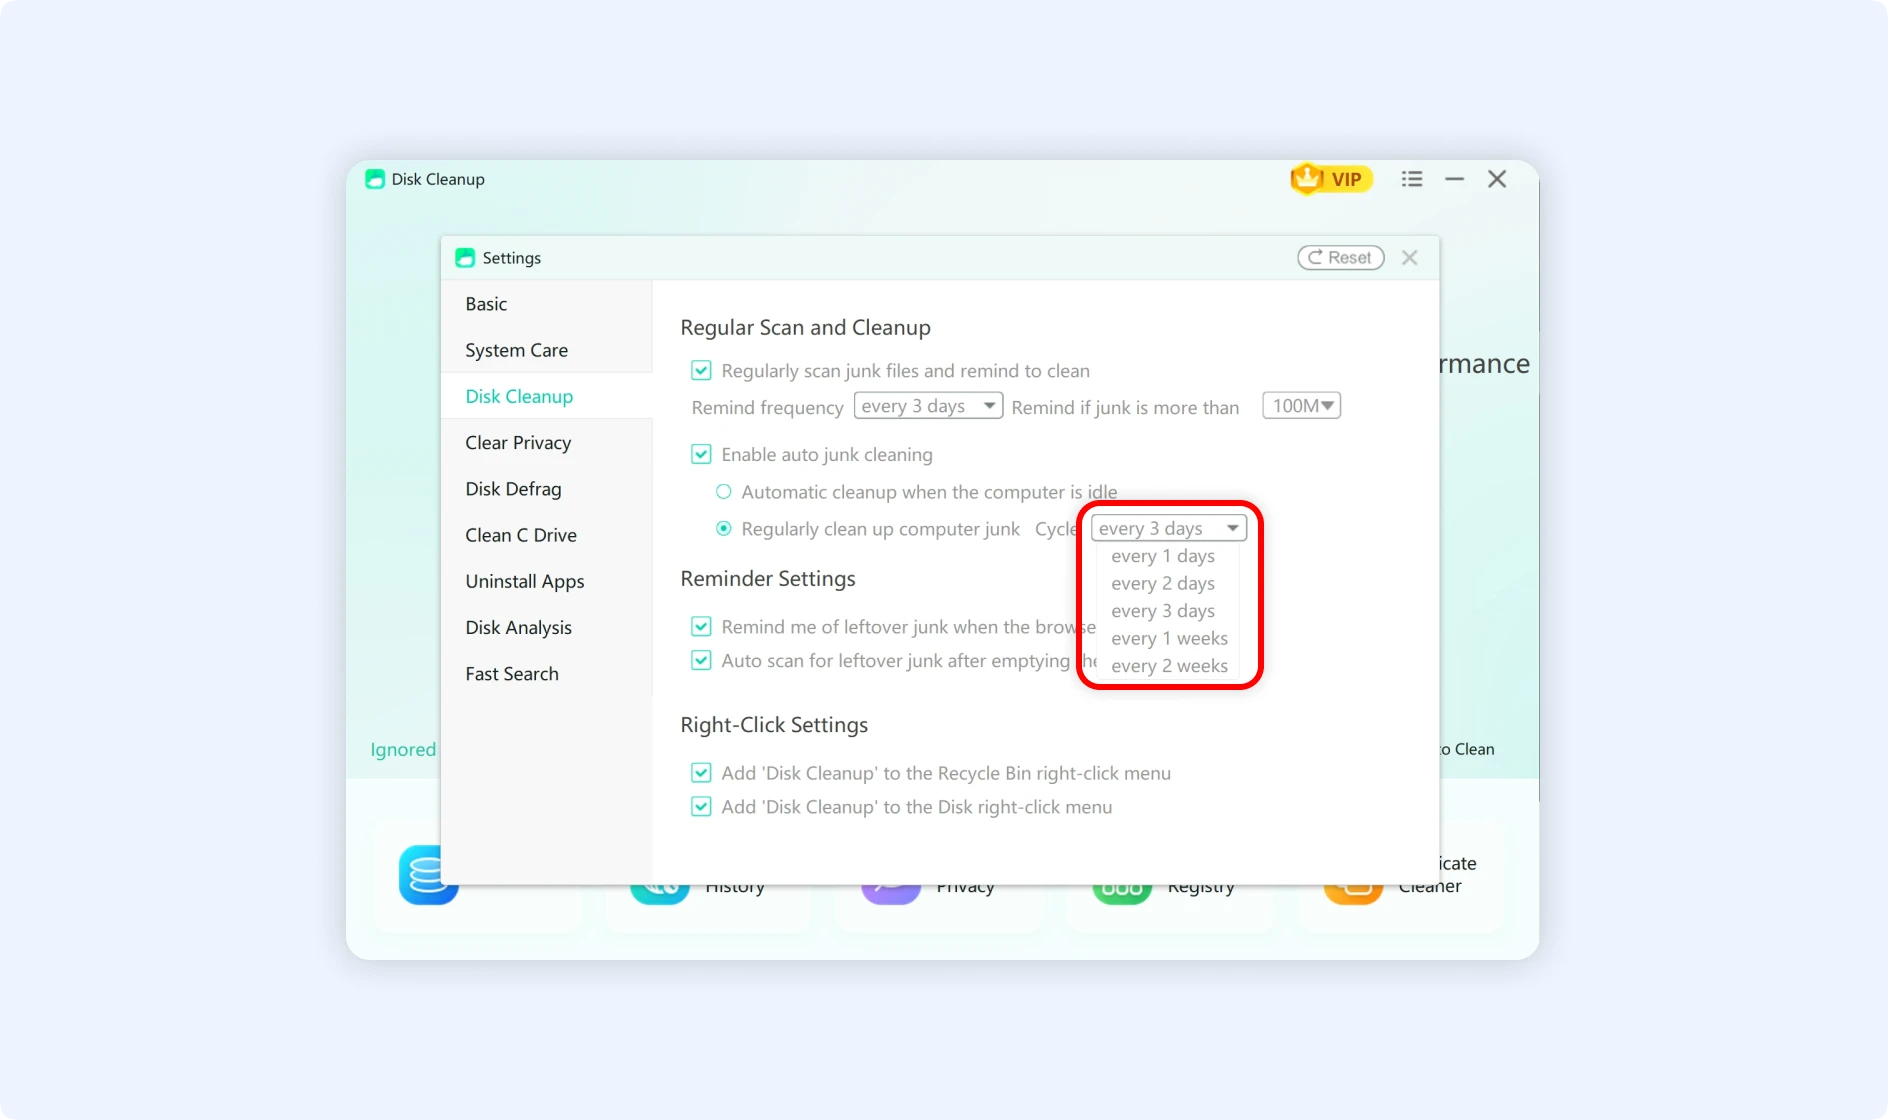
Step 3: Select the option to "Regularly clean up computer junk." You can set up automatic cleaning to take place every 1-3 days or every 1-2 weeks by selecting the "Cycle" option.
💡Tips:WMaster Cleanup will start the "Disk Cleanup" interface and run an automatic scan after you have enabled the automatic cleaning time you set. The cleaning process will be executed automatically once the scan is completed.