When you use a computer or the internet, you leave behind residual data, which includes file access histories, program usage logs, and search keywords. Web browsers keep track of things like your browsing history, cookies, autofill data, and login status. Not only does this collection of sensitive data take up space on devices, but it also increases the risk of exposure through unauthorized access. Such data leaks can put personal privacy and account security at serious risk.
The "Clear Privacy" feature of WMaster Cleanup protects users' digital privacy. This feature thoroughly checks all kinds of privacy traces on the system and in the browsers, like cookies, browsing history, use logs, and form data. It is a secure and quick approach to get rid of a lot of unnecessary data at once. With smart categorization, you can pick which privacy data to remove to protect your privacy while maintaining your computer's essential features.
Part 1. Benefits of WMaster Cleanup's "Clear Privacy" Feature
- Scans deeply for system usage traces and private data across many browsers.
- Privacy data is categorized by type, like usage records, browsing history, cookies, cache, and so on.
- Every entry in your privacy data has complete descriptors (content, location) so you can easily see what's private on your computer.
- With one click, you can remove all your personal data and protect your privacy.
- Supports custom cleanup, which lets you choose certain privacy data to delete while keeping other information.
- Works with most major browsers, such as Chrome, Firefox, Edge, IE, and others.
Tutorial to Clear Privacy by WMaster Cleanup
Please make sure that WMaster Cleanup is already downloaded on your PC.
Before you use the "Clear Privacy" feature to safely clean private data from your computer, please read the following:
- Remember to save unsubmitted forms and documents in your browser.
- Record your login credentials before cleaning your website cookies.
- Examine the scan results to identify the privacy content that needs to be removed before proceeding.
💡Tips:You cannot retrieve data once it's gone. It means you are unable to get back the data that has been cleaned.
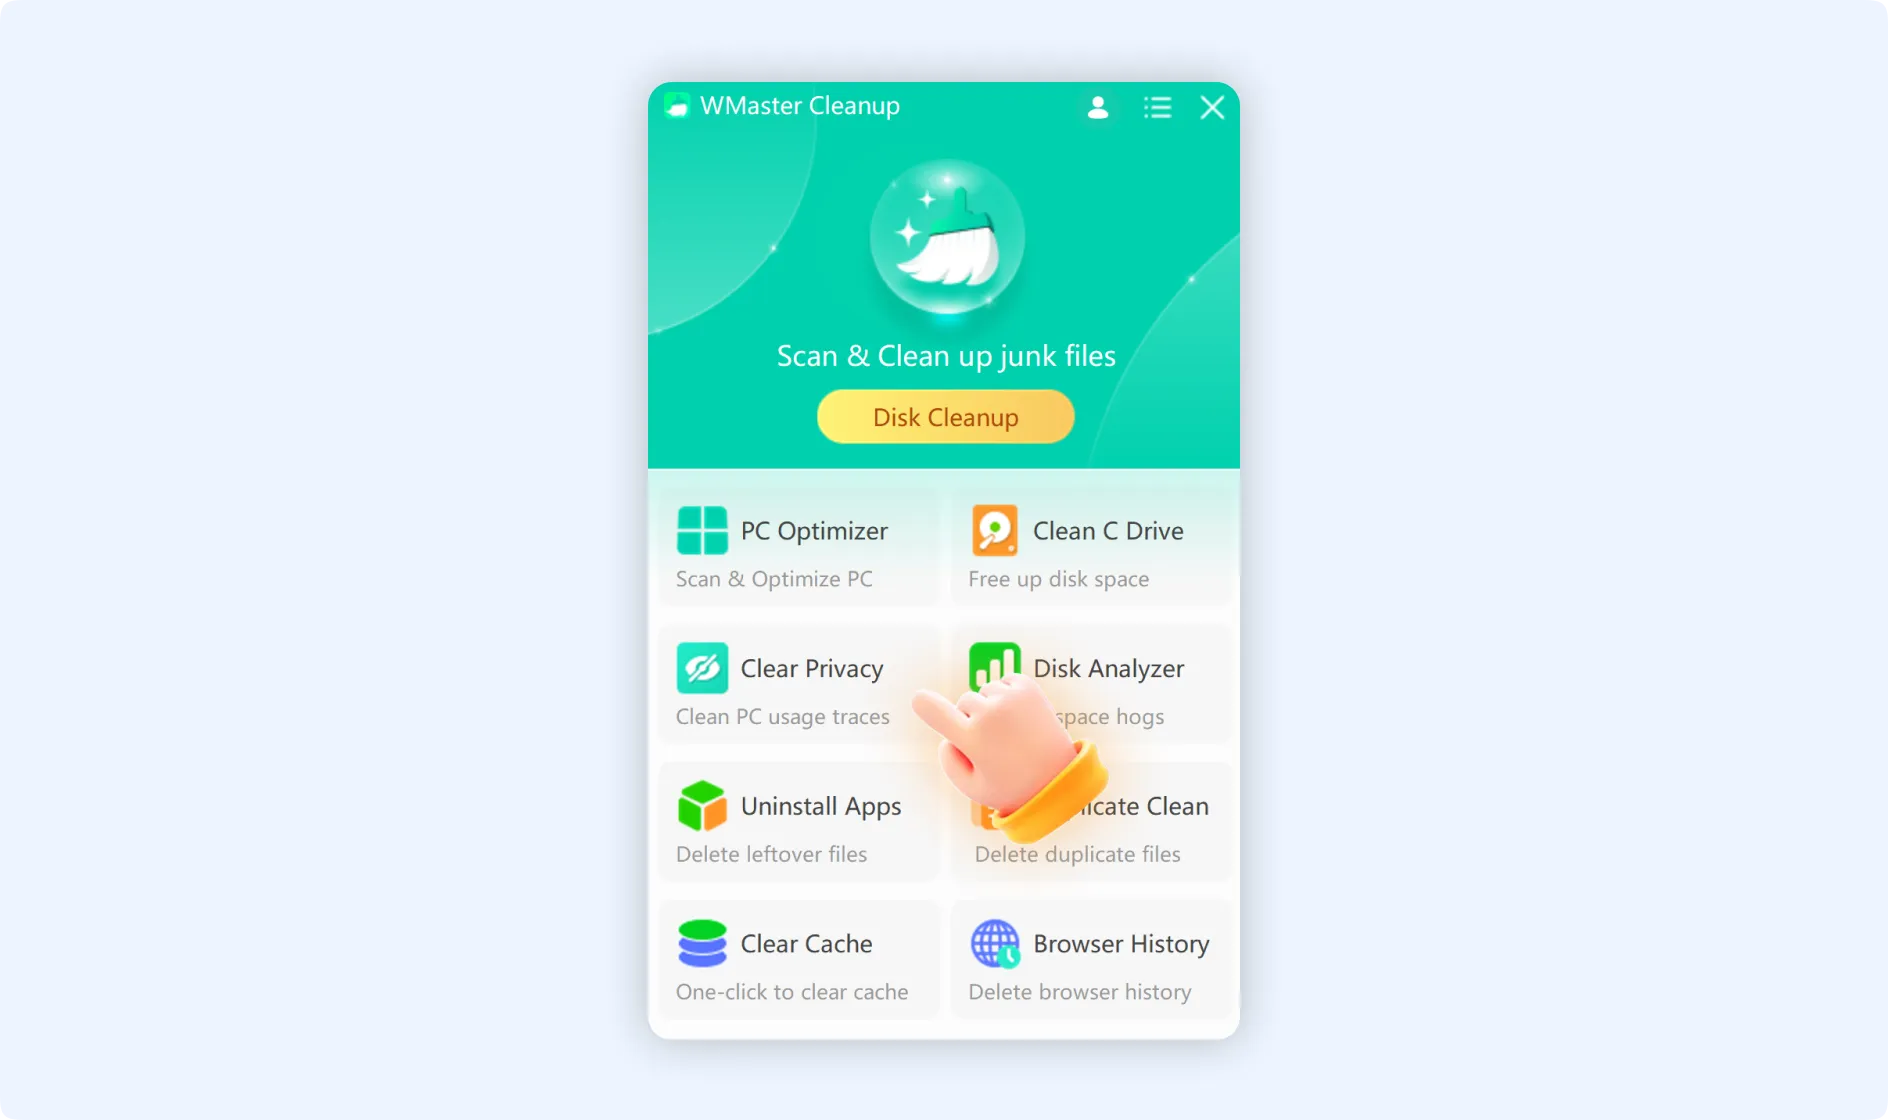
Step 1: Double-click the WMaster Cleanup icon to start the software on your desktop. Click the "Clear Privacy" feature available on the main interface.
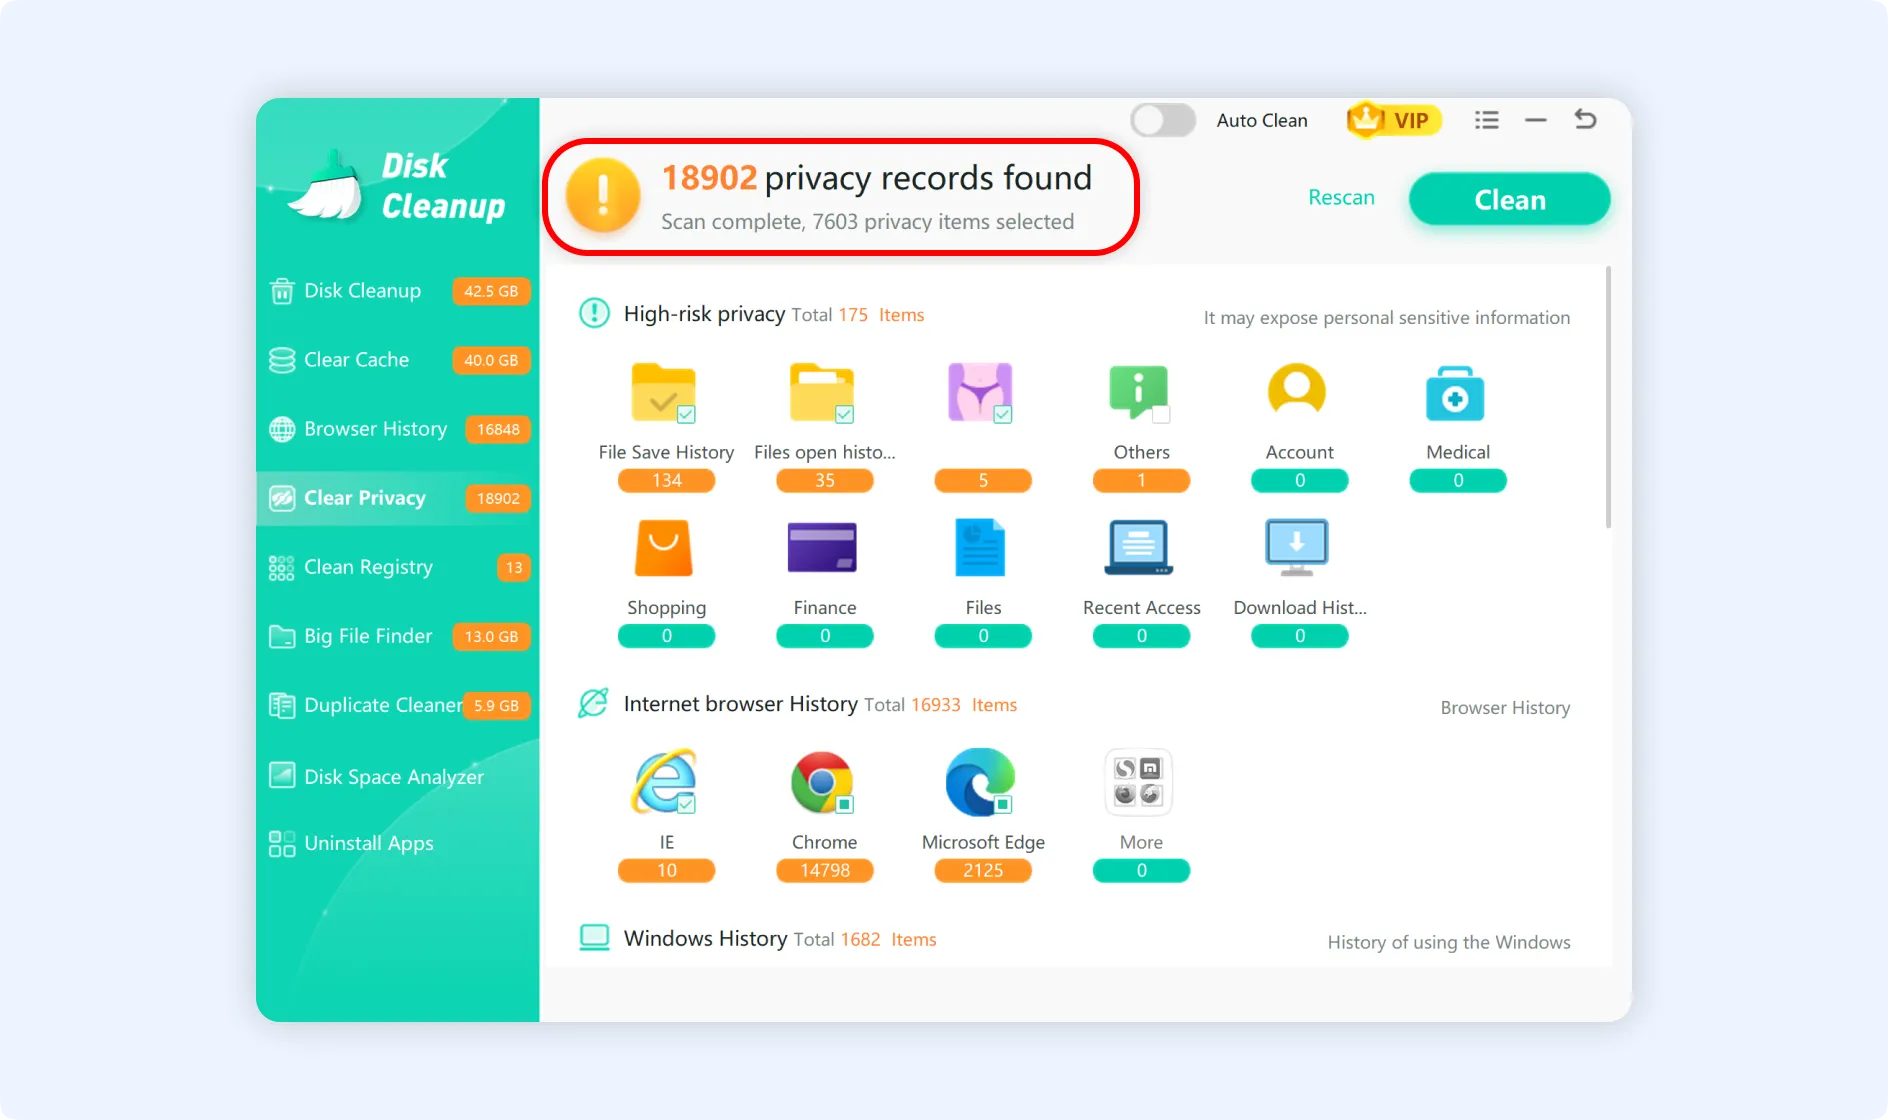
Step 2: Click the "Scan" button after you arrive at the "Clear Privacy" function interface. The "Clear Privacy" feature will start scanning through all of your computer's privacy data.

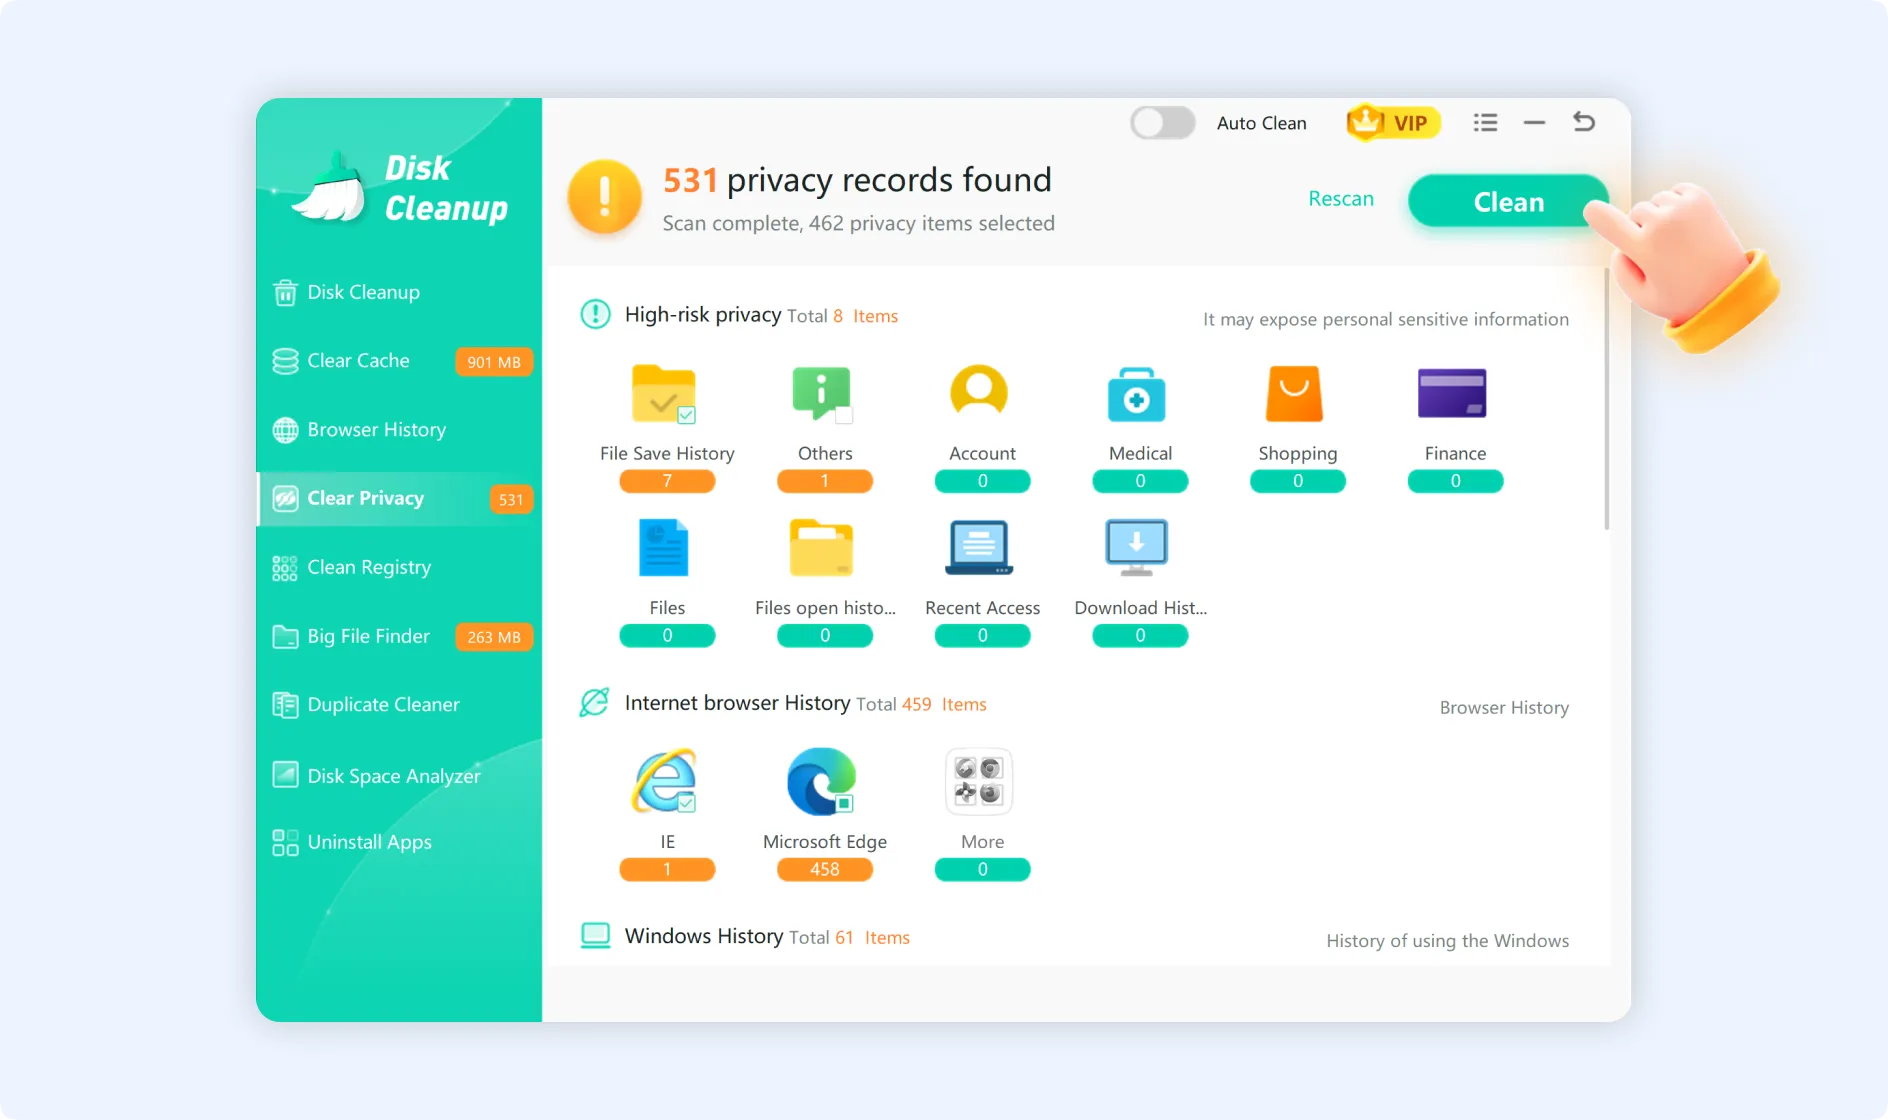
When the scanning process is done, the "Clear Privacy" function window will show all the privacy data items it found, sorted into the following groups: The top part gives a summary of the scan, broken down by category:
- High-risk Privacy: It includes private information, including account details, file operation history, medical records, purchasing history, and financial data.
- Internet Browser History: This includes records of websites visited, search history, cookies, auto-login credentials, and data for auto-fill forms.
- Windows History: It keeps track of things like recently used programs, file association information, search history, and USB usage logs.
- Other Privacy Data: This includes logs of downloads, program usage history, and multimedia playback.
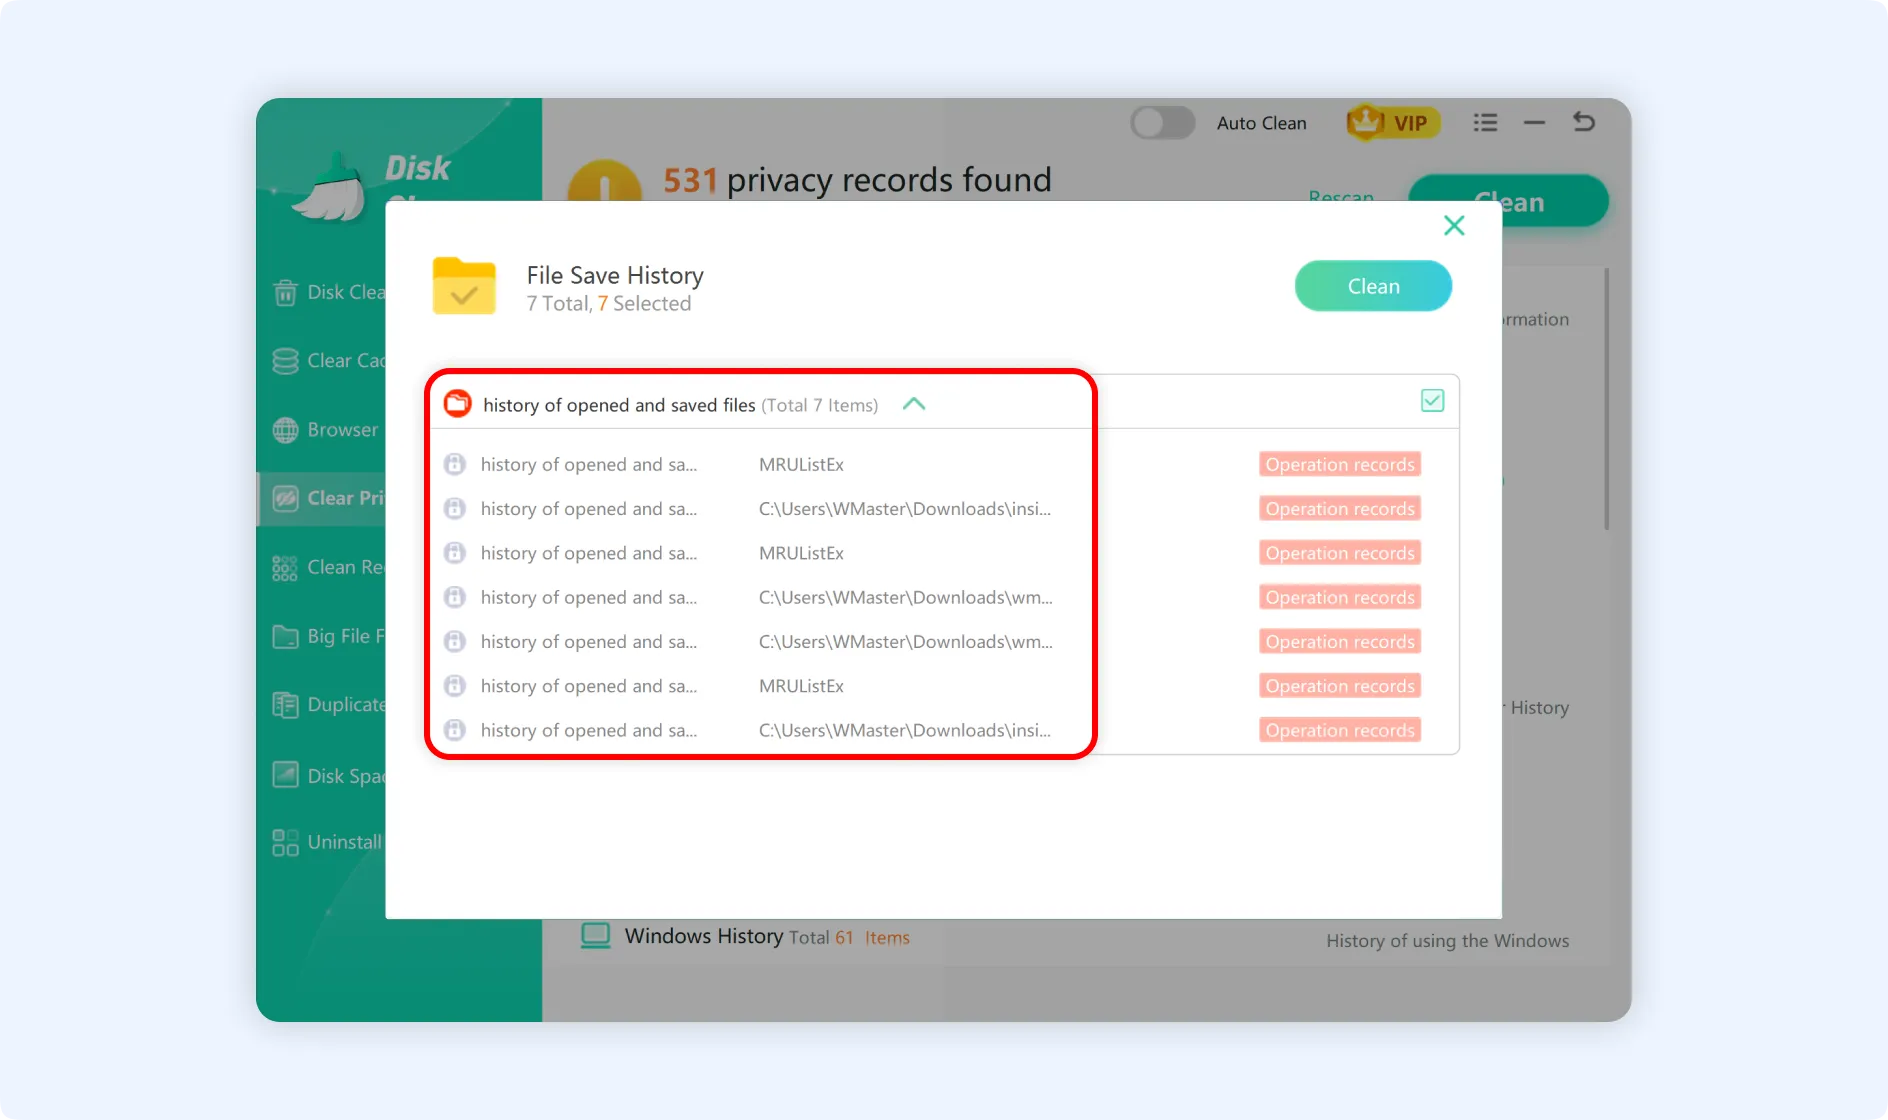
💡Tips 1:You can click any privacy item on the “Clear Privacy” interface to view its detailed information.
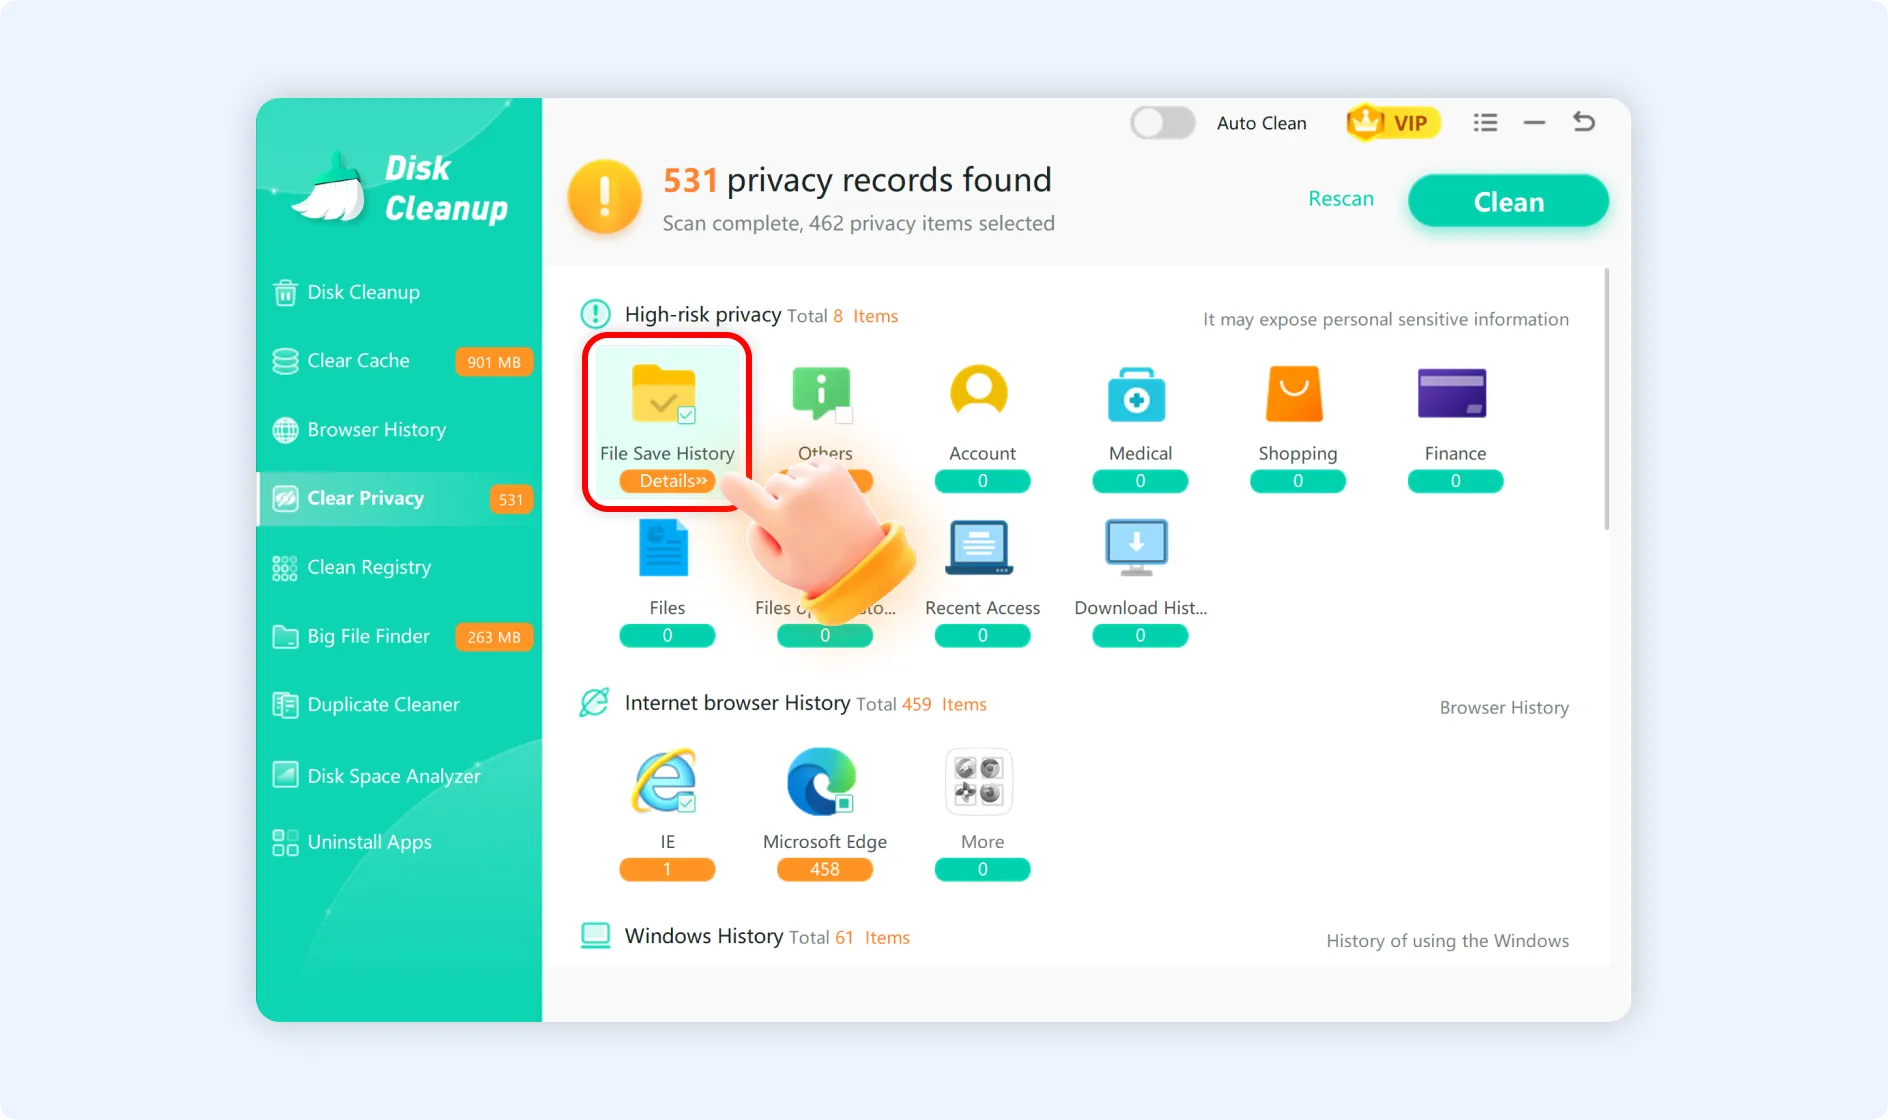
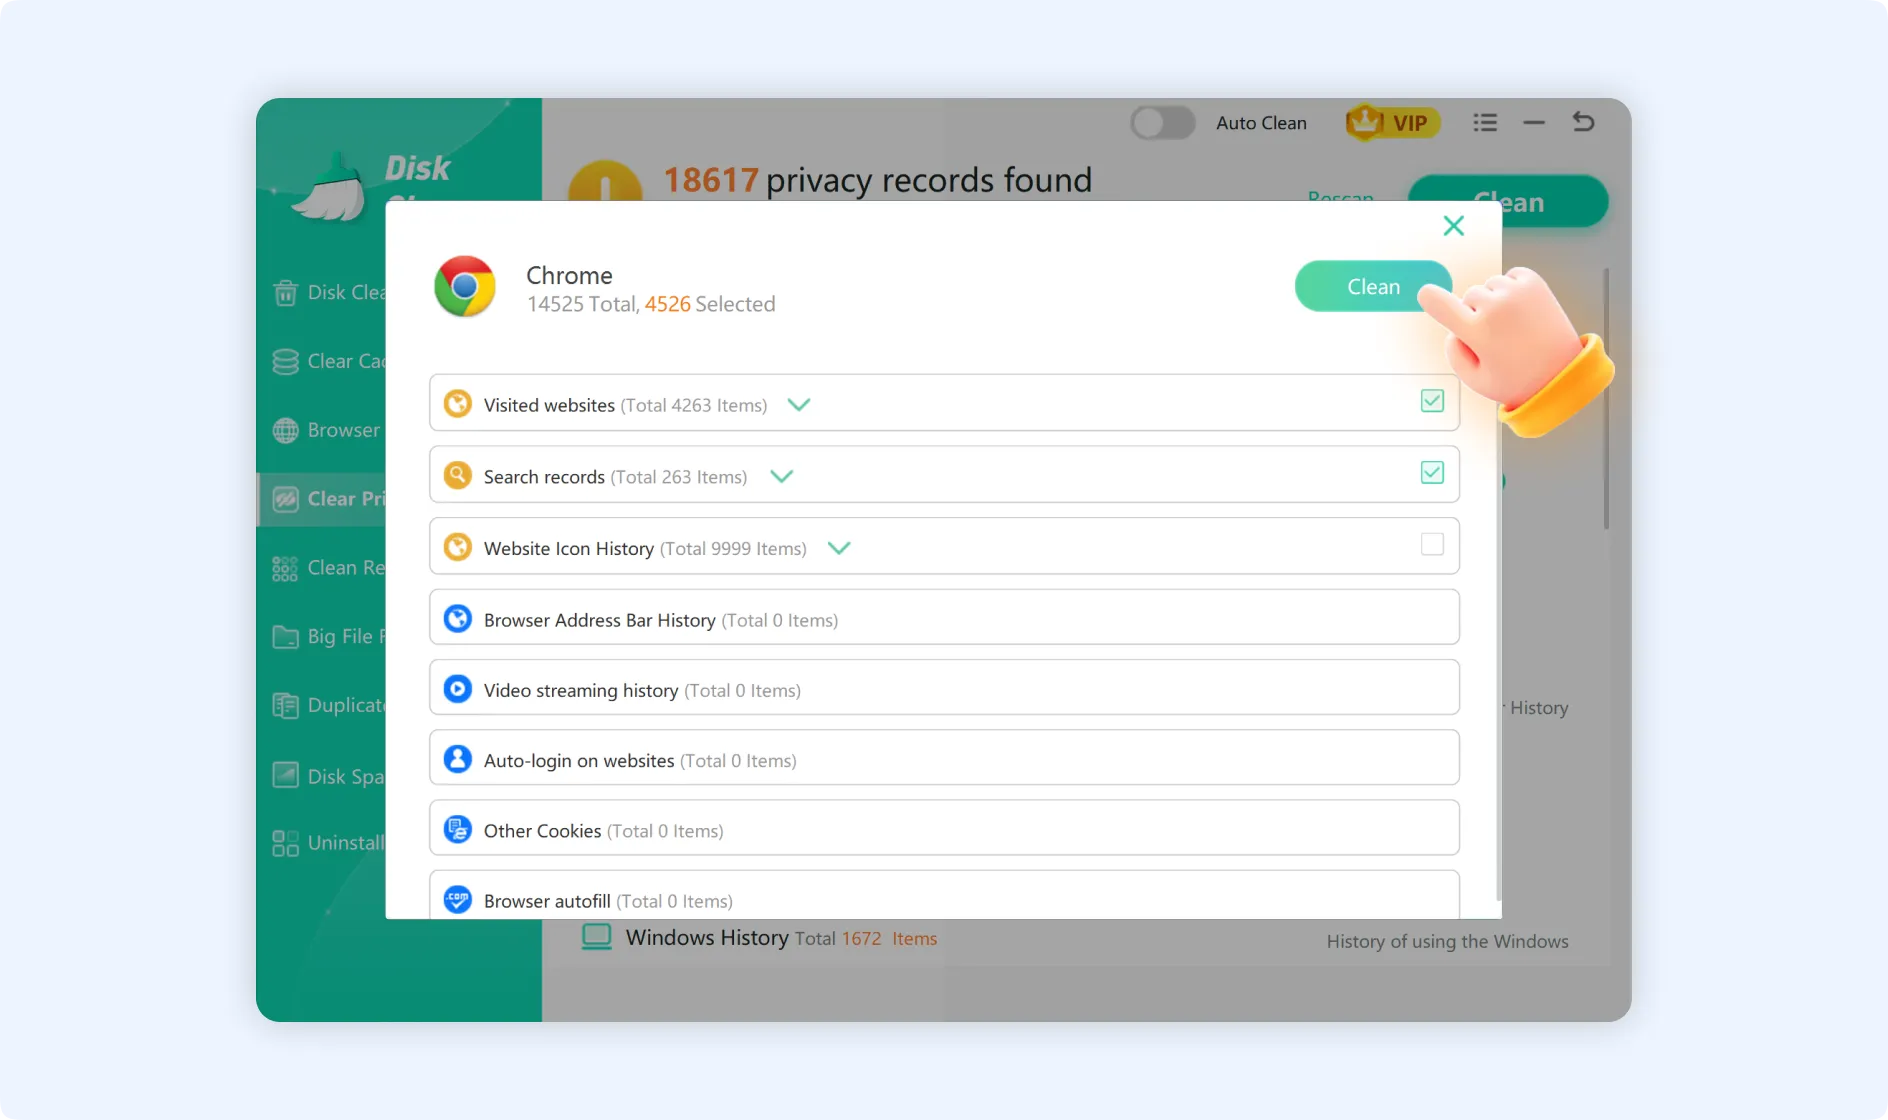
If you just want to delete your search history and visited websites but keep your website login status, choose "Visited websites" and "Search records" in the privacy data information interface, then click "Clean" in the panel.
Step 3: Go back to the main scan results interface after selecting all of the privacy data items you want to remove. In the top-right corner, click the "Clean" button. "Clear Privacy" will start securely deleting all of the selected privacy data in groups.
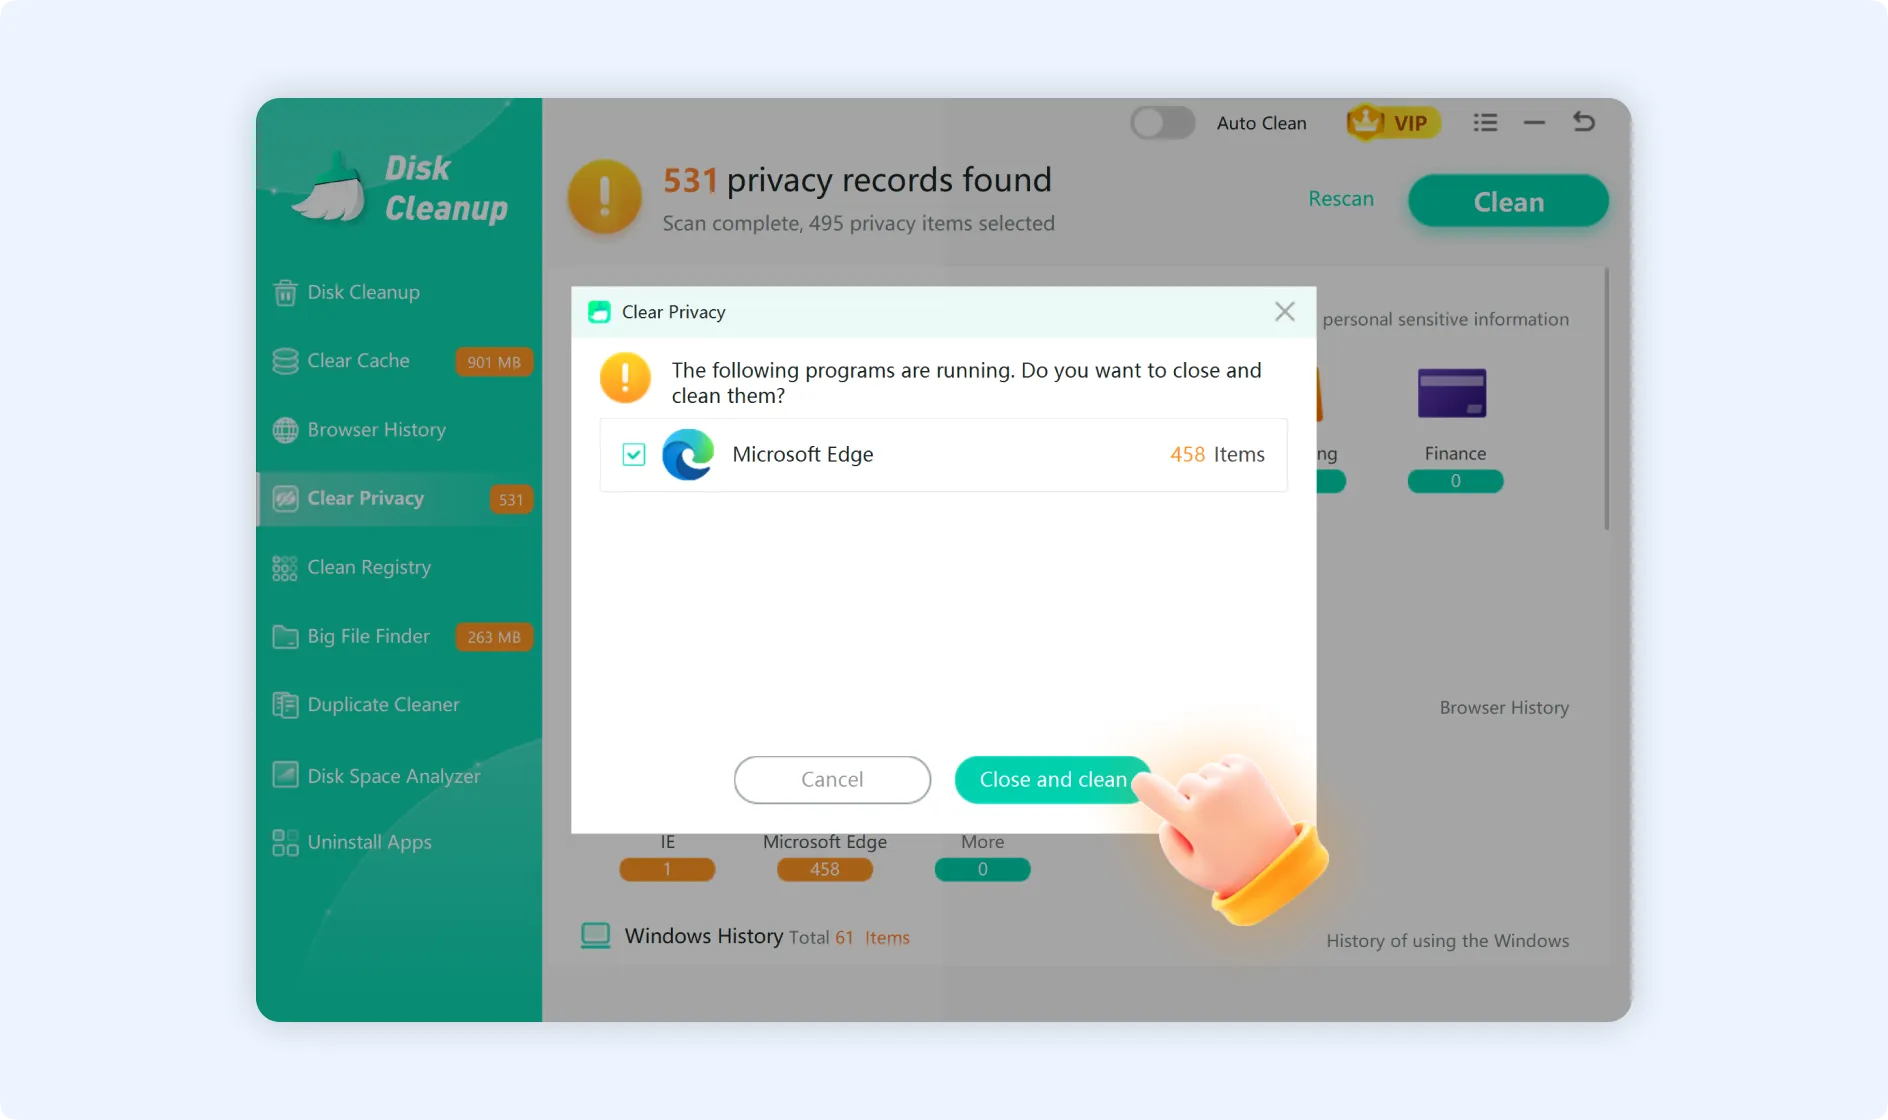
💡Tips 1:If your browser is open, "Clear Privacy" will show a message telling you to close it before continuing with the cleansing of browser-related data. Ensure you save any ongoing work, such as unsubmitted forms and unsaved documents, in your browser. Then, close the browser and click "Close and clean" to finish the cleanup.
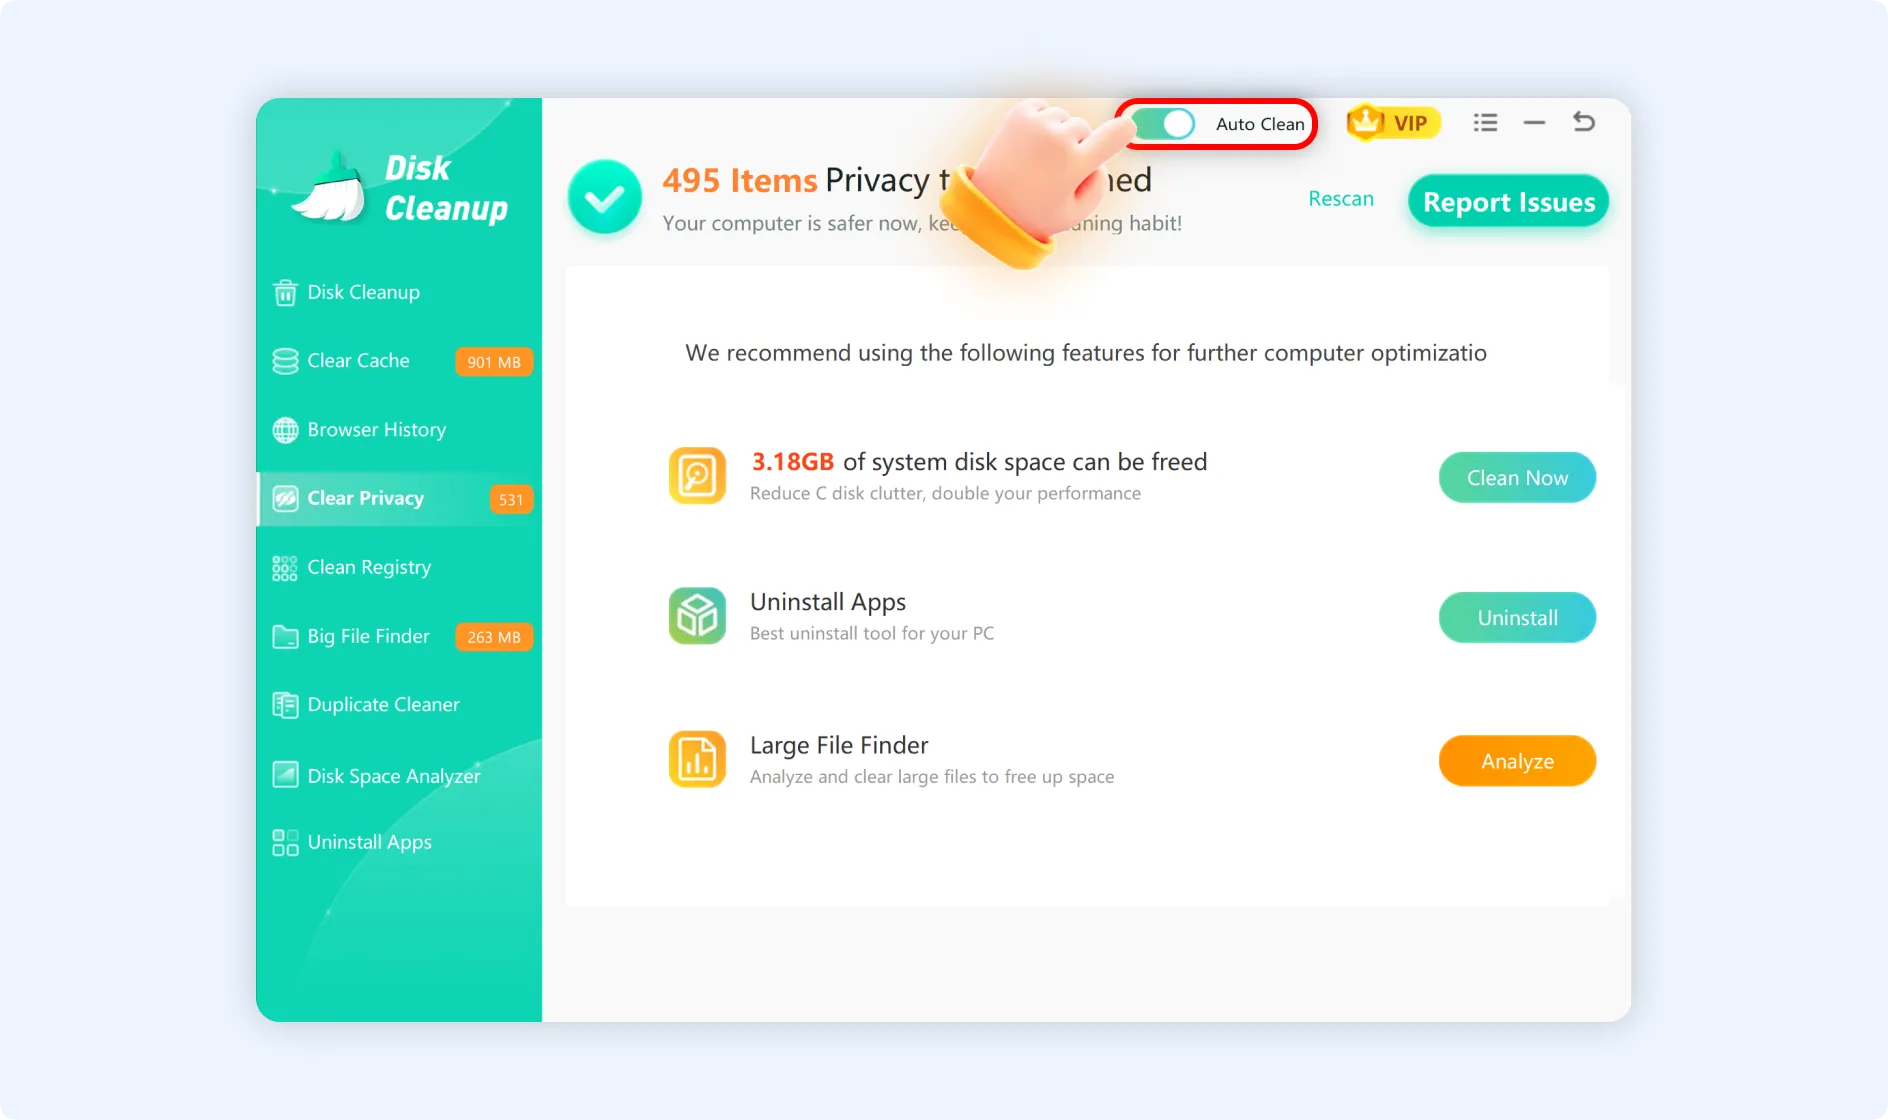
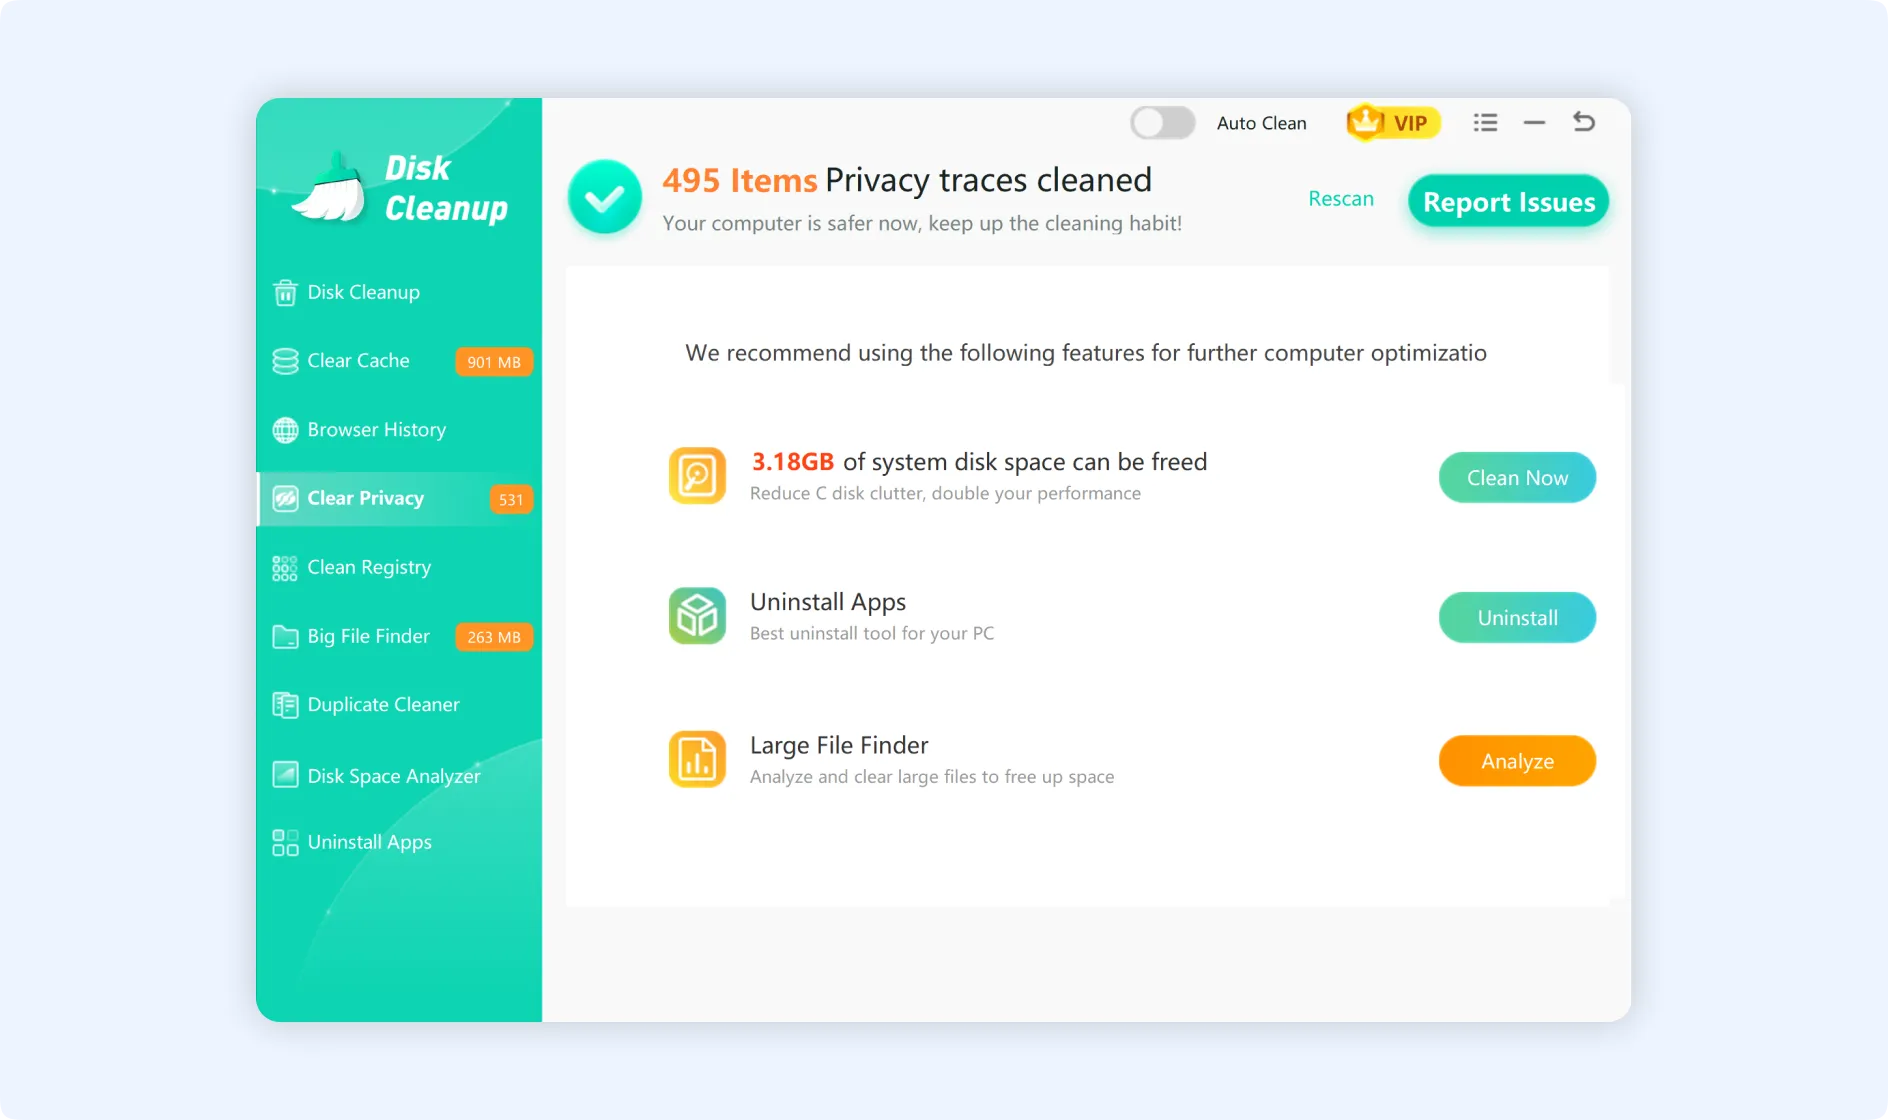
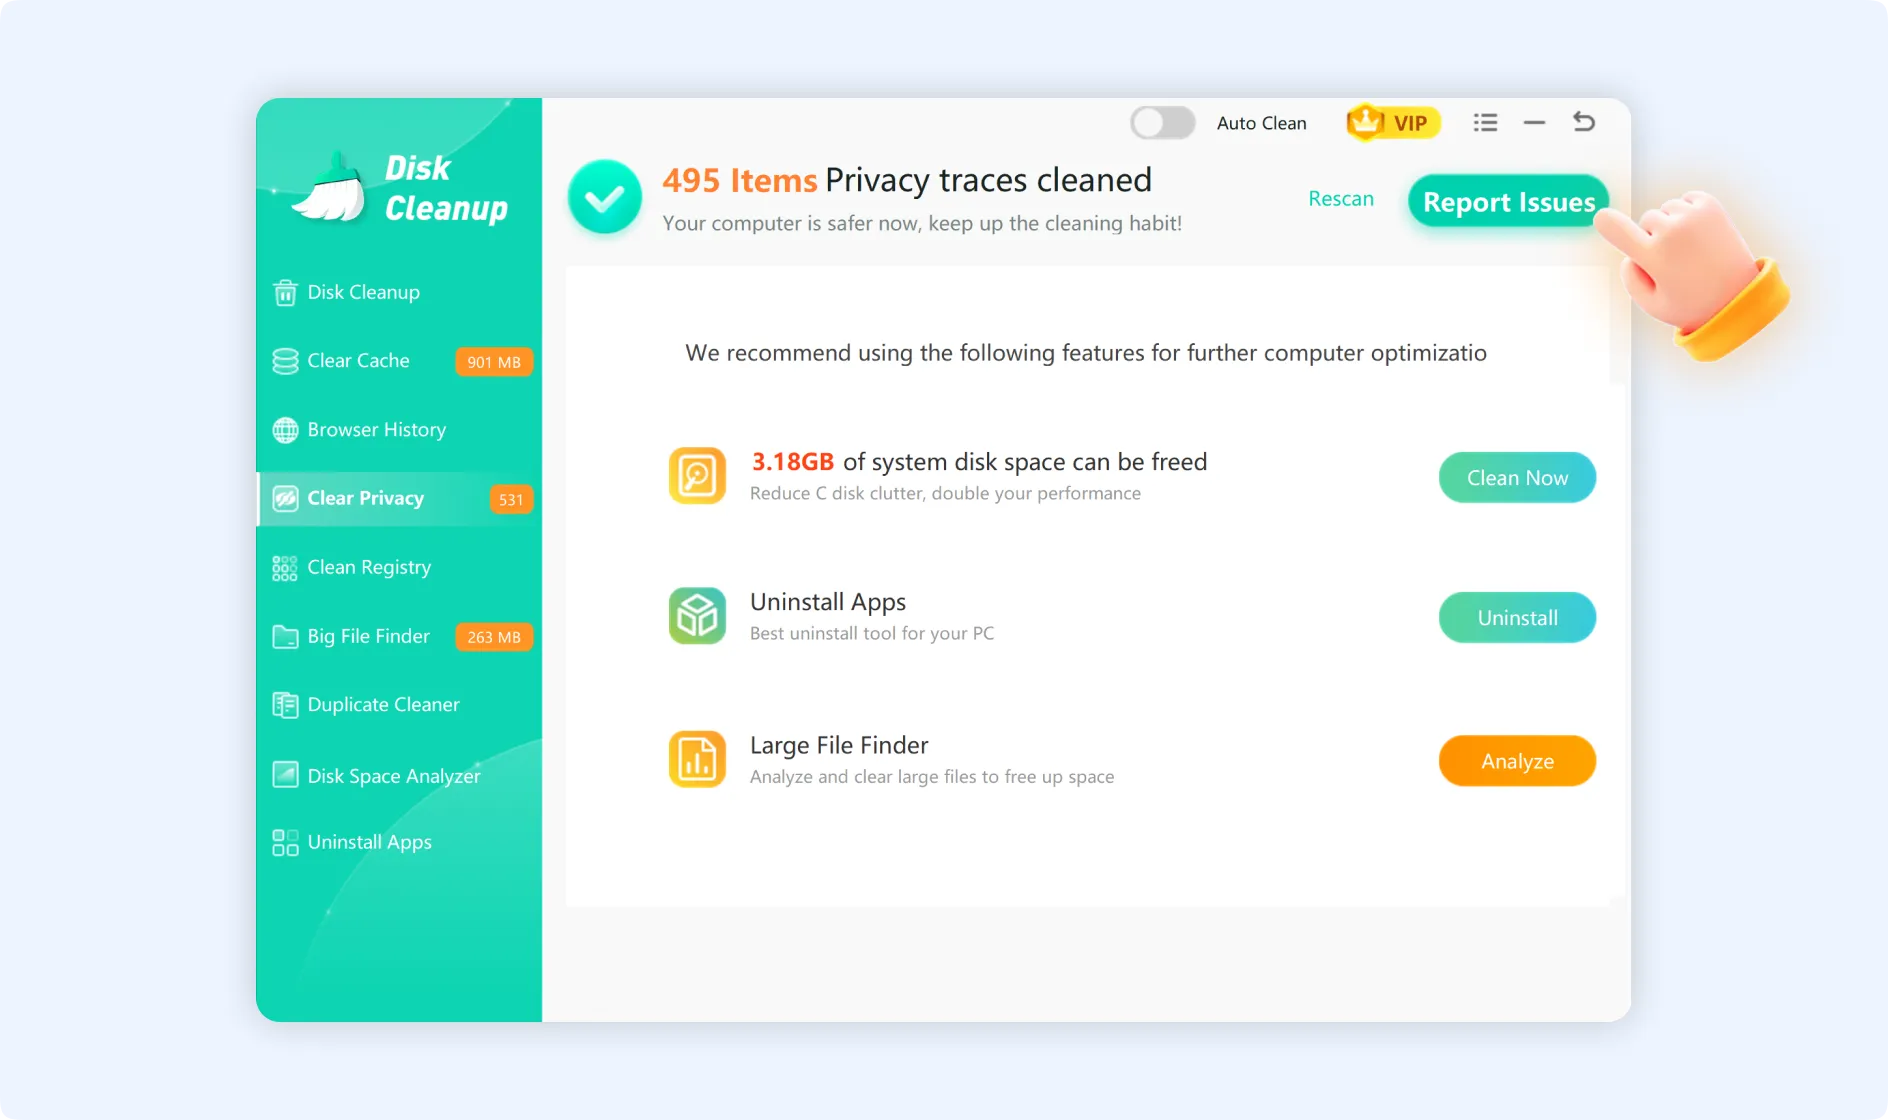
💡Tips 2:If you have any problem after cleaning privacy traces, click "Report Issues," and we will help you fix them.
💡Tips 3:Turn on the "Auto Clean" button available in the top right corner for a regular cleanup of privacy traces. Once you turn it on, "Clear Privacy" will automatically delete high-risk private data from your computer on the schedule you set.